|
|
| Line 35: |
Line 35: |
| | == Explosive loadout == | | == Explosive loadout == |
| | | | |
| − | With devastating weaponry that is capable of dealing high damage over a large area, it is generally best to engage the explosive-based Demoman at close range due to the nature of his weapons. While powerful, the Demoman's [[Grenade Launcher]] can be more difficult to aim than the weapons of other classes, and is hardest to aim when the enemy is not moving toward him in a straight line. The arming time required for his stickybombs gives him difficulty in immediate response, so catching him by surprise works greatly in your favor. Both weapons also require a relatively long time to reload. As a result of this loadout, he is usually very vulnerable at close range and is at risk of hurting himself with splash damage. Pursuing a Demoman who is equipped with a Stickybomb Launcher can be very dangerous, and requires careful consideration of whether he will or will not be able to kill you with a stickybomb trap in the area ahead. With the explosive load-out, the Demoman uses "indirect combat" to deal extreme amounts of damage, making this load-out perfect for destroying slow or stationary targets such as Sentry Guns and Heavies due to the high damage and the compensation for the slow arming time. However this makes the Demoman more suspectable to fast moving targets such as Scouts.
| + | A Demoman with an explosive loadout is capable of dealing high damage over a large area. Due to the nature of his weapons, it is best to engage him at close range, something the Scout, Soldier, or Pyro excels at. While powerful, the Demoman's [[Grenade Launcher]] can be more difficult to aim than other weapons. The arming time required for his Stickybombs makes it difficult for him to respond to an attack immediately, so catching him by surprise works greatly in your favor. Both weapons also require a relatively long time to reload. As a result, he is at risk of hurting himself with splash damage when at close range. Pursuing a Demoman who is equipped with a Stickybomb Launcher can be very dangerous, and requires careful consideration of whether he will or will not be able to kill you with a stickybomb trap in the area ahead. |
| − | | |
| − | Soldiers, Pyros, and Scouts are the most likely to kill all but the most experienced Demomen. For one, Demomen are notoriously poor in the air; they can fire, but their accuracy with the Grenade Launcher is hugely reduced, and their Sticky output becomes a lot more predictable. It is therefore in your advantage to do whatever you can in the air. Soldiers need only hit one direct rocket and maybe one more splash rocket, and they can finish the Demoman with their Shotgun - it never misses as long as your crosshair is targeting the Demo. They also are highly susceptible to [[Weapon heckling]] - most effective as a Pyro. If you quickly ignite a Demoman, he will instinctively turn to his Grenade Launcher to pelt you with explosives. Retreat and fire Shotgun shells at him. As he switches to his Sticky Launcher, switch to your Flamethrower and close in, reflecting his bombs back at him, and finish him. Scouts have even less trouble, as the Demoman's explosives are incredibly hard to aim; simply double (or triple if you have the [[Atomizer]]) jump over his head and fire repeatedly.
| |
| | | | |
| | == Melee loadout == | | == Melee loadout == |
| | | | |
| − | Alternatively, a Demoman can charge around the battlefield with one of many dangerous melee weapons and a damage-reducing shield, which can be seen attached to his left arm if he has it in his loadout. When carrying the shield, the Demoman can use its charge ability to close a surprising distance in a short time and deal [[critical hit]] damage (keep in mind that a Crit from a Demoman's melee weapon will, depending on loadout, instantly kill any class apart from the Soldier and the Heavy, even when [[overheal]]ed. Unfortunately, with the [[Splendid Screen]] equipped, the Demoman can use charge damage at any range, and then use an additional critical melee hit. This enables him to instantly kill almost any class, and makes him highly dangerous.) The best way to avoid this would be to interrupt his charge, or only attack when you are certain his charge is cooling down. If the Demoman completes a charge, or if he is stopped by use of explosives or movement-impairing attacks ([[slowdown]], [[stun]], [[compression blast]], etc.), he must wait for it to recharge before he can use it again. The turning power of the Demoman during a charge is also very limited, so the easiest choice for avoiding damage from him is to get out of his way. The best way to handle this style of Demoman is to attack him from a distance, try to evade or interrupt his charge attack, and take advantage of the recharge time between these attacks. Avoid engaging in hallways and other narrow areas that give you very little room to maneuver. Many Demoman melee weapons also feature an extended range, skewing the odds of a melee fight in his favor. Be aware that a shield-carrying Demoman may also still carry a Grenade Launcher. Engaging at close range is not recommended. Try to avoid juggling the 'melee orientated' Demoman when you have noticed he has not used his charge as he can easily charge in your direction even in mid-air and close the distance between you two. | + | Alternatively, a Demoman can charge around the battlefield with one of many dangerous melee weapons and a damage-reducing shield, which can be seen attached to his left arm if he is carrying one. When equipped with a shield, the Demoman can use its charge ability to close a surprising distance in a short time and deal [[critical hit]] damage, dealing massive damage to any class. It is best to dodge or interrupt the charge, then attack from range while it is on cooldown. Many Demoman melee weapons also feature an extended range, skewing the odds of a melee fight in his favor. Stay in open areas where you have room to maneuver; this will give additional leeway for avoiding both his Grenade Launcher and melee attacks. Bullet-based weapons work best against this sort of Demoman, as none of his shields reduce bullet damage. |
| | | | |
| − | Try and bait the Demoman into activating his charge, and do whatever you can to avoid it: airblast him back, launch him into the air with your rockets, or stun him with the Sandman. When he's helpless, backpedal out of his melee range and start blasting him. Your should be using a bullet weapon, as a Demoman with one of the shields has no bonus resistance to bullets, so these do normal damage.
| |
| | | | |
| | == Weapon-specific == | | == Weapon-specific == |
| Line 57: |
Line 54: |
| | | | | | |
| | * The Grenade Launcher has a long reload time and a small clip. Attack the Demoman while he is reloading. | | * The Grenade Launcher has a long reload time and a small clip. Attack the Demoman while he is reloading. |
| − | * A Demoman's grenades can bounce over cover and around corners, so don't rely as heavily on them when fighting a Demoman using his Grenade Launcher; narrow passageways are especially dangerous, given the grenades' splash radius. | + | * A Demoman's grenades can bounce over cover and around corners; narrow passageways are especially dangerous, given the grenades' splash radius. |
| − | * The Grenade Launcher fires slow projectiles which have a large travelling arc to account for, giving you time to dodge; slower classes should utilize cover and/or kill the Demoman quickly. | + | * Grenades travel slowly and in a wide arc, giving you time to dodge. Slower classes should utilize cover or kill the Demoman quickly. |
| − | * If you cannot avoid damage or death by a Grenade Launcher, move close to the Demoman so he suffers from the explosions as well. | + | * If you cannot avoid the Grenade Launcher's damage, move close to the Demoman so he suffers from the explosions as well. |
| | |- | | |- |
| | | align="center" valign="center" style="padding:0.5em" | {{Table icon|Loch-n-Load}} | | | align="center" valign="center" style="padding:0.5em" | {{Table icon|Loch-n-Load}} |
| Line 190: |
Line 187: |
| | |- | | |- |
| | |} | | |} |
| − |
| |
| − | == Anti-Demoman classes ==
| |
| − | Although it mostly depends on skill, some classes are designed to have an advantage over others, many classes have an advantage over a Demoman, as well as others having a disadvantage against him. Lets look at the ones who have an advantage over a Demoman:
| |
| − |
| |
| − | '''The Scout:'''
| |
| − | In terms of [[6v6]], the [[Scout]] is a Demoman's biggest threat, especially on mid-fights due to Scouts being able to arrive before your team's Soldiers can deal with them. Making [[Demoman]] also heavily reliant on his team's Scouts to defend him and attack the enemy Demoman while they try to do the same.
| |
| − |
| |
| − | The Scout is very fast and mobile and his ability to excel at dodging allows him to counter act his low health pool. Due to the high speeds of a Scout this leaves the usual 'explosive load-out Demoman' with a significant disadvantage, this is because of the Demoman's weapons as they have '''long reload intervals''', '''arcs''' making it harder to aim and the '''long set-up times''' such as the delay in the sticky-bombs and the time for a grenade to explode. Overall making the perfect prey for a Scout. However, Scouts are suspectable to hidden sticky traps.
| |
| − |
| |
| − | '''The Pyro'''
| |
| − | The [[Pyro]] is an 'ambush' based class, meaning he normally would catch his enemies off-guard, Demoman, unlike some other classes, is at a disadvantage if he isn't prepared with a sticky bomb trap to kill close-quarter enemies like Scouts. Additionally, the Pyro has the '[[airblast]]' ability allowing him to push away [[projectiles]] including sticky bombs and grenade pipes meaning that a skilled Pyro can render a Demoman '''useless''', making Pyro extremely dangerous to a Demoman and his [[Medic]] buddy with a [[Kritzkrieg]] charge as both can be instantly killed by the reflected "critically charged pipes". A Pyro can also airblast called-out sticky bomb traps which leaves the Demoman vulnerable to attacks off-guard, you can also kill a Demoman with his own sticky bomb trap.
| |
| − |
| |
| − | '''The Soldier'''
| |
| − | The [[Soldier]] is also a great ambushing class, his ability to rocket jump can allow him to "air-ambush" enemies and also allows him to get to spots not even Scouts can get too. His projectiles are also much easier to aim than a Demoman's as they don't '''arc''' and explode on contact with objects too, letting him deal more reliable splash damage. The Soldier also has a 25+ health advantage but moves slightly slower than a Demoman. Overall, if planned correctly a Soldier can easily kill a alone Demoman. However, due to a Soldiers slow speed, it leaves him more suspectable to spam than it would be to a Scout for instance.
| |
| | | | |
| | == See also == | | == See also == |
The Demoman is a versatile class, sporting above-average health and devastating weaponry. When formulating tactics, you can usually depend on the roles of most classes not dramatically changing. This does not apply to the Demoman, who can opt for an explosive-oriented playstyle with a Stickybomb Launcher or a melee-oriented playstyle with a shield like the Chargin' Targe. Each style has its own evident strengths and weaknesses, so pay attention to his loadout to avoid being caught off guard
General
 Role Role
|
- The Demoman is great at both offense and defense. Be ready to deal with a Demoman who's defending a corridor as well as one who leads the charge.
- The Demoman is particularly good at mid-range combat. Keep close to avoid the majority of his damage.
- As his name implies, the Demoman is excellent as demolitions. Pay attention to where he places his explosives, especially if you can't afford to move from a defensive location.
|
 Health Health
|
- The Demoman has a base health of 175, so he can withstand a considerable amount of damage. Unless the situation is extreme, the Demoman is likely to stand his ground rather than retreat.
- A Demoman has the most varying health in the entire game, as certain weapons can give him a health penalty or bonus. In addition, certain weapons can increase his maximum health or heal him each time he gets a kill. Take note of what weapons he is wielding to make an accurate assumption on his max health.
- A Demoman carrying the Chargin' Targe or Splendid Screen will have a large resistance to fire and explosive damage. He will be fully vulnerable to bullets and melee attacks, however.
|
 Speed Speed
|
- The Demoman is slower than a majority of the classes, so he is less likely to chase you down unless he is using a loadout that favors melee combat.
|
 Power Power
|
- The Demoman is quite deadly at range but fires all of his projectiles in an arc. This makes it somewhat difficult to aim, so take advantage by getting close and avoiding his projectiles.
- All of the Demoman's explosives can harm himself, giving you an additional advantage at close range.
- Certain Demomen with a shield and melee weapon will usually attempt to charge at players, killing them with the critical hit that is granted near the end of the charge. Avoid their large melee range and the charge, attacking him when he is at a normal pace.
|
Explosive loadout
A Demoman with an explosive loadout is capable of dealing high damage over a large area. Due to the nature of his weapons, it is best to engage him at close range, something the Scout, Soldier, or Pyro excels at. While powerful, the Demoman's Grenade Launcher can be more difficult to aim than other weapons. The arming time required for his Stickybombs makes it difficult for him to respond to an attack immediately, so catching him by surprise works greatly in your favor. Both weapons also require a relatively long time to reload. As a result, he is at risk of hurting himself with splash damage when at close range. Pursuing a Demoman who is equipped with a Stickybomb Launcher can be very dangerous, and requires careful consideration of whether he will or will not be able to kill you with a stickybomb trap in the area ahead.
Melee loadout
Alternatively, a Demoman can charge around the battlefield with one of many dangerous melee weapons and a damage-reducing shield, which can be seen attached to his left arm if he is carrying one. When equipped with a shield, the Demoman can use its charge ability to close a surprising distance in a short time and deal critical hit damage, dealing massive damage to any class. It is best to dodge or interrupt the charge, then attack from range while it is on cooldown. Many Demoman melee weapons also feature an extended range, skewing the odds of a melee fight in his favor. Stay in open areas where you have room to maneuver; this will give additional leeway for avoiding both his Grenade Launcher and melee attacks. Bullet-based weapons work best against this sort of Demoman, as none of his shields reduce bullet damage.
Weapon-specific
Primary
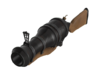
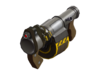
Grenade Launcher + reskins
|
- The Grenade Launcher has a long reload time and a small clip. Attack the Demoman while he is reloading.
- A Demoman's grenades can bounce over cover and around corners; narrow passageways are especially dangerous, given the grenades' splash radius.
- Grenades travel slowly and in a wide arc, giving you time to dodge. Slower classes should utilize cover or kill the Demoman quickly.
- If you cannot avoid the Grenade Launcher's damage, move close to the Demoman so he suffers from the explosions as well.
|

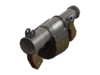
Loch-n-Load
|
- The Loch-n-Load has half the clip size of the Grenade Launcher; dodge the two grenades, then attack the Demoman while he reloads.
- Grenades fired from the Loch-n-Load do not explode if they strike anything other than enemy players and buildings. Cover and random movement will decrease the chances of getting hit.
- Make great effort in dodging the Loch n' Load's grenades; few classes can survive being struck by even one. The Loch-n-Load also has a faster projectile speed, putting slower classes at a disadvantage; kill or hide from the Demoman before he can fire this weapon.
- The Loch-n-Load deals additional self-damage to the Demoman. Even if you die at close range, there is a higher chance of the Demoman severely injuring or killing himself.
|
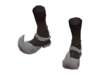
Ali Baba's Wee Booties + reskins
|
- Ali Baba's Wee Booties give the wearer an extra 25 max health. This can keep a Demoman alive long enough to counter-attack, so beware.
- However, he can no longer use his Grenade Launcher. He may still have his Stickybomb Launcher, so check to see if the Demoman is holding a shield or not.
- The Ali Baba's Wee Booties provide a doubled increase in turning control while charging; remain in areas that offer plenty of room and obstacles to avoid the Demoman's charge.
|
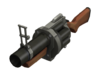
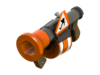
Loose Cannon
|
- Unlike the other Grenade Launchers, the Loose Cannon's cannonballs do not explode upon a direct hit with a player, and the explosion deals significantly less damage upon hitting a surface. Fighting the Demoman in close range or attacking him in a group will give him a difficult time to retaliate.
- Do not underestimate the cannonball's knockback, however. The Demoman may use this to his advantage to push you away from your group, or worse, into a hazard.
- Beware of this weapon's ability to time explosions. This allows the Demoman to have a slightly more strategic advantage.
- Be careful, as taking explosion damage right after impact damage will cause "Double Donk", which causes the explosive damage to Mini-Crit.
|
Secondary
Trap weapons
- Stickybombs can be destroyed by bullets and melee attacks (the latter option is rarely advised). Shoot them before they explode to prevent or minimize damage.
- Firing an explosive or a compression blast around corners can dislodge enemy stickybombs, revealing them before it's too late.
- Demomen must often watch over the stickybomb traps they lay; focusing on the traps leaves them more vulnerable to ambush and long-distance attacks.
- Killing a Demoman will automatically remove all his stickybombs, which can greatly aid your team's attack or defense.
Stickybomb Launcher + reskins
|
- The Stickybomb Launcher is more difficult to use at close range due to the lengthy arming time, but stickybombs have a large splash radius, so beware.
- The Stickybomb Launcher has a very long reload time. Avoid the stickybombs he fires at you, and attack the Demoman when he needs to reload.
- Demomen typically place stickybombs in hard-to-see spots and detonate them when an enemy approaches. Once the Demoman has detonated his stickybombs, he will have to replace them, giving you and your team a prime opportunity to advance and overwhelm him.
|
Scottish Resistance
|
- The Scottish Resistance is not well-suited for direct combat because of its even longer arming time, but can be used to set up multiple traps. Be careful when you encounter the stickybombs of this weapon; they are likely not the only cluster you will have to deal with.
- There is a possibility that there will be a stickybomb virtually anywhere you may tread; counter this by staying immobile and only moving when fired upon by the Demoman.
- Even if you don't see a Demoman near his Scottish Resistance stickybombs, he can still see their outlines through walls. He can detonate any group at any time and from any place.
- A Demoman using the Scottish Resistance is often heavily focused on his stickybombs; this makes him even more susceptable to ambush.
|
Sticky Jumper
|
- A resourceful Demoman might use the Sticky Jumper to get reach higher ground and/or long distances and then ambush enemies with his other weapons.
- Demomen with the Sticky Jumper can retreat as hastily as they arrive, especially if they had laid stickybombs before engaging you. Also expect a decent fight from him, as the weapon allows him to travel across the map without losing too much health.
|
Charge Weapons
Instead of using a Stickybomb Launcher, the Demoman can employ a shield that gives him the ability to rush at opponents every 12 seconds, granting him a guaranteed critical hit near the end of the charge. The shield also provides the Demoman added resistance to certain types of damage.
- A Charge can be delayed or nullified by using weapons with Stun, Slowdown and/or Knockback.
- When a Demoman charges, he can only rush forward, with little ability to adjust his aim. Try dodging a charge by strafing from it, as backing up may not cover enough distance, especially if the Demoman is attacking with a weapon with increased range. You can also stand on or behind cover to prevent being struck.
- Charging makes a Demoman more vulnerable to headshots from the front.
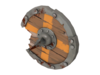
Chargin' Targe
|
- The Chargin' Targe gives the Demoman resistance to fire and explosion damage, and immunity to afterburn. If possible, use bullets on him; if not, attack him from outside his melee range.
- If you cannot avoid a charge, move up close and end the charge early, before the Demoman travels far enough to bash you with the Chargin' Targe and land a Mini-Crit or Critical Hit with his melee weapon.
|
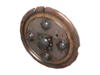
Splendid Screen
|
- The Splendid Screen doesn't provide as much resistance to fire and explosions as the Chargin' Targe does. Still, damage him with bullets for maximum effectiveness.
- The Splendid Screen can deal impact damage at any range; try not to engage him in close combat, or else you may suffer a nasty surprise charge.
|
Melee
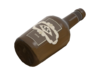
Bottle + reskins
|
- A Demoman will often resort to his Bottle at close range, as his other weapons are dangerous to use at that distance. Since his movement speed is below average, most classes will have little difficulty outrunning the Demoman while retaliating with non-explosive ranged weapons.
|
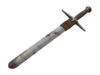
Eyelander + reskins
|
- Kill Demomen wielding the Eyelander from a distance as soon as they appear; if left unchecked, they may ambush unaware teammates and become faster and sturdier with each head they take. A Demoman who has collected the maximum number of heads will be a hit-and-run force to be reckoned with.
- Demomen will often use the Eyelander with a shield, to rush unsuspecting foes and kill them with the critical hit the charge can provide. Try to strafe away from a charge, as backing up may not be enough to escape the extended range of this weapon.
- If a Demoman using the Eyelander forces you into close combat, fighting back may be more beneficial than trying to escape; the weapon's range, its kill bonus, and being a slow-moving class often make retreat impossible.
- Because of the added bonus with each head the Demoman takes with the Eyelander, he will sometimes be willing to do whatever he can to earn heads. Consider luring the Demoman into traps or other dangerous situations.
|
Scotsman's Skullcutter
|
- The Scotsman's Skullcutter reduces the Demoman's speed, making him an easier target. However, this weapon has an increased melee range and deals more damage. Attack the Demoman from afar.
|
Claidheamh Mòr
|
- A Demoman wielding the Claidheamh Mòr will likely equip a shield as well, to make use of the weapon's only positive attribute: extending charges by half a second. It becomes even more important to strafe or take cover from a charging Demoman.
- Unlike the Eyelander, the Claidheamh Mòr only subtracts 15 from a Demoman's max health. Take note of the increased survivability.
|
Pain Train
|
- The Demoman suffers 10% more damage from bullets while the Pain Train is in his loadout. Use weapons that fire bullets for extra damage.
- Demomen with the Pain Train often sticky jump onto capture points, which can overcome teams that are ill-prepared for such a surprise. Have Sentry Guns guard points to easily dispatch of such Demomen.
|
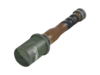
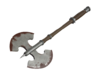
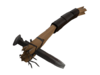
Ullapool Caber
|
- The Ullapool Caber explodes on contact with the world along with enemies. Try to stay well away from Demomen who wield this weapon, as one may catch you off guard by missing you and hitting something else. Avoid clustering near teammates, as this weapon can punish you all.
- Demomen who have the Ullapool Caber out may be low on health and are attempting a suicide attack. Kill one before he reaches you.
- If you cannot avoid being struck by a Demoman's Ullapool Caber, do as much damage as you can before he hits you, so that he ends up dying from either the blast or the fall caused by being sent skyward from the blast.
- Pairing the Ullapool Caber with a shield allows a Demoman to create deadly ambushes in open spaces. Take alternate routes littered with cover and obstacles.
|
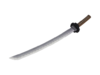
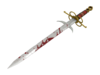
Half-Zatoichi
|
- Beware engaging a Demoman who has just slain one of your teammates with the Half-Zatoichi; he will likely take you on with it or his other weapons. Remain just outside his melee range so he continues using the weapon against you, and retaliate with your ranged weapons; if you are faster than the Demoman, he will be effectively helpless. Be aware of his shield if he has one equipped.
- If you have the Half-Zatoichi equipped as well, attack the Demoman while he is distracted by teammates assisting from afar or up close.
|
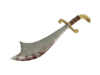
Persian Persuader
|
- While the Persian Persuader is equipped, it doubles the recharge rate of the Demoman's shield charges. Avoid fighting him within his charging range, especially if he has the Splendid Screen equipped as well.
- The Persian Persuader converts all ammo into health; try to remove any nearby ammo sources while fighting the Demoman.
- This also means the Demoman is prevented from replenishing his ammo; keep your distance and make him waste his shots to steadily decrease his effectiveness, especially in Arena.
|
See also
 Demoman Demoman |
|---|
| | Weapons |
Primary | | | Secondary | | | Melee |
Bottle ( Frying Pan, Saxxy, Scottish Handshake, Conscientious Objector, Freedom Staff, Bat Outta Hell, Memory Maker, Ham Shank, Golden Frying Pan, Necro Smasher, Crossing Guard, Prinny Machete) · Eyelander ( Horseless Headless Horsemann's Headtaker, Nessie's Nine Iron) · Pain Train · Scotsman's Skullcutter · Ullapool Caber · Claidheamh Mòr · Half-Zatoichi · Persian Persuader | | | |
| | | Abilities | | | | Cosmetics | | | | Item sets | | | | Special taunts | | | | Achievements | | | | Character | | | | Strategy | | | | Other | |
|
