|
|
| Line 139: |
Line 139: |
| | * Your team should concentrate fire on single targets buffed by the Concheror to prevent them from regaining any lost health. | | * Your team should concentrate fire on single targets buffed by the Concheror to prevent them from regaining any lost health. |
| | |- | | |- |
| | + | | align="center" valign="center" style="padding:0.5em" | |
| | + | {{Table icon|B.A.S.E. Jumper}} |
| | + | | |
| | + | *The B.A.S.E Jumper is a deadly duo when used with The Air Strike and Market Gardener. |
| | + | *The Market Gardener will be able to crit with the B.A.S.E Jumper as long as you were launched by an explosive. Try to look out for any parachuting Soldiers around with this deadly weapon. |
| | + | *The Air Strike increases clip size on kill and on rocket jumps, increased firing speed. Try to watch out for a barrage of rockets coming your way. |
| | |} | | |} |
| | | | |
Revision as of 08:33, 24 June 2014
The Soldier is a well-rounded, bulky class that is capable of both taking and dealing a decent amount of damage. While slow on foot, the Soldier is known for his trademark ability to rocket jump, which allows him to quickly maneuver around a map. He is most effective at close range or on high ground, where he can use the powerful splash damage from his rockets to reliably dispatch foes. The Soldier has a number of different loadout options that, according to the situation, allow him to increase his offensive or defensive capabilities as well as buff teammates, making him extremely versatile. Although lacking many exploitable weaknesses, the Soldier is not the master of any one trade; for example, the Scout is faster while the Demoman and Heavy can deal more damage.
General
 Role Role
|
- Due to the Soldier’s versatility, he is capable of performing many different tasks, such as assaulting an enemy base, defending mission objectives, or picking off important enemy targets.
- No matter what you are doing, always be prepared to deal with a Soldier.
|
 Health Health
|
- The Soldier has a relatively large amount of health, allowing him to keep fighting for long periods of time.
|
 Speed Speed
|
|
 Power Power
|
- The Soldier’s rockets are highly damaging, but are less powerful and can more easily be dodged as the distance between the two of you increases.
|
Weapon-specific
Primary weapons
Rocket Launcher + reskins
|
- While the projectiles from the Rocket Launcher travel fairly slowly, a Soldier will typically aim at your feet to hit you with the splash damage. Thus, seizing the high ground or keeping a distance makes it more difficult for him to hit you.
- The Rocket Launcher has a low magazine size and reloads slowly; if a Soldier misses all of his shots, he becomes extremely vulnerable afterward.
|
Direct Hit
|
- Rockets from the Direct Hit travel faster and can kill low-health classes in one hit at close range. However, the splash damage radius is extremely low, so keep a moderate distance from the Soldier so that you can easily dodge his shots.
- If launched into the air by an explosion, continue maneuvering to avoid being airshot, as the Direct Hit deals mini-crits to those propelled airborne by an explosion.
|
Black Box + reskins
|
- The Black Box heals the Soldier for 15 Health when its rockets hit an enemy, allowing him to stay in combat for prolonged periods of time. Rather than exchanging harassment, take out the Soldier before he can recover from any damage.
- The Black Box only holds three rockets in its clip, leaving the Soldier quickly vulnerable. This also hinders his ability to ambush you through rocket jumping.
|
Rocket Jumper
|
- The Rocket Jumper deals no damage and takes away the Soldier's most practical weapon, so dispatching him is much easier.
- Keep your distance from an airborne Soldier to avoid attacks from the Mantreads or Market Gardener. Don't linger in wide, vertical areas, where a Soldier could ambush you with these weapons.
|
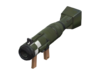
Liberty Launcher
|
- The Liberty Launcher’s rockets maintain the splash radius of those from the Rocket Launcher but travel moderately faster. Attack from a distance and make sure you have plenty of room to dodge any rockets that come your way.
- The Liberty Launcher deals 25% less damage, making it ineffective if you have allies or sources of health nearby. Even if you can't dodge some of the rockets, you have a greater chance of surviving the engagement.
- The Liberty Launcher also deals 25% less rocket jump damage to the wielder, increasing his survivability while traversing the map; be aware of the extra health a Soldier using this weapon may have should he drop in on you.
|
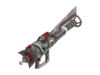
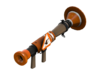
Cow Mangler 5000
|
- The Cow Mangler operates similarly to the Rocket Launcher but can never deal critical hits and inflicts heavily reduced damage to buildings.
- Don't allow a Soldier with the Cow Mangler 5000 to disable an allied Sentry Gun with a charged shot. It takes a few seconds to prepare, so use this time to take the Soldier out.
- If he succeeds in firing the charged shot, his entire clip will be emptied; either pursue him or switch focus to his teammates.
|
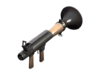
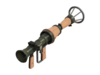
Beggar's Bazooka
|
- Never let a Soldier with the Beggar's Bazooka come close enough to unleash a barrage on your teammates. Ambush him as he loads, or force him to fire from a longer distance, where its lack of precision will cause some rockets to miss.
|
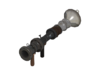
Air Strike
|
- The Air Strike begins with a paltry clip size which increases if the Soldier gets a kill. Take him out before be becomes a greater threat.
- The Air Strike's rockets have reduced explosive radius and damage, making them easier to dodge.
- If the Soldier manages to increase his clip size, focus him down in between his aerial barrages.
- A Soldier with the Air Strike needs to be airborne to fire his barrages. Predict his trajectory and shoot him down.
|
Secondary weapons
Armaments
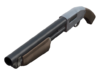
Shotgun
|
- A Soldier will typically use the Shotgun if he has no time to reload his Rocket Launcher or does not wish to damage himself from firing rockets at point-blank range. Either way, he is more vulnerable to attack when he wields his Shotgun instead of his primary weapon.
- Outmaneuver a Soldier so that he misses more often with his Shotgun. Back away to reduce the number of pellets that can hit you.
|
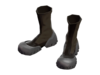
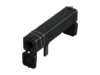
Gunboats
|
- A Soldier wearing the Gunboats will often rocket jump to higher ground without suffering too much damage and rain rockets upon you. Either take the high ground yourself or kill him before he even has the chance to begin a rocket jump assault.
- As the Gunboats replace the Soldier's Shotgun, he becomes less effective in direct combat; if he doesn't try to slowly reach you with his melee weapon, he risks self-injury from using his Rocket Launcher at close range.
|
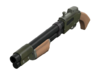
Reserve Shooter
|
- The Reserve Shooter is capable of landing mini-crits on airborne targets, even if the target is simply jumping, so stay grounded. If propelled into the air by a rocket, air strafe to avoid his fire and do your best to quickly reach solid ground.
- The Reserve Shooter's reduced magazine side makes it less reliable of a sidearm than the Shotgun.
- Weapon heckling is less effective against a Soldier with the Reserve Shooter due to its decreased weapon switch time.
|
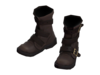
Mantreads
|
- A Soldier using the Mantreads will receive considerably less knock back from most weapons, allowing him to more easily maintain a high ground advantage. However, like with the Gunboats, he is deprived of a secondary weapon.
- Keep an eye out for airborne Soldiers; aside from firing rockets at you, one might try to fall on you and inflict damage with his Mantreads.
- The Mantreads only negate fall damage taken by the Soldier if he actually manages to land on an enemy; if you see a Soldier dropping towards you, back away so that he takes fall damage.
|
Righteous Bison
|
- The Righteous Bison deals considerably less damage than the Shotgun, but pierces through enemies and is effective at medium- to long-range harassment. Avoid clustering near your teammates to reduce the effectiveness of its piercing shots.
- The Righteous Bison's shots can harm a single target multiple times; if you do not have enough room to dodge the slow-moving projectiles, close the distance between you and the Soldier to reduce the number of times you are hit. Never run away in the direction of the laser.
|
Banners
A Soldier's banners provide a 10-second area-of-effect buff to nearby allies once he has dealt enough damage. Because the Soldier's teammates must remain close to him, weapons with splash damage are effective for fighting a wave of buffed enemies. Killing the Soldier will end the effect immediately; if possible, aim for him first. Additionally, a Soldier using a banner lacks a secondary weapon, making him less effective in direct combat; if taken down quickly, he won't be able to activate his chosen banner.
Melee weapons
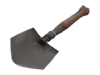
Shovel + reskins
|
- You should be able to outmaneuver a Soldier using the standard Shovel, as his low movement speed puts him at a slight disadvantage in melee combat.
|
Escape Plan
|
- A Soldier will typically use his Escape Plan's speed boost as a last resort to escape. When the Escape Plan is his active weapon, he takes guaranteed mini-crits.
- Note his movement speed to gauge his health and pick him off before he gets away; if a Soldier is running quickly while holding this weapon, it is a sign of weakness.
|
Equalizer
|
- The healthier a Soldier is, the less damage he can deal with his Equalizer. If a Soldier is attacking you with the weapon, he might be already injured; determine whether you can pick him off. Treat him as if he were using the default Shovel.
|
Pain Train
|
- Despite the increased ease in killing Soldiers using bullets while they are wielding the Pain Train, be wary of any that may rocket jump or otherwise sneak by and capture your team's control points.
|
Half-Zatoichi
|
- Beware engaging a Soldier who has just slain one of your teammates with the Half-Zatoichi; he will likely take you on with it or his longer-range weapons. Remain just outside his melee range so he continues using the weapon against you, and retaliate with your ranged weapons; if you are faster than the Soldier, he will be effectively helpless.
|

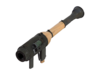
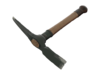
Market Gardener
|
- Keep an eye out for any airborne Soldier; aside from firing rockets at you, one might try to use his Market Gardener to land a guaranteed critical hit. Keep your distance until he lands.
|
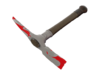
Disciplinary Action
|
- An enemy Soldier equipped with the Disciplinary Action will likely use it to hustle himself and teammates to the battlefield rather than fight. As with the Shovel, try to remain well out of a Soldier's range should he use this weapon against you.
|
See also
 Soldier Soldier |
|---|
| | Weapons |
Primary | | | Secondary | | | Melee |
Shovel ( Frying Pan, Saxxy, Conscientious Objector, Freedom Staff, Bat Outta Hell, Memory Maker, Ham Shank, Golden Frying Pan, Necro Smasher, Crossing Guard, Prinny Machete) · Equalizer · Pain Train · Half-Zatoichi · Disciplinary Action · Market Gardener · Escape Plan | | | |
| | | Abilities | | | | Cosmetics | | | | Item sets | | | | Special taunts | | | | Achievements | | | | Character | | | | Strategy | | | | Other | |
|
