|
|
| Line 115: |
Line 115: |
| | | class="small" align="center" valign="center" style="padding:0.5em" | {{Table icon|Pain Train}} | | | class="small" align="center" valign="center" style="padding:0.5em" | {{Table icon|Pain Train}} |
| | | | | | |
| − | *The effects of the pain train are all passive. You know a Demoman have the pain train equipped when he captures faster than usual (e.g. 2x instead of 1x).
| |
| | *The Demoman has a +10% vulnerability to bullets with the Pain Train equipped. Switch to a weapon that fires bullets for extra damage. | | *The Demoman has a +10% vulnerability to bullets with the Pain Train equipped. Switch to a weapon that fires bullets for extra damage. |
| | |- | | |- |
Revision as of 00:22, 17 March 2011
The Demoman is a unique class whose strategy depends on his loadout. With above average health and devastating weaponry, the Demoman is generally best engaged up close due to the nature of his weapons. While powerful, the Demoman's weapons have less accuracy than other classes' and up close he is usually vulnerable. Alternatively, a Demoman can charge around the battlefield with a variety of dangerous melee weapons and a shield which reduces damage. Therefore, the best way to engage a Demoman is to see what loadout he has and change your tactics accordingly.
General
 Role Role
|
- The Demoman is strong on defense, so he may stay behind in the part the map he is defending, and not chase enemies as vigorously as other classes would. He is also particularly powerful in mid-range combat, so close in and you may have an advantage.
|
 Health Health
|
- The Demoman has a base health of 175, so he can withstand a considerable amount of damage. Unless the situation is extreme, the Demoman is likely to stand his ground, rather than retreat.
- A Demoman using the Eyelander (without any heads) or Claidheamh Mòr will have less heath than usual, making him easier to kill.
|
 Speed Speed
|
- The Demoman is slower than a majority of the classes, so he is not likely to chase you down unless he has the Chargin' Targe or the Eyelander with multiple heads, or unless you are at low health and are vulnerable.
|
 Power Power
|
- The Demoman is quite deadly when using his primary and secondary weapons, but the projectiles are fired in an arc, which can make it difficult to aim for some Demomen. Getting close to him and avoiding his projectiles will make it easier for you to kill him.
|
Weapon Specific
A list of useful tidbits about the Demoman's tools, and how to counter them:
Primary Weapons
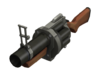
Grenade Launcher
|
- The Grenade Launcher has a long reload time and a small clip. Attack the Demoman when his weapon is out of ammo.
- A Demoman's grenades can bounce over cover and around corners, so don't rely as heavily on cover when fighting a Demoman using his Grenade Launcher.
- When firing the launcher and hitting at close range, the Demoman will likely get hit by his own grenade's explosion, dealing splash damage to himself. Use this to your advantage.
|

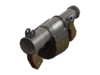
Loch-n-Load
|
- The Loch-n-Load deals additional self-damage to the Demoman. Even if you die at close range, there is a chance of the Demoman severely injuring or killing himself.
- The Loch-n-Load has a smaller clip size than the Grenade Launcher. Dodge the two grenades, and then attack him while he is reloading.
- Grenades fired from the Loch-n-Load do not explode if they strike an obstacle. Cover and random movement will decrease the chances of getting hit.
|
Secondary Weapons
Chargin' Targe
|
- The Chargin' Targe gives the Demoman resistance to fire and blast damage. Use a weapon that deals a different form of damage, if possible.
- The Charge effect can be canceled or delayed by using weapons with Stun, Slowdown and/or Knockback effects.
- When a Demoman is charging, his movement will be particularily easy to predict due to his inability to turn, strafe, crouch and jump. Use this to your advantage.
|
Trap Weapons
- Stickybombs can be destroyed by most weapons. Take them out from a safe distance to avoid being damaged.
- Using an explosive weapon around corners can dislodge enemy sticky traps, revealing them before it's too late.
- Killing the Demoman will automatically remove all his Stickybombs, so try to surprise him and kill him to remove sticky traps.
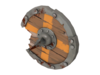
Stickybomb Launcher
|
- The Stickybomb Launcher is more difficult to use at close range due to the lengthy arming time, but be careful, because the stickies themselves have a large splash damage radius.
- The Stickybomb Launcher has a long reload time. Avoid the Stickybombs he fires at you, and attack the Demoman when he needs to reload.
|
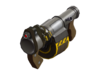
Scottish Resistance
|
- The Scottish Resistance is not well suited for direct combat, but can be used to set up multiple traps. When attacking, be aware of and avoid any stray Stickybombs near the Demoman.
|
Melee Weapons
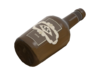 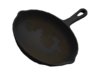
Bottle / Frying Pan
|
- A Demoman may use the Bottle or Frying Pan as a last resort at close range. Since the Demoman's speed is below average, back up while attacking him if he is chasing you with one of these weapons.
|
Eyelander / Horseless Headless Horsemann's Headtaker
|
- Demomen wielding this melee weapon would like nothing more than taking your head, so they will have an urge to try whatever they can to receive one. When a Demoman pulls out this weapon, back up immediately, so that the extended melee range doesn't catch you off guard.
- Demomen will mainly equip both the Chargin' Targe and this weapon to make good use of the charge speed and the Crit to chop your head off. Do not let this happen and don't get on his path.
|
Scotsman's Skullcutter
|
- This weapon reduces the Demoman's speed, making him an easier target. However, this weapon also has an increased melee range, so use a ranged weapon against the Demoman if possible.
|
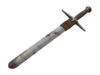
Claidheamh Mòr
|
- The Claidheamh Mòr increases the charge duration of the Chargin' Targe and gives the Demoman increased melee range. Any Demoman using the Claidheamh Mòr is also likely to be using the Targe, which gives resistance to explosion damage and fire damage, so try and stay back and inflict damage with bullets, if possible.
- It is easy to misjudge the range of the Demoman's charge while he wields the Claidheamh Mòr. Try to take cover behind an obstacle in order to prevent this from becoming a problem.
|
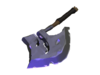
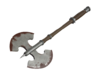
Pain Train
|
- The Demoman has a +10% vulnerability to bullets with the Pain Train equipped. Switch to a weapon that fires bullets for extra damage.
|
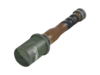
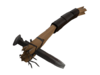
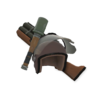
Ullapool Caber
|
- This Ullapool Caber explodes on contact with the world. Try to stay outside of the melee range of a Demoman who wields this weapon, as he may catch you off guard with the explosion.
- If you are within melee range of a Demoman using this weapon, try and cause the Demoman to miss and hit a wall, injuring himself.
- A Demoman using a Chargin' Targe in conjunction with this weapon can close the distance between you quickly and attack you with a guaranteed Critical hit. Beware of Demomen using this combination of weapons.
|
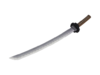
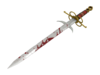
Half-Zatoichi
|
- A Demoman who draws out his Half-Zatoichi cannot switch to another weapon until he killed someone with it. Use this to your advantage as he will be helpless if you harass him outside of his melee distance. Just keep in mind that a Half-zatoichi that have killed someone is covered in blood.
- Half-Zatoichi instantkills anyone else using Half-Zatoichi, a charging Demoman with chargin targe can be instantly killed by a soldier or Demoman with just the right timing!
- A demoman who just killed someone with his Half-Zatoichi have regained full health, so be careful if you just saw the demoman kill one of your teammates with the Half-Zatoichi.
|
Class Set
The Expert's Ordnance
|
- A Demoman using this class pack will also have a 10% resistance to fire damage, so try to use weapons using explosives or bullets against him instead.
|
See also


