Difference between revisions of "Medic match-ups"
m (Filtered Medic match-ups: (Content filters applied to links) (Review RC#426408)) |
(vs. first 3 done and good to go.) |
||
| Line 6: | Line 6: | ||
| class="xsmall" | vs | | class="xsmall" | vs | ||
| class="small" align="center" valign="center" style="padding:0.5em" | [[Image:Scout.png|100x100px|link=Scout]]<br>[[Scout match-ups|Scout]] | | class="small" align="center" valign="center" style="padding:0.5em" | [[Image:Scout.png|100x100px|link=Scout]]<br>[[Scout match-ups|Scout]] | ||
| − | | When | + | | When flanking your team, an enemy Scout will regard you as his number one target. His maneuverability will allow him to get behind your team’s front lines and take you out with only a few shots from his [[Scattergun]]. Dodge his fire and get the attention of your teammates so that they can defend you. If the Scout catches you alone, backpedal while firing your [[Syringe Gun]]; his speed will make it difficult to land a hit with your melee weapon. Use your rapid fire to sweep the area and lead him with your shots. |
| − | |||
| − | |||
| − | |||
| − | |||
|- | |- | ||
| class="small" align="center" valign="center" style="padding:0.5em" | [[Image:Medic.png|100x100px|link=Medic]]<br>[[Medic]] | | class="small" align="center" valign="center" style="padding:0.5em" | [[Image:Medic.png|100x100px|link=Medic]]<br>[[Medic]] | ||
| class="xsmall" | vs | | class="xsmall" | vs | ||
| class="small" align="center" valign="center" style="padding:0.5em" | [[Image:Soldier.png|100x100px|link=Soldier]]<br>[[Soldier match-ups|Soldier]] | | class="small" align="center" valign="center" style="padding:0.5em" | [[Image:Soldier.png|100x100px|link=Soldier]]<br>[[Soldier match-ups|Soldier]] | ||
| − | | | + | | Although a Soldier is less mobile than a Scout, he can still [[rocket jump]] to bypass your teammates and target you. In the air, he will have a clear line of sight with which to bombard you with rockets. Stay near a reliable [[Medic buddy]] such as a Heavy to dissuade the Soldier from trying to dive-bomb you. While healing others, use nearby cover to avoid the splash damage from rockets. You have next to no chance of winning a one-on-one encounter with a competent Soldier, so if there are no teammates nearby, retreat while firing back with your Syringe Gun. |
| − | |||
| − | |||
|- | |- | ||
| class="small" align="center" valign="center" style="padding:0.5em" | [[Image:Medic.png|100x100px|link=Medic]]<br>[[Medic]] | | class="small" align="center" valign="center" style="padding:0.5em" | [[Image:Medic.png|100x100px|link=Medic]]<br>[[Medic]] | ||
| class="xsmall" | vs | | class="xsmall" | vs | ||
| class="small" align="center" valign="center" style="padding:0.5em" | [[Image:Pyro.png|100x100px|link=Pyro]]<br>[[Pyro match-ups|Pyro]] | | class="small" align="center" valign="center" style="padding:0.5em" | [[Image:Pyro.png|100x100px|link=Pyro]]<br>[[Pyro match-ups|Pyro]] | ||
| − | | | + | | When dealing with a Pyro, stay farther away from your patients, even when behind cover, as [[fire]] can pass through teammates and burn you as well. When a Pyro manages to light multiple teammates on fire, spread out your healing so that you can quickly extinguish them all. Out in the open, your [[Medic buddy]] ideally should be able to eliminate him before he comes within lethal range. Thus, a Pyro will rely heavily on [[ambush]]ing if he wants to take you out. That being said, if he manages to close the distance between the two of you, you are likely to die. If you end up fighting a Pyro, backpedal while firing your Syringe Gun and search for a Medkit to extinguish the [[afterburn]]. He is slower than you, making retreating somewhat easier. |
| − | + | If you deploy your ÜberCharge while a Pyro is around, he can use his [[compression blast]] to forcibly reposition you, even in your invulnerable state. Being separated from your patient will cut off the ÜberCharge link, leaving your patient vulnerable. Try to have your teammates kill any Pyros nearby before you deploy your ÜberCharge. | |
| − | If you | ||
| − | |||
|- | |- | ||
| class="small" align="center" valign="center" style="padding:0.5em" | [[Image:Medic.png|100x100px|link=Medic]]<br>[[Medic]] | | class="small" align="center" valign="center" style="padding:0.5em" | [[Image:Medic.png|100x100px|link=Medic]]<br>[[Medic]] | ||
Revision as of 05:46, 29 March 2011
| Class | Strategy | ||
|---|---|---|---|
 Medic |
vs |  Scout |
When flanking your team, an enemy Scout will regard you as his number one target. His maneuverability will allow him to get behind your team’s front lines and take you out with only a few shots from his Scattergun. Dodge his fire and get the attention of your teammates so that they can defend you. If the Scout catches you alone, backpedal while firing your Syringe Gun; his speed will make it difficult to land a hit with your melee weapon. Use your rapid fire to sweep the area and lead him with your shots. |
Medic |
vs |  Soldier |
Although a Soldier is less mobile than a Scout, he can still rocket jump to bypass your teammates and target you. In the air, he will have a clear line of sight with which to bombard you with rockets. Stay near a reliable Medic buddy such as a Heavy to dissuade the Soldier from trying to dive-bomb you. While healing others, use nearby cover to avoid the splash damage from rockets. You have next to no chance of winning a one-on-one encounter with a competent Soldier, so if there are no teammates nearby, retreat while firing back with your Syringe Gun. |
Medic |
vs |  Pyro |
When dealing with a Pyro, stay farther away from your patients, even when behind cover, as fire can pass through teammates and burn you as well. When a Pyro manages to light multiple teammates on fire, spread out your healing so that you can quickly extinguish them all. Out in the open, your Medic buddy ideally should be able to eliminate him before he comes within lethal range. Thus, a Pyro will rely heavily on ambushing if he wants to take you out. That being said, if he manages to close the distance between the two of you, you are likely to die. If you end up fighting a Pyro, backpedal while firing your Syringe Gun and search for a Medkit to extinguish the afterburn. He is slower than you, making retreating somewhat easier.
If you deploy your ÜberCharge while a Pyro is around, he can use his compression blast to forcibly reposition you, even in your invulnerable state. Being separated from your patient will cut off the ÜberCharge link, leaving your patient vulnerable. Try to have your teammates kill any Pyros nearby before you deploy your ÜberCharge. |
Medic |
vs |  Demoman |
In a one-on-one encounter, it takes much longer for your Syringe Gun to kill a Demoman than it takes him to lay a few Stickybombs and kill you. On the plus side, you can use your speed to make it difficult for him to land a grenade on you. If you do try to charge the Demoman try to keep random movements because a good Demoman will land a pipe bomb on you with ease. Try to keep in close where his weapons are much less effective, and consider reaching for your Saw if he doesn't think of his Bottle first. Only attack if he is distracted; otherwise just fire while running away.
When with a team-mate, it largely depends on him to take out the Demoman. There's not much you can do other than keep yourself alive by using your speed to avoid grenades and stickies. |
Medic |
vs | 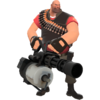 Heavy |
If you aren't standing behind and healing a friendly Heavy or Soldier when facing the opposing team's Heavy, then you are just asking to be mowed down. Otherwise, your buddy should have the edge over your opponent, unless the enemy Heavy is also accompanied by a Medic. If the other Heavy is accompanied by a Medic and gets the better of your own healing target, it would be wise to run. Don't try to take a Heavy down on your own unless he is distracted, can't see you, or you're at long range, in which case you can try to snipe him with a few syringes (aim high, so that they fall on him) and hope for the best. If you're lucky, you can force him to retreat. A distracted Heavy is also a good source to fill up your ÜberCharge with your Übersaw, but be cautious and strafe. His Minigun hits won't do much damage at long range, but beware of Natascha, which can slow down your escape if he decides to come after you. You could also try to circle strafe, jump, and duck around him to disorient him as your movement is much quicker than his, and lay on a few saw hits. |
Medic |
vs | 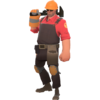 Engineer |
A lone Engineer is a fairly even encounter to you. You have more health and a rapid fire weapon, but lack the power of his Shotgun. Stay at medium to long range and returning fire with your Blutsauger while backpedaling. If he runs, don't follow wounded Engineers too far as a Sentry Gun is likely not too far away. You are an important indirect counter to the Engineer, and getting yourself killed will be a big setback for your team if the other team is using a lot of them. Beware of Engineers who have revenge Crits from the Frontier Justice.
You shouldn't be in a position where you have to move within range of an enemy Sentry Gun unaccompanied. If it's a level one Sentry Gun and you have a good angle on it, you can try to take the Sentry Gun out from long range. It will take a few seconds of concentrated fire, so be prepared to abort if there are Snipers, Spies, or Pyros nearby. If it's a higher level Sentry Gun, or it is actively being healed by the Engineer, retreat and find a friendly Heavy, Soldier, or Demoman to help you. Your ÜberCharge is the de facto tool for taking out Sentry Gun nests, indeed in some maps it is the ONLY way to take out certain Sentry Gun locations. If you are on attack, do your team-mates a huge favor by using the regular Medi Gun, the Kritzkrieg is more or less useless against Engineers. You may be able to allow them to take out the Sentry Gun while healing them constantly from just out of sight, but if the Sentry Gun is too well placed, or the Engineer is repairing too quickly, build up an ÜberCharge and use that to take out the entire Engineer nest, hopefully including the Engineer himself. |
Medic |
vs | Medic |
When fighting one-on-one with another Medic, you can either close to melee range and try to deliver a few whacks with the Bonesaw, or put your faith in superior Syringe Gun/Blutsauger skill and try to take him down with rapid-fire. If you both have the Blutsauger, then get comfortable, as you're probably going to be fighting with the same guy for a while, since the Blutsauger regenerates health and can't inflict significant damage fast enough. In the end, it will likely come down to who gets the first Bonesaw Crit. Keep moving to avoiding shots from his own Bonesaw or Syringe Gun. If you encounter a lone Medic with a buddy, the enemy Medic should be a priority target for your buddy. Let him take the Medic out, or help him with Syringe Gun/Blutsauger fire. Since Medics can't do a lot of damage quickly, the two of you will kill the opposing Medic long before he can kill you or your buddy, and then you can heal your buddy again. Try to keep your buddy between you and the other Medic, as you can heal your buddy a lot faster than you can regenerate. When you prevail, heal your buddy again. If the Medic has a Medic buddy of his own, and you don't, run away. Without help, there is very little chance you can take them out. If you and the other Medic have a buddy, try and outlast them. How well you can do this is mostly up to the skill of your own Medic buddy. If things are looking bad beyond hope, abandon your buddy rather than waste your current charge fill. If he sneaks up on you while you are distracted with healing, watch for his deadly Bonesaw and alert your team-mate. Some Medics also try to sneak up on other Medics, avoid their buddies, and stealthily take the enemy Medic out with a Bonesaw Crit. While this is very hard to pull off, it is very funny and humiliating to both the Medic and his buddy. |
Medic |
vs | 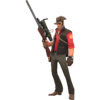 Sniper |
You're pretty quick, so don't stop moving. Move through Sniper hunting grounds as quickly as possible or find cover. Don't be afraid to leave your clueless buddy in the dust if he decides to take it slow, admiring the sprays and dandelions along the way. Other than other Snipers, a Medic is the highest priority target for a Sniper and they can take your buddy out with one shot no matter how overhealed he is. Another thing to bear in mind is unscrupulous Snipers can and will take you out with a single fully charged bodyshot, even if you haven't been injured- there are no words for how frustrating this is, so stay out of sight and keep moving wherever possible.
Ask your buddy to lay down suppressive fire so the Snipers can't get a clear shot (unless he's a Heavy, in which case the slowdown will get him easily killed). At anything less than long range, a Sniper should be a fairly easy target for your buddy. If you happen to come upon a lone Sniper, don't hesitate to open fire. If he is distracted, try to kill him from behind with the Bonesaw. If he sees you coming, use your Syringe Gun to mow him down, as he probably has a more powerful melee, but neither his rifle or SMG has as much stopping power as your syringes at close range. The Huntsman is a bit more dangerous, but remember he has to land two solid arrows to kill you, and the odds are still slightly tipped in your favor. Of course, a good Huntsman Sniper will still be able to one-shot you with a headshot, so do your best to be unpredictable. |
Medic |
vs | 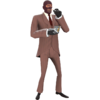 Spy |
When you're in a healing combination with a Heavy or Soldier, it attracts attention, particularly from Spies. If you know what you're doing you can Spy check suspicious team-mates calling to you for help by emptying a few rounds from the Syringe Gun into their body or delivering a few whacks from the Übersaw (a disguised Spy will NOT give ÜberCharge when hit with the Übersaw, so be mindful when Spy-checking teammates!). In a one-on-one melee fight the Medic will prevail as his Bonesaw out-damages the Knife from the front and its free Über increase with the Übersaw. However, if you're doing this, remember to keep a small amount of distance and your wits about you so as not to get sidestabbed. When you're healing another player be sure to never stop moving, and watch your back. If you can afford to, take down the Spy with your Bonesaw and then get back to healing your buddy. An exposed Spy should be easy prey for your buddy as long as you alert him quickly to the Spy's presence. Remember that your Medi Gun still works even if you're not facing your target, so check behind yourself often and don't be afraid to pull out your saw or gun if you see anything suspicious. Keep firing to take him down or drive him off. |
See also
|