Difference between revisions of "Medic match-ups"
(That's the next 3.) |
(Finished here.) |
||
| Line 39: | Line 39: | ||
| class="xsmall" | vs | | class="xsmall" | vs | ||
| class="small" align="center" valign="center" style="padding:0.5em" | [[Image:Medic.png|100x100px|link=Medic]]<br>Medic | | class="small" align="center" valign="center" style="padding:0.5em" | [[Image:Medic.png|100x100px|link=Medic]]<br>Medic | ||
| − | | | + | | You will rarely engage another Medic unless both of you are accompanied by a [[Medic buddy]]. In such an encounter, stay behind cover and keep healing your patient while he fights; your Syringe Gun’s damage output is not as helpful as your healing power. If the enemy Medic’s teammates are killed, he will be easy prey. If your own teammates are losing or defeated, abandon the area and flee instead of losing your ÜberCharge progress. |
| + | In a head-to-head battle against another Medic, dodge his needles and melee strikes while landing your own. A Medic that is using the [[Blutsauger]] will be healed as he fights and gain an enormous advantage. | ||
| + | |||
|- | |- | ||
| class="small" align="center" valign="center" style="padding:0.5em" | [[Image:Medic.png|100x100px|link=Medic]]<br>[[Medic]] | | class="small" align="center" valign="center" style="padding:0.5em" | [[Image:Medic.png|100x100px|link=Medic]]<br>[[Medic]] | ||
| class="xsmall" | vs | | class="xsmall" | vs | ||
| class="small" align="center" valign="center" style="padding:0.5em" | [[Image:Sniper.png|100x100px|link=Sniper]]<br>[[Sniper match-ups|Sniper]] | | class="small" align="center" valign="center" style="padding:0.5em" | [[Image:Sniper.png|100x100px|link=Sniper]]<br>[[Sniper match-ups|Sniper]] | ||
| − | | You | + | | You are one of the highest priority targets for any Sniper. He can kill you with a single headshot or a fully charged bodyshot, so you’ll want to move erratically and avoid entering open areas that give him a clear view of you. Ask your patient to lay down suppressive fire at the Sniper’s location to prevent him from getting a clear shot. Don’t be afraid to ditch your teammates and find cover if you know you’re being targeted. Once your teammates close the distance between them and the Sniper, he is easy prey, even for you. In a one-on-one fight, your weapons have more stopping power at close range than his. |
| − | |||
| − | Ask your | ||
| − | |||
| − | |||
|- | |- | ||
| class="small" align="center" valign="center" style="padding:0.5em" | [[Image:Medic.png|100x100px|link=Medic]]<br>[[Medic]] | | class="small" align="center" valign="center" style="padding:0.5em" | [[Image:Medic.png|100x100px|link=Medic]]<br>[[Medic]] | ||
| class="xsmall" | vs | | class="xsmall" | vs | ||
| class="small" align="center" valign="center" style="padding:0.5em" | [[Image:Spy_RED.png|100x100px|link=Spy]]<br>[[Spy match-ups|Spy]] | | class="small" align="center" valign="center" style="padding:0.5em" | [[Image:Spy_RED.png|100x100px|link=Spy]]<br>[[Spy match-ups|Spy]] | ||
| − | | | + | | Your ability to heal and deploy [[ÜberCharge]]s will make you a prime target for any Spy, especially while you are healing an assault class such as a Heavy or Soldier. Your [[Medi Gun]] will still work even if you’re not facing your healing target, so check behind yourself often for anything suspicious. If you are sure a “teammate” is a Spy, kill him yourself or alert your teammates; an exposed Spy should be easy prey for your [[Medic buddy]]. In a one-on-one fight, you have the advantage, as your weapons outdamage those of the Spy at any range. |
|} | |} | ||
Revision as of 04:14, 30 March 2011
| Class | Strategy | ||
|---|---|---|---|
 Medic |
vs | 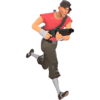 Scout |
When flanking your team, an enemy Scout will regard you as his number one target. His maneuverability will allow him to get behind your team’s front lines and take you out with only a few shots from his Scattergun. Dodge his fire and get the attention of your teammates so that they can defend you. If the Scout catches you alone, backpedal while firing your Syringe Gun; his speed will make it difficult to land a hit with your melee weapon. Use your rapid fire to sweep the area and lead him with your shots. |
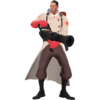
Medic |
vs | 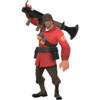 Soldier |
Although a Soldier is less mobile than a Scout, he can still rocket jump to bypass your teammates and target you. In the air, he will have a clear line of sight with which to bombard you with rockets. Stay near a reliable Medic buddy such as a Heavy to dissuade the Soldier from trying to dive-bomb you. While healing others, use nearby cover to avoid the splash damage from rockets. You have next to no chance of winning a one-on-one encounter with a competent Soldier, so if there are no teammates nearby, retreat while firing back with your Syringe Gun. |
Medic |
vs | 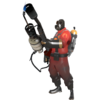 Pyro |
When dealing with a Pyro, stay farther away from your patients, even when behind cover, as fire can pass through teammates and burn you as well. When a Pyro manages to light multiple teammates on fire, spread out your healing so that you can quickly extinguish them all. Out in the open, your Medic buddy ideally should be able to eliminate him before he comes within lethal range. Thus, a Pyro will rely heavily on ambushing if he wants to take you out. That being said, if he manages to close the distance between the two of you, you are likely to die. If you end up fighting a Pyro, backpedal while firing your Syringe Gun and search for a Medkit to extinguish the afterburn. He is slower than you, making retreating somewhat easier.
If you deploy your ÜberCharge while a Pyro is around, he can use his compression blast to forcibly reposition you, even in your invulnerable state. Being separated from your patient will cut off the ÜberCharge link, leaving your patient vulnerable. Try to have your teammates kill any Pyros nearby before you deploy your ÜberCharge. |
Medic |
vs |  Demoman |
The Demoman’s array of explosive weaponry is capable of damaging both you and your patient at the same time. When facing an enemy Demoman, stay moderately away from your patient to minimize the splash damage you two take. Out in open areas, a Demoman can sticky jump to bypass your teammates and attack you from above. In this situation, use your speed to dodge his grenades and Stickybombs as your patient fights him off. If you must face a Demoman in combat yourself, move into close range, where he can damage himself and will find aiming difficult. |
Medic |
vs |  Heavy |
If you come across an enemy Heavy and aren’t accompanied by a decent Medic buddy, you’re asking to be mowed down. Your ability to heal should give your patient the advantage against a lone Heavy. Use your teammate as impromptu cover against his Minigun. Should the enemy Heavy defeat your healing target, flee while firing your Syringe Gun. Don’t try fighting him up close unless he is distracted; you are fast, but not as mobile as the Scout. |
Medic |
vs |  Engineer |
In a one-on-one encounter, a lone Engineer is a fairly even match for you. Keep a medium distance to reduce the damage of his Shotgun, but don’t bother pursuing him if he flees; he’s probably not too far from a Sentry Gun. You should never be in a position where you are within the range of an enemy Sentry Gun without a teammate. Your Syringe Gun is capable of taking out from long range, but it will take a few seconds of concentrated fire. If the Engineer is watching his Sentry Gun, come back with teammates.
Your standard ÜberCharge is one of the best tools for taking out Sentry Gun nests and is the reason you are an important indirect counter to the Engineer. If your team is having trouble getting past a particular Sentry Gun, deploy your ÜberCharge on an offensive class so that they can take it out. |
Medic |
vs | Medic |
You will rarely engage another Medic unless both of you are accompanied by a Medic buddy. In such an encounter, stay behind cover and keep healing your patient while he fights; your Syringe Gun’s damage output is not as helpful as your healing power. If the enemy Medic’s teammates are killed, he will be easy prey. If your own teammates are losing or defeated, abandon the area and flee instead of losing your ÜberCharge progress.
In a head-to-head battle against another Medic, dodge his needles and melee strikes while landing your own. A Medic that is using the Blutsauger will be healed as he fights and gain an enormous advantage. |
Medic |
vs |  Sniper |
You are one of the highest priority targets for any Sniper. He can kill you with a single headshot or a fully charged bodyshot, so you’ll want to move erratically and avoid entering open areas that give him a clear view of you. Ask your patient to lay down suppressive fire at the Sniper’s location to prevent him from getting a clear shot. Don’t be afraid to ditch your teammates and find cover if you know you’re being targeted. Once your teammates close the distance between them and the Sniper, he is easy prey, even for you. In a one-on-one fight, your weapons have more stopping power at close range than his. |
Medic |
vs |  Spy |
Your ability to heal and deploy ÜberCharges will make you a prime target for any Spy, especially while you are healing an assault class such as a Heavy or Soldier. Your Medi Gun will still work even if you’re not facing your healing target, so check behind yourself often for anything suspicious. If you are sure a “teammate” is a Spy, kill him yourself or alert your teammates; an exposed Spy should be easy prey for your Medic buddy. In a one-on-one fight, you have the advantage, as your weapons outdamage those of the Spy at any range. |
See also
|