The Soldier is a well-rounded, bulky class that is capable of both taking and dealing a decent amount of damage. While slow on foot, the Soldier is known for his trademark ability to rocket jump, which allows him to quickly maneuver around a map. He is most effective at close range or on high ground, where he can use the powerful splash damage from his rockets to reliably dispatch foes. The Soldier has a number of different loadout options that, according to the situation, allow him to increase his offensive or defensive capabilities as well as buff teammates, making him extremely versatile. Although lacking many exploitable weaknesses, the Soldier is not the master of any one trade; for example, the Scout is faster while the Demoman and Heavy can deal more damage.
General
 Role Role
|
- Due to the Soldier’s versatility, he is capable of performing many different tasks, such as assaulting an enemy base, defending mission objectives, or picking off important enemy targets.
- No matter what you are doing, always be prepared to deal with a Soldier.
|
 Health Health
|
- The Soldier has a relatively large amount of health, allowing him to keep fighting for long periods of time.
|
 Speed Speed
|
|
 Power Power
|
- The Soldier’s rockets are highly damaging, but are less powerful and can more easily be dodged as the distance between the two of you increases.
|
Weapons
Primary weapons
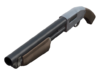
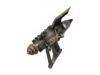
Rocket Launcher / Original / Festive Rocket Launcher
|
- While the projectiles from the Rocket Launcher travel fairly slowly, a Soldier will typically aim at your feet to hit you with the splash damage. Thus, seizing the high ground or keeping a distance makes it more difficult for him to hit you.
- Additionally, the Rocket Launcher has a low magazine size and reloads slowly; if a Soldier misses his shots, he becomes extremely vulnerable afterwards.
|
Direct Hit
|
- Rockets from the Direct Hit move faster and are capable of killing weaker classes in one hit at close range. However, the splash damage radius is extremely low, so keep a moderate distance from the Soldier so that you can more easily dodge his shots.
- If launched into the air by a rocket, continue maneuvering to avoid being airshot.
|
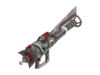
Black Box
|
- The Black Box heals the Soldier for a small amount when its rockets hit an enemy, allowing him to stay in combat for prolonged periods of time. However, its reduced clip size leave him vulnerable once he’s expended his three shots.
- Rather than simply exchanging harassment, take out the Soldier before he can recover from any damage.
|
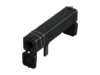
Rocket Jumper
|
- Although there is no practical use for the Rocket Jumper, a Soldier might use it to quickly maneuver around the map to secure important positions. The Rocket Jumper deals no damage, so you shouldn’t have any trouble against a Soldier wielding it.
|
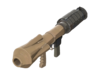
Liberty Launcher
|
- The Liberty Launcher’s rockets maintain the standard splash radius but travel moderately faster than those from the Rocket Launcher.
- While dodging the Soldier’s shots may be more difficult, he only has three shots and thus becomes vulnerable more quickly.
|
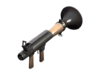
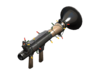
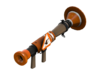
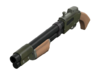
Cow Mangler 5000
|
- The Cow Mangler 5000's small penalties in damage and reload time are minor, so treat it as a regular Rocket Launcher with one extra shot. *If the Soldier tries to utilize the powerful charged shot, attack him; he is immobile during the long charging process and the shot expends his entire clip.
- While a Soldier using the Cow Mangler 5000 can disable buildings, he still deals reduced damage to them, making him less effective against a Sentry Gun encampment.
|
Secondary weapons
Armaments
Shotgun
|
- While not as powerful as the Rocket Launcher, the Shotgun is still a strong weapon at close to medium range. A Soldier will typically use it after he is out of loaded rockets, or does not wish to damage himself with the rockets' splash. Either way, he is more vulnerable to attack when he is wielding the Shotgun as opposed to his primary weapon.
|
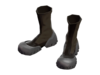
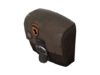
Gunboats
|
- A Soldier with the Gunboats will often use the reduced self-damage from rocket jumping to reach high ground without suffering too much damage. Without his Shotgun, he is less effective in direct combat. However, the height advantage offered by rocket jumps and the lessened self-damage offered by the Gunboats will allow him to rain rockets on you with ease. Either take the high ground yourself or take him out quickly.
|
Reserve Shooter
|
- The Reserve Shooter is capable of landing Mini-Crits on airborne targets, even if the target is simply jumping, so stay grounded. If bounced into the air by a rocket, air strafe to avoid his fire and do your best to quickly reach solid ground.
- The Reserve Shooter's reduced magazine side makes it less reliable of a sidearm than the Shotgun.
|
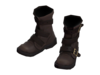
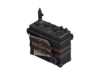
Mantreads
|
- A Soldier using the Mantreads will receive considerably less knock back from most damaging sources, allowing him to more easily maintain a high ground advantage.
- Like with the Gunboats, he is deprived of a secondary weapon.
- Keep an eye out for any airborne Soldier; aside from firing rockets at you, he might try to utilize the Mantreads' stomp damage.
|
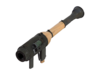
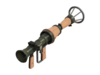
Righteous Bison
|
- The Righteous Bison deals considerably less damage than the Shotgun but pierces through enemies and is effective at medium range harassment. Avoid clustering near your teammates to reduce the effectiveness of its piercing shots, not to mention the splash damage of the Soldier's rockets.
|
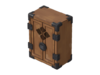
Banners
A Soldier's banners can provide a temporary area-of-effect buff to nearby allies once he was fulfilled certain criteria in combat. Because the Soldier's teammates must remain close to him, weapons with splash damage are effective for fighting a wave of buffed enemies. Killing the Soldier will end the effect immediately; if possible, aim for him first. Additionally, a Soldier using a banner lacks a secondary weapon, making him less effective in direct combat; if taken down quickly rather than in prolonged combat, he won't be able to activate his chosen banner.
Buff Banner
|
- After dealing a significant amount of damage, the Buff Banner allows a Soldier and his allies to deal mini-crits; it's best to fight from behind cover while he and his allies are buffed.
|
Battalion's Backup
|
- After taking a significant amount of damage, the Battalion's Backup allows a Soldier and his allies to take reduced damage and ignore critical hits.
- If he manages to activate the buff, target the Soldier first so that you can once again deal full damage to his teammates.
- The Soldier will need to heal multiple times in order to live long enough to activate the buff, so deny his source of healing outright.
|
Concheror
|
- After dealing or recieving a signficant amount of damage, the Concheror allows a Soldier and his allies to heal upon dealing damage.
- Your team should concentrate fire on single targets to prevent them from regaining any lost health.
|
Melee weapons
Item set effects
See also
 Soldier Soldier |
|---|
| | Weapons |
Primary | | | Secondary | | | Melee |
Shovel ( Frying Pan, Saxxy, Conscientious Objector, Freedom Staff, Bat Outta Hell, Memory Maker, Ham Shank, Golden Frying Pan, Necro Smasher, Crossing Guard, Prinny Machete) · Equalizer · Pain Train · Half-Zatoichi · Disciplinary Action · Market Gardener · Escape Plan | | | |
| | | Abilities | | | | Cosmetics | | | | Item sets | | | | Special taunts | | | | Achievements | | | | Character | | | | Strategy | | | | Other | |
|
