Difference between revisions of "Medic match-ups"
(An important way a Medic can counter every class is to help their respective counters. Just as helping out the wolf population will consequently lead to decreasing of other animal populations.) |
m (Corrected a mistake) |
||
| Line 30: | Line 30: | ||
When using the ÜberCharge from either the [[Medi Gun]] or [[Kritzkrieg]], the Pyro can use his [[compression blast]] to forcibly reposition you, even in your buffed state. Try to have your teammates kill any nearby Pyros before you deploy the respective ÜberCharge. | When using the ÜberCharge from either the [[Medi Gun]] or [[Kritzkrieg]], the Pyro can use his [[compression blast]] to forcibly reposition you, even in your buffed state. Try to have your teammates kill any nearby Pyros before you deploy the respective ÜberCharge. | ||
| − | + | Pyros are quit weak against Engineers, Heavies and maybe even Scouts. So prioritize healing those classes if you want the enemy Pyro to have a harder time getting to you. | |
'''Useful weapons:''' | '''Useful weapons:''' | ||
| Line 42: | Line 42: | ||
'''Tactics:''' When facing an enemy Demoman, have your patient take point so they take the brunt of his grenades and Stickybombs. Stay away from your patient to minimize the splash damage you take and remain at medium range to reliably dodge the Demoman's projectiles. If the Demoman Sticky jumps to dive-bomb you, take cover as your patient fights him off, breaking your healing connection if necessary. If you must face a Demoman yourself, move into close range, where he can damage himself and will find aiming difficult. | '''Tactics:''' When facing an enemy Demoman, have your patient take point so they take the brunt of his grenades and Stickybombs. Stay away from your patient to minimize the splash damage you take and remain at medium range to reliably dodge the Demoman's projectiles. If the Demoman Sticky jumps to dive-bomb you, take cover as your patient fights him off, breaking your healing connection if necessary. If you must face a Demoman yourself, move into close range, where he can damage himself and will find aiming difficult. | ||
| − | Duo to the Demoman's weakness against a Scout, you should obviously ensure the well being of friendly Scouts to put the enemy Demo in | + | Duo to the Demoman's weakness against a Scout, you should obviously ensure the well being of friendly Scouts to put the enemy Demo in danger. |
'''Useful weapons:''' | '''Useful weapons:''' | ||
Revision as of 20:37, 18 June 2021
| “ | Come over here... I promise I vill heal you!
Click to listen
— The Medic on the ideal bait
|
” |
| Class | Strategy | ||
|---|---|---|---|
 Medic |
vs. | 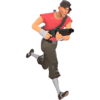 Scout |
Relative merits: When flanking your team, an enemy Scout will regard you as his number one target. His maneuverability will allow him to get behind your team’s front lines and take you out with only a few shots from his Scattergun.
Tactics: Get the attention of your teammates so that they can defend you. If you must defend yourself, the Syringe Gun does a great deal of damage at point-blank range, provided you can actually hit the Scout. Use your rapid fire to sweep the area and lead him with your shots. If you have an Engineer on your team, retreating to his Sentry Gun is a great option. In general, healing and helping your Engineers stay alive will create a lot of obstacles for the enemy Scout. Overhealing your own Scouts will also do the same, as Scouts are very good counters to one another. Useful weapons:
|
Medic |
vs. | 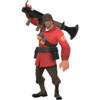 Soldier |
Relative merits: The Soldier can be found both on the front lines and roaming around using his rocket jump. His main threat comes from how he can use a rocket jump to fly over your teammates and target you.
Tactics: The Soldier's rockets can deal splash damage, so take cover behind teammates and obstacles as you heal. Additionally, keep a lookout for Soldiers rocket jumping in from above, where he has a clear line of sight to bombard you. If you are directly targeted, take cover and get the attention of your team, even breaking your healing connection if necessary. Staying near Sentry Guns is also a good choice as their knockback can disrupt a rocket jumping Soldier's course. Anticipate when a Soldier might rocket jump towards you and take countermeasures. Stay near a reliable Medic buddy, such as a Heavy, and position yourself near escape routes where the Soldier can't easily follow you, such as building entrances. Useful weapons:
|
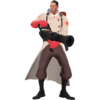
Medic |
vs. | 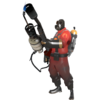 Pyro |
Relative merits: The Pyro's Flame Thrower uses fire, which can pass through teammates and burn you as well. He must fight at close range, while you can watch for ambushes while healing and slightly outrun him. His compression blast can forcibly reposition you away from teammates to cut your ÜberCharge link.
Tactics: When dealing with a Pyro and his flames, stay farther away from your patients to avoid being conflagrated. If a Pyro manages to light multiple teammates on fire, spread out your healing so that you can quickly extinguish them all. Out in the open, your Medic buddy ideally should be able to eliminate him before he comes within lethal range. If a Pyro manages to ambush you, backpedal while firing your Syringe Gun and search for a Medkit to extinguish the afterburn. Your natural health regeneration can offset some, but not all of the damage done by afterburn. When using the ÜberCharge from either the Medi Gun or Kritzkrieg, the Pyro can use his compression blast to forcibly reposition you, even in your buffed state. Try to have your teammates kill any nearby Pyros before you deploy the respective ÜberCharge. Pyros are quit weak against Engineers, Heavies and maybe even Scouts. So prioritize healing those classes if you want the enemy Pyro to have a harder time getting to you. Useful weapons:
|
Medic |
vs. |  Demoman |
Relative merits: The Demoman’s array of explosive weaponry can damage both you and your patient at the same time. Out in open areas, a Demoman can Sticky jump to bypass your teammates and attack you from above. You can outduel him at close range, where your Syringe Gun is strongest and his explosions can damage himself.
Tactics: When facing an enemy Demoman, have your patient take point so they take the brunt of his grenades and Stickybombs. Stay away from your patient to minimize the splash damage you take and remain at medium range to reliably dodge the Demoman's projectiles. If the Demoman Sticky jumps to dive-bomb you, take cover as your patient fights him off, breaking your healing connection if necessary. If you must face a Demoman yourself, move into close range, where he can damage himself and will find aiming difficult. Duo to the Demoman's weakness against a Scout, you should obviously ensure the well being of friendly Scouts to put the enemy Demo in danger. Useful weapons:
|
Medic |
vs. | 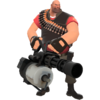 Heavy |
Relative merits: Team up with an ally who has the firepower to wear the Heavy down as you heal off any residual damage. Without backup, your Syringe Gun does not deal enough damage without getting close, which is a terrible idea against the Heavy's Minigun.
Tactics: Encourage your Medic buddy to use cover and tactics properly, and avoid following teammates into a position that exposes you. If your Medic buddy is killed, flee behind cover unless you are certain you can finish the Heavy off. On close-ranged maps, Demomen and Scouts are Heavies worst nightmare. On a bit more spaced maps, Snipers and Spies also pose a significant threat to him. Assess the situation as a Medic and decide who of these four would be better at handling a Heavy at the momement. Then prioritize your healing toward them. Useful weapons:
|
Medic |
vs. | 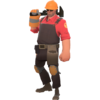 Engineer |
Relative merits: You and a patient can wear down an Engineer and his Sentry Gun by forcing him to retreat or spend all his metal on repairs. The Engineer's Shotgun gives him a slight advantage away from his Sentry Gun and your teammates, but that rarely happens.
Tactics: Heal a teammate as they duck in and out of cover to safely destroy a Sentry Gun. You should avoid being within range of the Sentry Gun yourself, as the Syringe Gun would take a few seconds of concentrated fire that would attract enemy attention. Your standard ÜberCharge is one of the best tools for taking out Sentry Gun nests and is the reason you are an important indirect counter to the Engineer. If your team is having trouble getting past a particular Sentry Gun, deploy your ÜberCharge on an offensive class so that they can take it out. During the ÜberCharge, stand in front of the Sentry Gun to draw its fire and knock back so your patient can close the distance and deal more damage. Demomen and Soldiers are your best bet when it comes to dealing with enemy Sentries. So make sure to help them out and constantly Über them for maximum Sentry-busting potential. Useful weapons:
|
Medic |
vs. | Medic |
Relative merits: Most likely, both you and the enemy Medic will have your own Medic buddies.
Tactics: The battle between you and then enemy Medic won't be about fighting one another. It will come down to who can more efficiently help out each others team and who can execute a better ÜberCharge. Make sure to stay focused on helping your team and building Über instead of chasing cheap kills. Its also important to know the enemy Meidic's Übercharge percentage, as that information can help you decide whether is it good to play it safely or aggressively. You can know this by using the Über counting technique explained in the Community Medic's strategy section about Übercharge. Useful weapons:
|
Medic |
vs. | 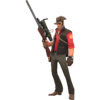 Sniper |
Relative merits: You are one of the highest priority targets for any Sniper, who can kill you with a single headshot or a fully charged bodyshot. Even if your Medic buddy falls, you can outduel the Sniper at close range.
Tactics: Move erratically and avoid entering open areas that give the Sniper a clear view of you. Ask your patient to lay down suppressive fire at the Sniper’s location to prevent him from getting a clear shot. Don’t be afraid to ditch your teammates and find cover if you know you’re being targeted. |
Medic |
vs. | 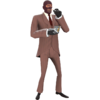 Spy |
Relative merits: Your ability to heal and deploy ÜberCharges makes you a prime target for any Spy, especially while you are healing an assault class such as a Heavy or Soldier. In a one-on-one fight, you have the advantage, as your weapons outdamage his at any range.
Tactics: Your Medi Gun works even if you’re not facing your healing target, so check behind yourself often for anything suspicious. If you are sure a “teammate” is a Spy, kill him yourself or alert your allies. Be wary of chasing an enemy Spy yourself, as your teammates still need healing. Keep in mind that an enemy Spy may attempt to trick you into healing him. Useful weapons:
|
See also
|