Difference between revisions of "Scream Fortress 2014/da"
m (→Baner) |
ShadowMan44 (talk | contribs) m |
||
| (7 intermediate revisions by 4 users not shown) | |||
| Line 1: | Line 1: | ||
| + | {{update trans|[[Scream_Fortress_2014#Unused content|Unused content, Trivia, Gallery]].}} | ||
| + | |||
| + | {{DISPLAYTITLE:Scream Fortress 2014}} | ||
[[File:Sixth Annual Scream Fortress Special.jpg|right|365px|link=http://www.teamfortress.com/screamfortress6/]] | [[File:Sixth Annual Scream Fortress Special.jpg|right|365px|link=http://www.teamfortress.com/screamfortress6/]] | ||
| Line 11: | Line 14: | ||
== Tillæg == | == Tillæg == | ||
=== Våben === | === Våben === | ||
| + | {{main|Weapons/da|l1=Våben}} | ||
{| class="wikitable collapsible" cellpadding="3" style="text-align:center;" | {| class="wikitable collapsible" cellpadding="3" style="text-align:center;" | ||
| − | | width=" | + | | width="80px" style="background:#6A5587;" | '''{{class link|All Classes|br=yes|color=white}}''' |
| − | | | + | | style="background:#AD9DC3;" | {{item icon|Necro Smasher|75px}} |
| − | | style="background: #F1ECF7;"| ''' | + | | style="background:#F1ECF7;" | '''{{item link|Necro Smasher}}'''<sup>†</sup> |
| + | |- | ||
| + | | height="30px" style="background:#6A5587;" | <font color="white">'''{{common string|Notes}}'''</font> | ||
| + | | colspan="2" | <sup>†</sup>Alle klasser bortset fra Spy. | ||
|} | |} | ||
| − | |||
| − | === | + | === Sæt === |
| − | {| class="wikitable collapsible" cellpadding=" | + | {{main|Halloween Costumes/da|l1=Halloween-kostumer}} |
| − | | width=" | + | {| class="wikitable collapsible" cellpadding="2" style="text-align:center;" |
| − | | | + | | width="80px" style="background:#6A5587;" rowspan="6" | '''{{class link|Scout|br=yes|color=white}}''' |
| − | | style="background: #F1ECF7;"| ''' | + | | style="background:#E8E2F0;" rowspan="3" |'''{{item link|Deep-Fried Dummy}}'''<br/> |
| + | | style="background:#AD9DC3;" | {{icon item|Nugget Noggin|75px}} | ||
| + | | style="background:#F1ECF7;" | '''{{item link|Nugget Noggin}}''' | ||
|- | |- | ||
| − | | | + | | style="background:#AD9DC3;" | {{icon item|Fowl Fists|75px}} |
| − | | style="background: #F1ECF7;"| ''' | + | | style="background:#F1ECF7;" | '''{{item link|Fowl Fists}}''' |
|- | |- | ||
| − | | | + | | style="background:#AD9DC3;" | {{icon item|Talon Trotters|75px}} |
| − | | style="background: #F1ECF7;"| ''' | + | | style="background:#F1ECF7;" | '''{{item link|Talon Trotters}}''' |
|- | |- | ||
| − | | | + | | style="background:#E8E2F0;" rowspan="3" |'''{{item link|Rooftop Rebel}}'''<br/> |
| − | | style="background: #F1ECF7;"| ''' | + | | style="background:#AD9DC3;" | {{icon item|Head Hunter|75px}} |
| + | | style="background:#F1ECF7;" | '''{{item link|Head Hunter}}''' | ||
|- | |- | ||
| − | | | + | | style="background:#AD9DC3;" | {{icon item|Claws And Infect|75px}} |
| − | | style="background: #F1ECF7;"| ''' | + | | style="background:#F1ECF7;" | '''{{item link|Claws And Infect}}''' |
|- | |- | ||
| − | | | + | | style="background:#AD9DC3;" | {{icon item|Crazy Legs|75px}} |
| − | | style="background: #F1ECF7;"| ''' | + | | style="background:#F1ECF7;" | '''{{item link|Crazy Legs}}''' |
|- | |- | ||
| − | | | + | | style="background:#6A5587;" rowspan="3" | '''{{class link|Soldier|br=yes|color=white}}''' |
| − | | | + | | style="background:#E8E2F0;" rowspan="3" |'''{{item link|Sgt. Helsing}}'''<br/> |
| − | | style="background: #F1ECF7;"| ''' | + | | style="background:#AD9DC3;" | {{icon item|Hellhunter's Headpiece|75px}} |
| + | | style="background:#F1ECF7;" | '''{{item link|Hellhunter's Headpiece}}''' | ||
|- | |- | ||
| − | | | + | | style="background:#AD9DC3;" | {{icon item|Supernatural Stalker|75px}} |
| − | | style="background: #F1ECF7;"| ''' | + | | style="background:#F1ECF7;" | '''{{item link|Supernatural Stalker}}''' |
|- | |- | ||
| − | | | + | | style="background:#AD9DC3;" | {{icon item|Ghoul Gibbin' Gear|75px}} |
| − | | style="background: #F1ECF7;"| ''' | + | | style="background:#F1ECF7;" | '''{{item link|Ghoul Gibbin' Gear}}''' |
|- | |- | ||
| − | | | + | | style="background:#6A5587;" rowspan="2" | '''{{class link|Pyro|br=yes|color=white}}''' |
| − | | style="background: #F1ECF7;"| ''' | + | | style="background:#E8E2F0;" rowspan="2" | '''{{item link|Automated Abnormality}}'''<br/> |
| + | | style="background:#AD9DC3;" | {{icon item|Arsonist Apparatus|75px}} | ||
| + | | style="background:#F1ECF7;" | '''{{item link|Arsonist Apparatus}}''' | ||
|- | |- | ||
| − | | | + | | style="background:#AD9DC3;" | {{icon item|Moccasin Machinery|75px}} |
| − | + | | style="background:#F1ECF7;" | '''{{item link|Moccasin Machinery}}''' | |
| − | | style="background: #F1ECF7;"| ''' | ||
|- | |- | ||
| − | | | + | | style="background:#6A5587;" rowspan="2" | '''{{class link|Demoman|br=yes|color=white}}''' |
| − | | style="background: #F1ECF7;"| ''' | + | | style="background:#E8E2F0;" rowspan="2" | '''{{item link|Forgotten King}}'''<br/> |
| + | | style="background:#AD9DC3;" | {{icon item|Forgotten King's Restless Head|75px}} | ||
| + | | style="background:#F1ECF7;" | '''{{item link|Forgotten King's Restless Head}}''' | ||
|- | |- | ||
| − | | | + | | style="background:#AD9DC3;" | {{icon item|Forgotten King's Pauldrons|75px}} |
| − | | style="background: #F1ECF7;"| ''' | + | | style="background:#F1ECF7;" | '''{{item link|Forgotten King's Pauldrons}}''' |
|- | |- | ||
| − | | | + | | style="background:#6A5587;" rowspan="3" | '''{{class link|Heavy|br=yes|color=white}}''' |
| − | | style="background: #F1ECF7;"| ''' | + | | style="background:#E8E2F0;" rowspan="3" | '''{{item link|Minsk Beast}}'''<br/> |
| + | | style="background:#AD9DC3;" | {{icon item|Minsk Beef|75px}} | ||
| + | | style="background:#F1ECF7;" | '''{{item link|Minsk Beef}}''' | ||
|- | |- | ||
| − | | | + | | style="background:#AD9DC3;" | {{icon item|Bull Locks|75px}} |
| − | | style="background: #F1ECF7;"| ''' | + | | style="background:#F1ECF7;" | '''{{item link|Bull Locks}}''' |
|- | |- | ||
| − | | | + | | style="background:#AD9DC3;" | {{icon item|Bone-Cut Belt|75px}} |
| − | | style="background: #F1ECF7;"| ''' | + | | style="background:#F1ECF7;" | '''{{item link|Bone-Cut Belt}}''' |
|- | |- | ||
| − | | | + | | style="background:#6A5587;" rowspan="7" | '''{{class link|Medic|br=yes|color=white}}''' |
| − | | | + | | style="background:#E8E2F0;" rowspan="3" | '''{{item link|Canis Ex Machina}}'''<br/> |
| − | | style="background: #F1ECF7;"| ''' | + | | style="background:#AD9DC3;" | {{icon item|Hundkopf|75px}} |
| + | | style="background:#F1ECF7;" | '''{{item link|Hundkopf}}''' | ||
|- | |- | ||
| − | | | + | | style="background:#AD9DC3;" | {{icon item|Kriegsmaschine-9000|75px}} |
| − | | style="background: #F1ECF7;"| ''' | + | | style="background:#F1ECF7;" | '''{{item link|Kriegsmaschine-9000}}''' |
|- | |- | ||
| − | | | + | | style="background:#AD9DC3;" | {{icon item|Herzensbrecher|75px}} |
| − | | style="background: #F1ECF7;"| ''' | + | | style="background:#F1ECF7;" | '''{{item link|Herzensbrecher}}''' |
|- | |- | ||
| − | | | + | | style="background:#E8E2F0;" rowspan="2" | '''{{item link|Dr. Acula}}'''<br/> |
| − | | style="background: #F1ECF7;"| ''' | + | | style="background:#AD9DC3;" | {{icon item|Vampire Makeover|75px}} |
| + | | style="background:#F1ECF7;" | '''{{item link|Vampire Makeover}}''' | ||
|- | |- | ||
| − | | | + | | style="background:#AD9DC3;" | {{icon item|Vampiric Vesture|75px}} |
| − | + | | style="background:#F1ECF7;" | '''{{item link|Vampiric Vesture}}''' | |
| − | | style="background: #F1ECF7;"| ''' | ||
|- | |- | ||
| − | | | + | | style="background:#E8E2F0;" rowspan="2" | '''{{item link|The Templar}}'''<br/> |
| − | | style="background: #F1ECF7;"| ''' | + | | style="background:#AD9DC3;" | {{icon item|Templar's Spirit|75px}} |
| + | | style="background:#F1ECF7;" | '''{{item link|Templar's Spirit}}''' | ||
|- | |- | ||
| − | | | + | | style="background:#AD9DC3;" | {{icon item|Wings of Purity|75px}} |
| − | | style="background: #F1ECF7;"| ''' | + | | style="background:#F1ECF7;" | '''{{item link|Wings of Purity}}''' |
|- | |- | ||
| − | | | + | | style="background:#6A5587;" rowspan="5" | '''{{class link|Sniper|br=yes|color=white}}''' |
| − | | style="background: #F1ECF7;"| ''' | + | | style="background:#E8E2F0;" rowspan="3" | '''{{item link|Manngaroo}}'''<br/> |
| + | | style="background:#AD9DC3;" | {{icon item|Marsupial Muzzle|75px}} | ||
| + | | style="background:#F1ECF7;" | '''{{item link|Marsupial Muzzle}}''' | ||
|- | |- | ||
| − | | | + | | style="background:#AD9DC3;" | {{icon item|Roo Rippers|75px}} |
| − | + | | style="background:#F1ECF7;" | '''{{item link|Roo Rippers}}''' | |
| − | | style="background: #F1ECF7;"| ''' | ||
|- | |- | ||
| − | | | + | | style="background:#AD9DC3;" | {{icon item|Kanga Kickers|75px}} |
| − | | style="background: #F1ECF7;"| ''' | + | | style="background:#F1ECF7;" | '''{{item link|Kanga Kickers}}''' |
|- | |- | ||
| − | | | + | | style="background:#E8E2F0;" rowspan="2" | '''{{item link|Reptiloid}}'''<br/> |
| − | | style="background: #F1ECF7;"| ''' | + | | style="background:#AD9DC3;" | {{icon item|Cranial Conspiracy|75px}} |
| + | | style="background:#F1ECF7;" | '''{{item link|Cranial Conspiracy}}''' | ||
|- | |- | ||
| − | | | + | | style="background:#AD9DC3;" | {{icon item|Scaly Scrapers|75px}} |
| − | | style="background: #F1ECF7;"| ''' | + | | style="background:#F1ECF7;" | '''{{item link|Scaly Scrapers}}''' |
| − | | | + | |} |
| − | + | ||
| − | | style=" | + | === Kosmetik genstande === |
| − | + | {{main|Cosmetic items/da|l1=Kosmetik genstande}} | |
| − | | width=" | + | {| class="wikitable collapsible" cellpadding="3" style="text-align:center;" |
| − | | | + | | width="80px" style="background:#6A5587;" rowspan="1" | '''{{class link|Soldier|br=yes|color=white}}''' |
| − | | style="background: #F1ECF7;"| ''' | + | | style="background:#AD9DC3;" | {{item icon|Battle Bird|75px}} |
| + | | style="background:#F1ECF7;" | '''{{item link|Battle Bird}}''' | ||
|- | |- | ||
| − | | | + | | style="background:#6A5587;" rowspan="4" | '''{{class link|Pyro|br=yes|color=white}}''' |
| − | | style="background: #F1ECF7;"| ''' | + | | style="background:#AD9DC3;" | {{item icon|Creature's Grin|75px}} |
| + | | style="background:#F1ECF7;" | '''{{item link|Creature's Grin}}''' | ||
|- | |- | ||
| − | | | + | | style="background:#AD9DC3;" | {{item icon|Lollichop Licker|75px}} |
| − | | style="background: #F1ECF7;"| ''' | + | | style="background:#F1ECF7;" | '''{{item link|Lollichop Licker}}''' |
|- | |- | ||
| − | | | + | | style="background:#AD9DC3;" | {{item icon|Mr. Juice|75px}} |
| − | | style="background: #F1ECF7;"| ''' | + | | style="background:#F1ECF7;" | '''{{item link|Mr. Juice}}''' |
|- | |- | ||
| − | | | + | | style="background:#AD9DC3;" | {{item icon|Vampyro|75px}} |
| − | | style="background: #F1ECF7;"| ''' | + | | style="background:#F1ECF7;" | '''{{item link|Vampyro}}''' |
|- | |- | ||
| − | | | + | | style="background:#6A5587;" rowspan="2" | '''{{class link|Demoman|br=yes|color=white}}''' |
| − | | style="background: #F1ECF7;"| ''' | + | | style="background:#AD9DC3;" | {{item icon|Eyeborg|75px}} |
| + | | style="background:#F1ECF7;" | '''{{item link|Eyeborg}}''' | ||
|- | |- | ||
| − | | | + | | style="background:#AD9DC3;" | {{item icon|Mannhattan Project|75px}} |
| − | | style="background: #F1ECF7;"| ''' | + | | style="background:#F1ECF7;" | '''{{item link|Mannhattan Project}}''' |
|- | |- | ||
| − | | | + | | style="background:#6A5587;" rowspan="1" | '''{{class link|Heavy|br=yes|color=white}}''' |
| − | | | + | | style="background:#AD9DC3;" | {{item icon|Immobile Suit|75px}} |
| − | | style="background: #F1ECF7;"| ''' | + | | style="background:#F1ECF7;" | '''{{item link|Immobile Suit}}''' |
|- | |- | ||
| − | | | + | | style="background:#6A5587;" rowspan="5" | '''{{class link|Engineer|br=yes|color=white}}''' |
| − | | style="background: #F1ECF7;"| ''' | + | | style="background:#AD9DC3;" | {{item icon|Beep Man|75px}} |
| + | | style="background:#F1ECF7;" | '''{{item link|Beep Man}}''' | ||
|- | |- | ||
| − | | | + | | style="background:#AD9DC3;" | {{item icon|Garden Bristles|75px}} |
| − | | style="background: #F1ECF7;"| ''' | + | | style="background:#F1ECF7;" | '''{{item link|Garden Bristles}}''' |
|- | |- | ||
| − | | | + | | style="background:#AD9DC3;" | {{item icon|Iron Fist|75px}} |
| − | | style="background: #F1ECF7;"| ''' | + | | style="background:#F1ECF7;" | '''{{item link|Iron Fist}}''' |
|- | |- | ||
| − | | | + | | style="background:#AD9DC3;" | {{item icon|Soul of 'Spensers Past|75px}} |
| − | | style="background: #F1ECF7;"| ''' | + | | style="background:#F1ECF7;" | '''{{item link|Soul of 'Spensers Past}}''' |
|- | |- | ||
| − | | | + | | style="background:#AD9DC3;" | {{item icon|Tiny Texan|75px}} |
| − | | style="background: #F1ECF7;"| ''' | + | | style="background:#F1ECF7;" | '''{{item link|Tiny Texan}}''' |
|- | |- | ||
| − | | | + | | style="background:#6A5587;" rowspan="2" | '''{{class link|Sniper|br=yes|color=white}}''' |
| − | | style="background: #F1ECF7;"| ''' | + | | style="background:#AD9DC3;" | {{item icon|Marsupial Man|75px}} |
| + | | style="background:#F1ECF7;" | '''{{item link|Marsupial Man}}''' | ||
|- | |- | ||
| − | | | + | | style="background:#AD9DC3;" | {{item icon|Mr. Mundee's Wild Ride|75px}} |
| − | + | | style="background:#F1ECF7;" | '''{{item link|Mr. Mundee's Wild Ride}}''' | |
| − | | style="background: #F1ECF7;"| ''' | ||
|- | |- | ||
| − | | | + | | style="background:#6A5587;" rowspan="4" | '''{{class link|Spy|br=yes|color=white}}''' |
| − | | style="background: #F1ECF7;"| ''' | + | | style="background:#AD9DC3;" | {{item icon|Facepeeler|75px}} |
| + | | style="background:#F1ECF7;" | '''{{item link|Facepeeler}}''' | ||
|- | |- | ||
| − | | | + | | style="background:#AD9DC3;" | {{item icon|Nightmare Hunter|75px}} |
| − | | style="background: #F1ECF7;"| ''' | + | | style="background:#F1ECF7;" | '''{{item link|Nightmare Hunter}}''' |
|- | |- | ||
| − | | | + | | style="background:#AD9DC3;" | {{item icon|Rogue's Rabbit|75px}} |
| − | | style="background: #F1ECF7;"| ''' | + | | style="background:#F1ECF7;" | '''{{item link|Rogue's Rabbit}}''' |
|- | |- | ||
| − | | | + | | style="background:#AD9DC3;" | {{item icon|Shadowman's Shade|75px}} |
| − | + | | style="background:#F1ECF7;" | '''{{item link|Shadowman's Shade}}''' | |
| − | | style="background: #F1ECF7;"| ''' | ||
|- | |- | ||
| − | | | + | | style="background:#6A5587;" rowspan="3" | '''{{class link|All Classes|br=yes|color=white}}''' |
| − | | style="background: #F1ECF7;"| ''' | + | | style="background:#AD9DC3;" | {{item icon|Ghost of Spies Checked Past|75px}} |
| + | | style="background:#F1ECF7;" | '''{{item link|Ghost of Spies Checked Past}}''' | ||
|- | |- | ||
| − | | | + | | style="background:#AD9DC3;" | {{item icon|Hooded Haunter|75px}} |
| − | | style="background: #F1ECF7;"| ''' | + | | style="background:#F1ECF7;" | '''{{item link|Hooded Haunter}}''' |
|- | |- | ||
| + | | style="background:#AD9DC3;" | {{item icon|Li'l Dutchman|75px}} | ||
| + | | style="background:#F1ECF7;" | '''{{item link|Li'l Dutchman}}''' | ||
|} | |} | ||
| − | === | + | === Handlingsgenstande === |
| − | + | {{main|Action items/da|l1=Handlingsgenstande}} | |
| − | + | {| class="wikitable collapsible" cellpadding="3" style="text-align:center;" | |
| − | + | | width="80px" style="background:#AD9DC3;" | {{item icon|Halloween Gift Cauldron|75px}} | |
| − | + | | style="background:#F1ECF7;" | '''{{item link|Halloween Gift Cauldron}}''' | |
| − | | | ||
| − | |||
| − | |||
| − | |||
| − | |||
| − | |||
| − | |||
| − | |||
| − | |||
| − | |||
| − | |||
| − | |||
| − | |||
| − | |||
| − | |||
| − | |||
| − | |||
| − | |||
| − | |||
| − | |||
| − | |||
| − | |||
| − | |||
| − | |||
| − | |||
| − | |||
| − | |||
| − | |||
| − | |||
| − | | width=" | ||
| − | |||
| − | |||
| − | |||
| − | |||
| − | |||
| − | |||
| − | |||
| − | |||
| − | |||
| − | |||
| − | | style="background:#F1ECF7;" | ''' | ||
| − | |||
| − | |||
| − | |||
| − | |||
| − | |||
| − | |||
| − | |||
| − | |||
| − | |||
| − | |||
| − | |||
| − | |||
| − | |||
| − | |||
| − | |||
| − | |||
| − | |||
| − | |||
| − | |||
| − | |||
| − | |||
| − | |||
| − | |||
| − | |||
| − | |||
| − | |||
| − | |||
| − | |||
| − | |||
| − | |||
| − | |||
| − | |||
| − | |||
| − | |||
| − | |||
| − | |||
| − | |||
| − | |||
| − | |||
| − | |||
| − | |||
| − | |||
| − | |||
| − | |||
| − | |||
| − | |||
| − | |||
| − | |||
| − | |||
| − | |||
| − | |||
| − | |||
| − | |||
| − | |||
| − | |||
| − | |||
| − | |||
|- | |- | ||
| + | | style="background:#AD9DC3;" | {{item icon|Kritz or Treat Canteen|75px}} | ||
| + | | style="background:#F1ECF7;" | '''{{item link|Kritz or Treat Canteen}}''' | ||
|} | |} | ||
| − | === | + | === Værktøjer === |
| + | {{main|Tools/da|l1=Værktøjer}} | ||
{| class="wikitable collapsible" cellpadding="3" style="text-align:center;" | {| class="wikitable collapsible" cellpadding="3" style="text-align:center;" | ||
| − | | width=" | + | | width="80px" style="background:#AD9DC3;" | {{item icon|Unlocked Creepy Scout Crate|75px}} |
| − | + | | style="background:#F1ECF7;" | '''{{item link|Unlocked Creepy Scout Crate}}''' | |
| − | | style="background: #F1ECF7;"| ''' | ||
|- | |- | ||
| − | | | + | | style="background:#AD9DC3;" | {{item icon|Unlocked Creepy Soldier Crate|75px}} |
| − | + | | style="background:#F1ECF7;" | '''{{item link|Unlocked Creepy Soldier Crate}}''' | |
| − | | style="background: #F1ECF7;"| ''' | ||
|- | |- | ||
| − | | | + | | style="background:#AD9DC3;" | {{item icon|Unlocked Creepy Pyro Crate|75px}} |
| − | + | | style="background:#F1ECF7;" | '''{{item link|Unlocked Creepy Pyro Crate}}''' | |
| − | | style="background: #F1ECF7;"| ''' | ||
|- | |- | ||
| − | | | + | | style="background:#AD9DC3;" | {{item icon|Unlocked Creepy Demo Crate|75px}} |
| − | + | | style="background:#F1ECF7;" | '''{{item link|Unlocked Creepy Demo Crate}}''' | |
| − | | style="background: #F1ECF7;"| ''' | ||
|- | |- | ||
| − | | | + | | style="background:#AD9DC3;" | {{item icon|Unlocked Creepy Heavy Crate|75px}} |
| − | + | | style="background:#F1ECF7;" | '''{{item link|Unlocked Creepy Heavy Crate}}''' | |
| − | | style="background: #F1ECF7;"| ''' | ||
|- | |- | ||
| − | | | + | | style="background:#AD9DC3;" | {{item icon|Unlocked Creepy Engineer Crate|75px}} |
| − | + | | style="background:#F1ECF7;" | '''{{item link|Unlocked Creepy Engineer Crate}}''' | |
| − | | style="background: #F1ECF7;"| ''' | ||
|- | |- | ||
| − | | | + | | style="background:#AD9DC3;" | {{item icon|Unlocked Creepy Medic Crate|75px}} |
| − | + | | style="background:#F1ECF7;" | '''{{item link|Unlocked Creepy Medic Crate}}''' | |
| − | | style="background: #F1ECF7;"| ''' | ||
|- | |- | ||
| − | | | + | | style="background:#AD9DC3;" | {{item icon|Unlocked Creepy Sniper Crate|75px}} |
| − | + | | style="background:#F1ECF7;" | '''{{item link|Unlocked Creepy Sniper Crate}}''' | |
| − | | style="background: #F1ECF7;"| ''' | ||
| − | |||
| − | |||
| − | |||
| − | |||
| − | |||
| − | |||
| − | |||
| − | |||
| − | |||
| − | |||
| − | |||
|- | |- | ||
| + | | style="background:#AD9DC3;" | {{item icon|Unlocked Creepy Spy Crate|75px}} | ||
| + | | style="background:#F1ECF7;" | '''{{item link|Unlocked Creepy Spy Crate}}''' | ||
|} | |} | ||
=== Baner === | === Baner === | ||
| − | {{main|List of maps}} | + | {{main|List of maps/da|l1=Liste over baner}} |
{| class="wikitable" cellpadding="2" style="text-align:center;" | {| class="wikitable" cellpadding="2" style="text-align:center;" | ||
| − | + | ! style="background: #6A5587;" class="header" | <span style="color: white;"> Navn | |
| − | ! style="background: #6A5587;" class="header" | | + | ! style="background: #6A5587;" class="header" | <span style="color: white;"> Billede |
| − | ! style="background: #6A5587;" class="header" | | + | ! style="background: #6A5587;" class="header" | <span style="color: white;"> Spiltilstand |
| − | + | ! style="background: #6A5587;" class="header" | <span style="color: white;"> Filnavn | |
| − | ! style="background: #6A5587;" class="header" | | ||
| − | |||
| − | |||
| − | |||
| − | |||
| − | |||
|- | |- | ||
| + | | style="background:#AD9DC3;" | '''[[Carnival of Carnage/da|<span style="color: white;">Carnival of Carnage]]''' | ||
| + | | style="background:#F1ECF7;" | [[File:Carnival of Carnage.jpg|160px|link=Carnival of Carnage/da]] | ||
| + | | style="background:#F1ECF7;" | '''[[Special Delivery (game mode)/da|Speciallevering]]'''<br>[[File:Doomsday_event_briefcase.png|50px|link=Special Delivery (game mode)/da]] | ||
| + | | {{code|sd_doomsday_event}} | ||
|} | |} | ||
| − | === | + | === Usædvanlige effekter === |
| + | {{main|Unusual effects/da|l1=Usædvanlige effekter}} | ||
| + | <gallery perrow="4"> | ||
| + | File:Unusual_Amaranthine.png| {{item name|Amaranthine}} | ||
| + | File:Unusual_Bonzo_The_All-Gnawing.png| {{item name|Bonzo The All-Gnawing}} | ||
| + | File:Unusual_Ghastly_Ghosts_Jr.png| {{item name|Ghastly Ghosts Jr.}} | ||
| + | File:Unusual_Haunted_Phantasm_Jr.png| {{item name|Haunted Phantasm Jr.}} | ||
| + | File:Unusual_Stare_From_Beyond.png| {{item name|Stare From Beyond}} | ||
| + | File:Unusual_The_Ooze.png| {{item name|The Ooze}} | ||
| + | <!-- Hån --> | ||
| + | File:Unusual_Ghastly_Ghosts.png| {{item name|Ghastly Ghosts}} | ||
| + | File:Unusual_Haunted_Phantasm.png| {{item name|Haunted Phantasm}} | ||
| + | </gallery> | ||
| + | |||
| + | == Præstationer == | ||
| + | === {{Achiev type link|merasmachievements}} === | ||
{{Halloween 2014 achievement list}} | {{Halloween 2014 achievement list}} | ||
| Line 358: | Line 285: | ||
== Ydre links == | == Ydre links == | ||
| − | *[http://www.teamfortress.com/screamfortress6/ Scream Fortress 2014] | + | *[http://www.teamfortress.com/screamfortress6/ Scream Fortress 2014] {{lang icon|en}} |
{{Scream Fortress 2014 Nav}} | {{Scream Fortress 2014 Nav}} | ||
| + | {{Scream Fortress Events Nav}} | ||
{{Major updates nav}} | {{Major updates nav}} | ||
Latest revision as of 03:43, 11 November 2023
| Denne oversættelse trænger til en opdatering. Du kan hjælpe med forbedre artiklen ved at redigere den med indhold fra Scream Fortress 2014 (view source). Se også Help:Language translation (Engelsk). De specifikke instruktioner er; Unused content, Trivia, Gallery. |
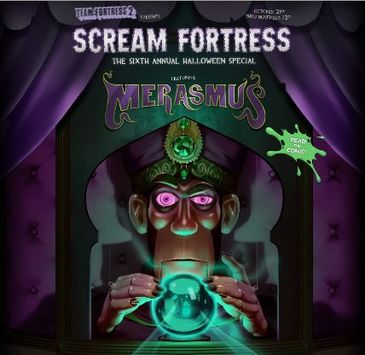
Scream Fortress 2014 var en betydningsfuld opdatering som indeholdte et karneval styret af Merasmus. Den introducerede radio biler som em runde slutnings aktivitet, med tre forskellige baner/udgaver. Det er den sjette Scream Fortress Opdatering. Alle spillere som logger ind på Team Fortress 2 efter at have downloaded opdateringen, vil blive tildelt Halloween Gift Cauldron, som indeholder tre tilfældige Scream Fortress 2014 genstande, én af disse genstande vil altid være både i Sær og Hjemsøgt kvalitet.
Opdateringen bragte 50 nye beklædnings genstande, 6 præstationer, Halloween begivenheds banen Carnival of Carnage samt med Kritz or Treat Canteen og Necro Smasher: et alle klasses (bortset fra Spy) nærkampsvåben reskin.
Opdateringen indviede også de Sære Hjemsøgte kvalitets genstande. Alle Sære Hjemsøgte kvalitets genstande inkludere 2 sære dele -- "Carnival Games Won" og "Carnival Underworld Kills" (Spillere skubbet af banen). Normale drab kan kun tælles i banen Carnival of Carnage.
Indholdsfortegnelse
Tillæg
Våben
| Nekromantisk Nakker† | ||
| Noter | †Alle klasser bortset fra Spy. | |
Sæt
Kosmetik genstande
Handlingsgenstande
| Halloween Gift Cauldron | |
| Kritz Eller Ballade-feltflasken |
Værktøjer
Baner
| Navn | Billede | Spiltilstand | Filnavn |
|---|---|---|---|
| Carnival of Carnage | 
|
Speciallevering
|
sd_doomsday_event
|
Usædvanlige effekter

Evig

Bonzo Den Altgnavende

Spøgelsesagtige Spøgelser Jr.

Hjemsøgt Spøgelse Jr.

Hinsides Stirren
Slammet
Spøgelsesagtige Spøgelser
Hjemsøgt Spøgelse


Præstationer
 Merasmachievements
|
|


Bagateller
- Agathodaimon symboler var brugt på opdaterings siden til at skrive fortryllelsernes navne. Disse symboler var også brugt i de forrige Halloween opdatering i 2012 og 2013.
Ydre links
- Scream Fortress 2014 (Engelsk)
| |||||
| |||||||||||||||||||||||||||||||||||||||||||||||||||||||||||||||||||||||||||||||||||||||||||||||