|
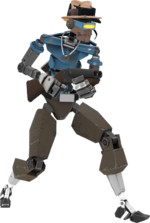
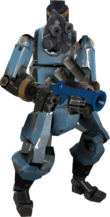
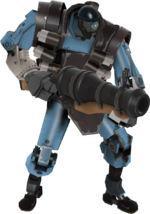
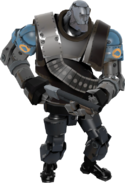
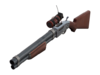
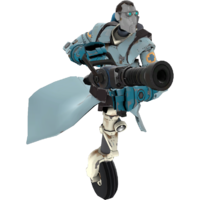
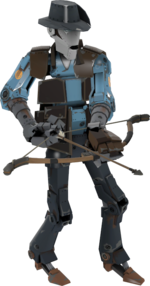
 Major League Scout Major League Scout
Health: 6,000
Speed: 320 HU/s
 Captures control points twice as fast compared to other giants Captures control points twice as fast compared to other giants
Teammates respawn much faster compared to other giants
Mobile, but weak, the Major League Scout is ideal at getting the job done quickly. It can only reliably kill one target at a time, but is perfectly capable of stunning or knocking away multiple enemies at once in order to clear a path. The quick move speed combined with the ability to triple jump allows the Major League Scout to take routes other giants could only dream of. Combined with the double capture rate, this causes the Major League Scout to pose a serious threat to the human team should it slip by their line of defense.
|

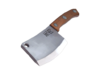
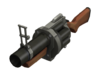
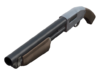
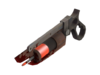
Force-A-Nature
|
+100% bullets per shot
+30% more accurate
+900% knockback on target
+2 clip size (4 shots)
 -20% damage penalty -20% damage penalty
|
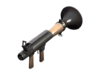
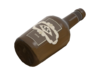
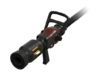
Flying Guillotine
|
+65% weapon switch speed
+90% faster recharge rate
|
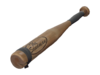
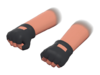
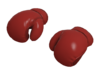
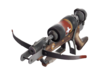
Sandman
|
+90% ball recharge rate
+30% melee attack speed
+6 maximum balls carried
|

|
 Giant Soldier Giant Soldier
Health: 10,000
Speed: 98 HU/s
Like a normal Soldier, this giant can manage just about any threat. However, it must take care to place its shots carefully, as there are no reload speed or clip size bonuses. Due to the lack of a Shotgun, airblast can be an effective means of defending your team against this giant. Although it's normally quite slow, it can also perform rocket jumps in PLR maps to traverse areas faster, or to make a quick escape.
|
Rocket Launcher
|
+85% damage bonus
+20% explosion radius
No random critical hits
|
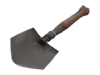
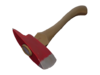
Shovel
|
|
|
|
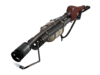
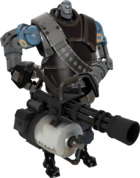
Giant 10-Shot Bazooka Soldier
Health: 10,000
Speed: 98 HU/s
What the Giant 10-Shot Bazooka Soldier lacks in quality, it makes up for in quantity. As the name implies, up to ten rockets can be quickly loaded and fired at a time, making for deadly close-to-mid range barrages. Alternatively, rockets can be rapidly fired individually, resulting in a steady stream of damage output. However, the Giant 10-Shot Bazooka Soldier is relatively slow, and the rockets are extremely inaccurate at longer ranges.
|
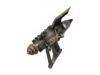
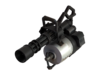
Beggar's Bazooka
|
+7 clip size
+80% reload speed
+80% firing speed
No overloading
+6 degrees in random projectile deviation
-45% damage penalty
No random critical hits
|
Shovel
|
|
|
|
Giant Mega Bison Soldier
Health: 10,000
Speed: 120 HU/s
|
Righteous Bison
|
On Kill: 1 second of 100% critical chance
+20% damage bonus
+290% damage vs buildings
+70% firing speed
+85% reload speed
|
Disciplinary Action
|
+65% weapon switch speed
+15% melee attack speed
|

|
 Giant Pyro Giant Pyro
Health: 10,000
Speed: 171 HU/s
Some giants just want to watch the world burn. Others, like the Giant Pyro, just want everyone to get the hell away from them. Should you feel the need to get close anyway, you'll either be either enjoying a nice & warm shower of fire, or you'll be punted halfway across the map. Keep your distance instead, and you'll be relatively safe, so long as you don't feed it projectiles to reflect.
|
Flame Thrower
|
Airblast destroys enemy stickybombs
Reflected projectiles become critical
+150% airblast push force
+40% airblast range
+40% damage bonus
+50% flame particle lifetime (flames travel further)
+25% flame particle size
|
Fire Axe
|
|
|
Giant Flare Pyro
Health: 10,000
Speed: 120 HU/s
You better get ready for some heat, because things (specifically you) are about to get a lot hotter up in here thanks to the Giant Flare Pyro. This giant, as one might expect, specializes in sending enemies scrambling for health due to its ability to hand out long-lasting critical afterburn like candy. With that in mind, it's particularly vulnerable against fireproof humans.
|

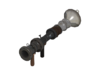
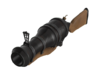
Scorch Shot
|
+75% reload speed
+100% afterburn length
+200% afterburn damage
No random critical hits
|
Third Degree
|
|

|
 Giant Rapid Fire Demoman Giant Rapid Fire Demoman
Health: 10,000
Speed: 105 HU/s
Need some pills? This one's got plenty of 'em. It dispenses tons of hard-hitting explosives, although it's unlikely every one will hit its target. Despite being one of the slowest giants, it's capable of performing an explosive jump in PLR maps.
|
Grenade Launcher
|
+75% firing speed
+70% reload speed
+1 clip size
No random critical hits
|
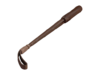
Bottle
|
|

|
Giant Demoknight
Health: 10,000
Speed: 140 HU/s
Hits hard, hits fast, but has no ranged weaponry. Try not to get too close, as this giant is king of close quarter combat, and every kill will make him more powerful. It has no real means of dealing with Sentry Guns however, which means it must rely on teammate support to clear Engineer nests.
|
Chargin' Targe
|
+25% charge recharge rate
+100% charge impact damage
Full turning control while charging
|
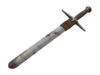
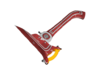
Eyelander
|
On Kill: 3 seconds of 100% critical chance
+200 health restored on kill
+140% damage bonus
+50% melee attack range
+20% melee attack speed
+0.5s increase in charge length
No head collection
|
|
Sir Nukesalot
Health: 10,000
Speed: 118 HU/s
Makes Michael Bay look like an explosive amateur. This one certainly lives up to its name, as it's capable of clearing large areas with a single shot. The large explosions leave a cloud of smoke, which can help teammates advance without being seen. However, it has very little means of direct combat, which makes Pyros, Scouts, and other close range attackers much more threatening.
|
Loose Cannon
|
Always deals critical hits
+600% damage bonus
+100% explosion radius
No fuse
-75% clip size
-47% projectile speed
-80% reload speed
-100% firing speed
|
Bottle
|
No random critical hits
|
|
 Giant Heavy Giant Heavy
Health: 10,000
Speed: 115 HU/s (revved down) 71.5 HU/s (revved up)
When it's time to bring in the big guns, this giant's got you covered. It's the slowest giant when attacking, but pumps out massive damage in a constant hail of bullets. Like normal Heavies, it's more vulnerable to Snipers and Spies due to the slow speed and the "focus down individual targets" style of attacking.
|
Minigun
|
+60% damage bonus
+30% faster move speed while deployed
No random critical hits
|
Fists
|
|
|
Giant Shotgun Heavy
Health: 10,000
Speed: 127 HU/s
Ready to get literally blown away? Like the Giant Demoknight, you won't want to get too close, as it has the ability to kill any target in a single hit with a well placed shot. Unlike the Giant Demoknight however, it has no real means of closing the gap without slowly huddling your way, making ranged attacks more effective against it. Be wary that if it gets a kill with its melee weapon, it's going to be raining crits for the next eight seconds.
|
Shotgun
|
+900% bullets per shot
+90% faster reload time
-130% firing speed
-50% damage penalty
No random critical hits
|
Killing Gloves of Boxing
|
On Kill: 8 seconds of 100% critical chance
+50% melee attack range
+20% melee attack speed
+65% faster weapon switch speed
|

|
 Giant Engineer Giant Engineer
Health: 6,000
Speed: 174 HU/s
Builds Giant Dispensers and Giant Mini-Sentries
Robot teammates respawn at the Teleporter Exit
This giant excels at enhancing its team's offense, although it only has basic means of defending itself, along with having a low health pool. It can build Giant Mini-Sentry Guns, which, while powerful, can be taken down quickly with focused fire. Its Giant Dispensers can be erected and upgraded quickly, which then dispenses ammo and health over a large area. Its Teleporter Exit becomes the team's respawn point, although both teams will be alerted of its presence. The Giant Engineer is particularly vulnerable against enemy Spies, since its buildings can still be sapped. Note that when this giant dies, all of its buildings are destroyed as well.
|
Frontier Justice
|
+30% faster firing speed
|

Pistol
|
|
Gunslinger
|
+50% melee attack speed
+200% faster construction rate
Teleporter build speed increased by 100%
Sentry build speed increased by 40%
-50% slower repair rate
|
Construction PDA
|
+550% max building health
+250% Sentry Gun damage bonus
+50% Sentry Gun range
+700% Dispenser range
+75 metal regenerated every 5 seconds on wearer
-45% slower Sentry Gun firing speed
|
Destruction PDA
|
Allows user to demolish sapped buildings
|
|
 Giant Kritzkrieg Medic Giant Kritzkrieg Medic
Health: 6,000
Speed: 185.6 HU/s
Nearby teammates recover health automatically
Nearby teammates receive the effects of the Ubercharge when deployed
Essentially a walking Kritz Dispenser, the Giant Kritzkrieg Medic becomes very deadly when surrounded by friendly combat classes. However, the relatively low health and lack of personal firepower makes it vulnerable the moment it doesn't have teammates nearby.
|
Crusader's Crossbow
|
+19 clip size
+90% faster reload speed
+1 degree in random projectile deviation
No random critical hits
|
Kritzkrieg
|
+300% Ubercharge rate
+50% max overheal (buffs teammates to 200% health)
|
Ubersaw
|
+60% melee attack speed
No random critical hits
|
|
 Giant Rapid Fire Huntsman Giant Rapid Fire Huntsman
Health: 10,000
Speed: 150 HU/s
A hybrid between a support and combat giant, the Giant Rapid-Fire Huntsman can prove to be quite versatile. The highly damaging, penetrating arrows will quickly put down most threats at mid-to-long distances, and are only limited by the player's prediction abilities. Equipped with up to five Jarates at once, the Giant Rapid Fire Huntsman is more than capable of quickly weakening groups of enemies for its team, but this also enables it to easily dispatch close range attackers when used in conjunction with the Bushwacka. Just be careful about tossing one at an enemy Pyro...
|
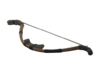
Huntsman
|
+70% reload speed
+100% damage bonus
Projectiles penetrate enemy players and buildings
+30% faster move speed while an arrow is drawn
-15% damage vs buildings
|
Jarate
|
+90% jar regeneration rate
+4 maximum jars carried
+65% faster weapon switch speed
|
Bushwacka
|
|

|
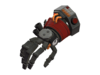
Super Spy
Health: 3,000
Speed: 300 HU/s (450 HU/s while cloaked)
Teammates respawn much faster compared to other giants
Can drop the bomb for teammates to carry
Immune to the effects of afterburn
 Normal sized Normal sized
|
Diamondback
|
+100% damage bonus
Projectiles penetrate enemy players
Fires tracer rounds
-20% firing speed
|
Red-Tape Recorder
|
Deals damage at stock Sapper rate
|
Your Eternal Reward
|
+50% faster melee attack speed
+20% damage bonus
+15% faster weapon switch speed
Does not disable the Disguise Kit
|
Invis Watch
|
Reduced decloak sound volume
Increases move speed and jump height while cloaked
+100% cloak duration
+25% faster decloak rate
|


