Difference between revisions of "Tough Break Update"
BrazilianNut (talk | contribs) m |
BrazilianNut (talk | contribs) m (→Additions) |
||
| Line 18: | Line 18: | ||
{{main|Cosmetic items}} | {{main|Cosmetic items}} | ||
{| class="wikitable collapsible" cellpadding=2 style="text-align:center;" | {| class="wikitable collapsible" cellpadding=2 style="text-align:center;" | ||
| + | | width="90px" style="background:#F2D9AD;" rowspan="2" | '''{{class link|Scout|br=yes}}''' | ||
| + | | style="background:#8847FF;" | {{Icon item|Bonk Batter's Backup|75px}} | ||
| + | | style="background:#FFFCF7;" | '''{{item link|Bonk Batter's Backup}}''' | ||
|- | |- | ||
| − | | style="background: # | + | | style="background:#4B69FF;" | {{Icon item|Hot Heels|75px}} |
| − | + | | style="background:#FFFCF7;" | '''{{item link|Hot Heels}}''' | |
| − | | style="background: #FFFCF7 "| '''{{item link| | ||
|- | |- | ||
| − | | | + | | style="background:#F2D9AD;" rowspan="1" | '''{{class link|Soldier|br=yes}}''' |
| − | | style="background: #FFFCF7 "| '''{{item link| | + | | style="background:#4B69FF;" | {{Icon item|Diplomat|75px}} |
| + | | style="background:#FFFCF7;" | '''{{item link|Diplomat}}''' | ||
|- | |- | ||
| − | | style="background: #F2D9AD; | + | | style="background:#F2D9AD;" rowspan="1" | '''{{class link|Demoman|br=yes}}''' |
| − | | | + | | style="background:#4B69FF;" | {{Icon item|Shin Shredders|75px}} |
| − | | style="background: #FFFCF7 "| '''{{item link| | + | | style="background:#FFFCF7;" | '''{{item link|Shin Shredders}}''' |
|- | |- | ||
| − | | style="background: #F2D9AD | + | | style="background:#F2D9AD;" rowspan="1" | '''{{class link|Heavy|br=yes}}''' |
| − | | | + | | style="background:#4B69FF;" | {{Icon item|Siberian Sweater|75px}} |
| − | | style="background: #FFFCF7 "| '''{{item link| | + | | style="background:#FFFCF7;" | '''{{item link|Siberian Sweater}}''' |
|- | |- | ||
| − | | style="background: #F2D9AD | + | | style="background:#F2D9AD;" rowspan="1" | '''{{class link|Engineer|br=yes}}''' |
| − | | | + | | style="background:#8847FF;" | {{Icon item|Winter Backup|75px}} |
| − | | style="background: #FFFCF7 "| '''{{item link| | + | | style="background:#FFFCF7;" | '''{{item link|Winter Backup}}''' |
|- | |- | ||
| − | | style="background: #F2D9AD | + | | style="background:#F2D9AD;" rowspan="3" | '''{{class link|Medic|br=yes}}''' |
| − | | | + | | style="background:#4B69FF;" | {{Icon item|Berlin Brain Bowl|75px}} |
| − | | style="background: #FFFCF7 "| '''{{item link| | + | | style="background:#FFFCF7;" | '''{{item link|Berlin Brain Bowl}}''' |
|- | |- | ||
| − | | style="background: # | + | | style="background:#4B69FF;" | {{Icon item|Bunnyhopper's Ballistics Vest|75px}} |
| − | + | | style="background:#FFFCF7;" | '''{{item link|Bunnyhopper's Ballistics Vest}}''' | |
| − | | style="background: #FFFCF7 "| '''{{item link| | ||
|- | |- | ||
| − | | | + | | style="background:#4B69FF;" | {{Icon item|Medical Monarch|75px}} |
| − | | style="background: #FFFCF7 "| '''{{item link| | + | | style="background:#FFFCF7;" | '''{{item link|Medical Monarch}}''' |
|- | |- | ||
| − | | | + | | style="background:#F2D9AD;" rowspan="2" | '''{{class link|Spy|br=yes}}''' |
| − | | style="background: #FFFCF7 "| '''{{item link| | + | | style="background:#4B69FF;" | {{Icon item|A Hat to Kill For|75px}} |
| + | | style="background:#FFFCF7;" | '''{{item link|A Hat to Kill For}}''' | ||
|- | |- | ||
| − | | style="background: # | + | | style="background:#4B69FF;" | {{Icon item|Chicago Overcoat|75px}} |
| − | + | | style="background:#FFFCF7;" | '''{{item link|Chicago Overcoat}}''' | |
| − | | style="background: #FFFCF7 "| '''{{item link| | ||
|- | |- | ||
| − | | align=" | + | | style="background:#F2D9AD; text-align:left;" rowspan="1" | '''{{class link|Soldier}}<br>{{class link|Heavy}}''' |
| − | | style="background: #FFFCF7 "| '''{{item link| | + | | style="background:#8847FF;" | {{Icon item|Gift Bringer|75px}} |
| + | | style="background:#FFFCF7;" | '''{{item link|Gift Bringer}}''' | ||
|- | |- | ||
| − | | style="background: #F2D9AD; | + | | style="background:#F2D9AD;" rowspan="3" | '''{{class link|All Classes|br=yes}}''' |
| − | | | + | | style="background:#D32CE6;" | {{Icon item|A Well Wrapped Hat|75px}} |
| − | | style="background: #FFFCF7 "| '''{{item link| | + | | style="background:#FFFCF7;" | '''{{item link|A Well Wrapped Hat}}''' |
|- | |- | ||
| − | | style="background: # | + | | style="background:#8847FF;" | {{Icon item|Chill Chullo|75px}} |
| − | + | | style="background:#FFFCF7;" | '''{{item link|Chill Chullo}}''' | |
| − | | style="background: #FFFCF7 "| '''{{item link| | ||
|- | |- | ||
| − | | | + | | style="background:#4B69FF;" | {{Icon item|Patriot Peak|75px}} |
| − | + | | style="background:#FFFCF7;" | '''{{item link|Patriot Peak}}''' | |
| − | |||
| − | |||
| − | | style="background: #FFFCF7 "| '''{{item link|Patriot Peak}}''' | ||
|} | |} | ||
| − | === | + | === Taunts === |
| − | {{main|Taunts | + | {{main|Taunts}} |
{| class="wikitable collapsible" cellpadding=2 style="text-align:center;" | {| class="wikitable collapsible" cellpadding=2 style="text-align:center;" | ||
| + | | width="90px" style="background:#F2D9AD;" rowspan="1" | '''{{class link|Demoman|br=yes}}''' | ||
| + | | style="background:#FFFCF7;" | {{Icon item|Bad Pipes|75px}} | ||
| + | | style="background:#FFFCF7;" | '''{{item link|Bad Pipes}}''' | ||
|- | |- | ||
| − | | style="background: #F2D9AD | + | | style="background:#F2D9AD;" rowspan="1" | '''{{class link|Engineer|br=yes}}''' |
| − | | | + | | style="background:#FFFCF7;" | {{Icon item|Bucking Bronco|75px}} |
| − | | style="background: #FFFCF7 "| '''{{item link| | + | | style="background:#FFFCF7;" | '''{{item link|Bucking Bronco}}''' |
|- | |- | ||
| − | | style="background: #F2D9AD | + | | style="background:#F2D9AD;" rowspan="1" | '''{{class link|All Classes|br=yes}}''' |
| − | + | | style="background:#FFFCF7" | {{Icon item|Mannrobics|75px}} | |
| − | + | | style="background:#FFFCF7" | '''{{item link|Mannrobics}}''' | |
| − | |||
| − | |||
| − | | | ||
| − | | style="background: #FFFCF7 "| '''{{item link|Mannrobics}}''' | ||
|} | |} | ||
| Line 94: | Line 92: | ||
{{main|Tools}} | {{main|Tools}} | ||
{| class="wikitable collapsible" cellpadding="3" style="text-align:center;" | {| class="wikitable collapsible" cellpadding="3" style="text-align:center;" | ||
| − | | | + | | width="90px" style="background:#F2D9AD" | {{Icon item|Pyroland Weapons Case|75px}} |
| − | | style="background: #FFFCF7 "| '''{{item link|Pyroland Weapons Case}}''' | + | | style="background:#FFFCF7" | '''{{item link|Pyroland Weapons Case}}''' |
|- | |- | ||
| − | | | + | | style="background:#F2D9AD" | {{Icon item| Smissmas 2015 Festive Gift|75px}} |
| − | | style="background: #FFFCF7 "| '''{{item link|Smissmas 2015 Festive Gift}}''' | + | | style="background:#FFFCF7" | '''{{item link|Smissmas 2015 Festive Gift}}''' |
|- | |- | ||
| − | | | + | | style="background:#F2D9AD" | {{Icon item|Strange Count Transfer Tool|75px}} |
| − | | style="background: #FFFCF7 "| '''{{item link|Strange Count Transfer Tool}}''' | + | | style="background:#FFFCF7" | '''{{item link|Strange Count Transfer Tool}}''' |
|- | |- | ||
| − | | | + | | style="background:#F2D9AD" | {{Icon item|Tough Break Campaign Pass|75px}} |
| − | | style="background: #FFFCF7 "| '''{{item link|Tough Break Campaign Pass}}''' | + | | style="background:#FFFCF7" | '''{{item link|Tough Break Campaign Pass}}''' |
|- | |- | ||
| − | | | + | | style="background:#F2D9AD" | {{Icon item|Tough Break Cosmetic Case|75px}} |
| − | | style="background: #FFFCF7 "| '''{{item link|Tough Break Cosmetic Case}}''' | + | | style="background:#FFFCF7" | '''{{item link|Tough Break Cosmetic Case}}''' |
|- | |- | ||
| − | | | + | | style="background:#F2D9AD" | {{Icon item|Tough Break Cosmetic Key|75px}} |
| − | | style="background: #FFFCF7 "| '''{{item link|Tough Break Cosmetic Key}}''' | + | | style="background:#FFFCF7" | '''{{item link|Tough Break Cosmetic Key}}''' |
|- | |- | ||
| − | | | + | | style="background:#F2D9AD" | {{Icon item|Tough Break Key|75px}} |
| − | | style="background: #FFFCF7 "| '''{{item link|Tough Break Key}}''' | + | | style="background:#FFFCF7" | '''{{item link|Tough Break Key}}''' |
|- | |- | ||
| − | | | + | | style="background:#F2D9AD" | {{Icon item|Warbird Weapons Case|75px}} |
| − | | style="background: #FFFCF7 "| '''{{item link|Warbird Weapons Case}}''' | + | | style="background:#FFFCF7" | '''{{item link|Warbird Weapons Case}}''' |
|- | |- | ||
| − | | | + | | style="background:#F2D9AD" | {{Icon item|Festivizer|75px}} |
| − | | style="background: #FFFCF7 "| '''{{item link|Festivizer}}'''<sup>†</sup> | + | | style="background:#FFFCF7" | '''{{item link|Festivizer}}'''<sup>†</sup> |
|- | |- | ||
| − | | | + | | style="background:#F2D9AD" | '''Notes''' |
| − | | style="background: #FFFCF7 "| <sup>†</sup> Added in the {{Patch name|12|22|2015}}. | + | | style="background:#FFFCF7" | <sup>†</sup> Added in the {{Patch name|12|22|2015}}. |
|} | |} | ||
| − | === | + | === Maps === |
| − | {{main|List of maps | + | {{main|List of maps}} |
{| class="wikitable" cellpadding=2 style="text-align:center;" | {| class="wikitable" cellpadding=2 style="text-align:center;" | ||
|- style="height: 20px;" | |- style="height: 20px;" | ||
| − | ! class="header" style="background-color:#DBA901;" | | + | ! class="header" style="background-color:#DBA901;" | <span style="color:white;"> Name |
| − | ! class="header" style="background-color:#DBA901;" | | + | ! class="header" style="background-color:#DBA901;" | <span style="color:white;"> Picture |
| − | ! class="header" style="background-color:#DBA901;" | | + | ! class="header" style="background-color:#DBA901;" | <span style="color:white;"> Game mode |
| − | ! class="header" style="background-color:#DBA901;" | | + | ! class="header" style="background-color:#DBA901;" | <span style="color:white;"> File name |
|- | |- | ||
| − | |style="background | + | | width="90px" style="background:#F2D9AD;" | '''[[Highpass]]''' |
| − | + | | [[File:KOTH Highpass.jpg|160px|link=Highpass]] | |
| − | + | | '''[[King of the Hill]]'''<br>[[File:Controlpoint.png|50px|link=King of the Hill]] | |
| − | + | | {{code|koth_highpass}} | |
|- | |- | ||
| − | |style="background | + | | style="background:#F2D9AD;" | '''[[Landfall]]''' |
| − | + | | [[File:Ctf landfall rc0005.jpg|160px|link=Landfall]] | |
| − | + | | '''[[Capture the Flag]]'''<br>[[File:Intel blu idle.png|50px|link=Capture the Flag]] | |
| − | + | | {{code|ctf_landfall}} | |
|- | |- | ||
| − | |style="background | + | | style="background:#F2D9AD;" | '''[[Snowycoast]]''' |
| − | + | | [[File:Pl_snowycoast.jpg|160px|link=Snowycoast]] | |
| − | + | | '''[[Payload]]'''<br>[[File:BLU_Bombcart.png|50px|link=Payload]] | |
| − | + | | {{code|pl_snowycoast}} | |
|- | |- | ||
| − | |style="background | + | | style="background:#F2D9AD;" |'''[[Vanguard]]''' |
| − | + | | [[File:Cp vanguard.png|160px|link=Vanguard]] | |
| − | + | | '''[[Control Point (game mode)|Control Point]]'''<br>[[File:Controlpoint.png|50px|link=Control Point (game mode)]] | |
| − | + | | {{code|cp_vanguard}} | |
|} | |} | ||
| − | ===Tweaked Classes=== | + | === Tweaked Classes === |
{| class="wikitable" | {| class="wikitable" | ||
| − | ! style="background: #DBA901;" class="header" | <span style="color: white;"> Class | + | ! style="background:#DBA901;" class="header" | <span style="color: white;"> Class |
| − | ! style="background: #DBA901;" class="header" | <span style="color: white;"> Changes | + | ! style="background:#DBA901;" class="header" | <span style="color: white;"> Changes |
|- | |- | ||
| − | ! style="background: #F2D9AD;" rowspan="3" | {{ | + | ! width="90px" style="background:#F2D9AD;" rowspan="3" | {{class link|Pyro|br=yes}} |
| {{c|+|Added:}} Extinguishing a teammate will now return 20 health to the Pyro. | | {{c|+|Added:}} Extinguishing a teammate will now return 20 health to the Pyro. | ||
|- | |- | ||
| Line 167: | Line 165: | ||
| {{c|-|Changed:}} Consecutive Airblasts will no longer prevent enemies from air-strafing until they touch the ground | | {{c|-|Changed:}} Consecutive Airblasts will no longer prevent enemies from air-strafing until they touch the ground | ||
|- | |- | ||
| − | ! style="background: #F2D9AD;" rowspan="4" | {{ | + | ! style="background:#F2D9AD;" rowspan="4" | {{class link|Demoman|br=yes}} |
| {{c|+|Added:}} Charging now removes debuffs from the Demoknight (Bleed, Fire, Mad Milk, Jarate) | | {{c|+|Added:}} Charging now removes debuffs from the Demoknight (Bleed, Fire, Mad Milk, Jarate) | ||
|- | |- | ||
| Line 176: | Line 174: | ||
| {{c|-|Changed:}} All Swords now have a slower deploy and holster speed compared to base weapons in addition to their increased melee range | | {{c|-|Changed:}} All Swords now have a slower deploy and holster speed compared to base weapons in addition to their increased melee range | ||
|- | |- | ||
| − | ! style="background: #F2D9AD;" rowspan="2" | {{ | + | ! style="background:#F2D9AD;" rowspan="2" | {{class link|Engineer|br=yes}} |
| {{c|+|Changed:}} Sentry Guns brought into a respawn room no longer detonate outside of Mann vs. Machine | | {{c|+|Changed:}} Sentry Guns brought into a respawn room no longer detonate outside of Mann vs. Machine | ||
|- | |- | ||
| {{c|-|Added:}} After removing a Sapper from a Sentry Gun, there is now a 0.5s delay before the sentry is active again | | {{c|-|Added:}} After removing a Sapper from a Sentry Gun, there is now a 0.5s delay before the sentry is active again | ||
|- | |- | ||
| − | ! style="background: #F2D9AD;" rowspan="2" | {{ | + | ! style="background:#F2D9AD;" rowspan="2" | {{class link|Medic|br=yes}} |
| {{c|+|Added:}} Medics now have slightly higher health regeneration when healing a hurt patient | | {{c|+|Added:}} Medics now have slightly higher health regeneration when healing a hurt patient | ||
|- | |- | ||
| {{c|+|Changed:}} During setup time, ÜberCharge build rate is now increased by 3x | | {{c|+|Changed:}} During setup time, ÜberCharge build rate is now increased by 3x | ||
|- | |- | ||
| − | ! style="background: #F2D9AD;" | {{ | + | ! style="background:#F2D9AD;" | {{class link|Spy|br=yes}} |
| {{c|=|Added:}} The HUD 'Cloak' meter now displays 'MOTION' and 'FEIGN' when Cloak and Dagger and Dead Ringer are equipped respectively | | {{c|=|Added:}} The HUD 'Cloak' meter now displays 'MOTION' and 'FEIGN' when Cloak and Dagger and Dead Ringer are equipped respectively | ||
|- | |- | ||
| − | ! style="background: #F2D9AD;" rowspan="2" | {{ | + | ! style="background:#F2D9AD;" rowspan="2" | {{class link|All Classes|br=yes}} |
| {{c|+|Added:}} Upon spawning, friendly players (including [[disguise]]d Spies) will show an outline for 10 seconds | | {{c|+|Added:}} Upon spawning, friendly players (including [[disguise]]d Spies) will show an outline for 10 seconds | ||
|- | |- | ||
| {{c|+|Changed:}} Base weapon switch speed changed from 0.67 seconds to 0.5 seconds | | {{c|+|Changed:}} Base weapon switch speed changed from 0.67 seconds to 0.5 seconds | ||
| − | |||
|} | |} | ||
=== Tweaked Weapons === | === Tweaked Weapons === | ||
{| class="wikitable" | {| class="wikitable" | ||
| − | ! style="background: #DBA901;" class="header" | <span style="color: white;"> Class | + | ! style="background:#DBA901;" class="header" | <span style="color: white;"> Class |
| − | ! style="background: #DBA901;" class="header" | <span style="color: white;"> Weapon | + | ! style="background:#DBA901;" class="header" | <span style="color: white;"> Weapon |
| − | ! style="background: #DBA901;" class="header" | <span style="color: white;"> Changes | + | ! style="background:#DBA901;" class="header" | <span style="color: white;"> Changes |
|- | |- | ||
| − | ! style="background: #F2D9AD;" rowspan=5| {{ | + | ! width="90px" style="background:#F2D9AD;" rowspan=5 | {{class link|Scout|br=yes}} |
! rowspan=1 | {{Icon item|Mad Milk|icon-size=75px}} <br /> {{item link|Mad Milk}} | ! rowspan=1 | {{Icon item|Mad Milk|icon-size=75px}} <br /> {{item link|Mad Milk}} | ||
| {{c|+|Added:}} Extinguishing an ally will now reduce the cool down by 20% | | {{c|+|Added:}} Extinguishing an ally will now reduce the cool down by 20% | ||
| Line 216: | Line 213: | ||
| {{c|+|Changed:}} Reduced damage penalty to 65% (from 70%) | | {{c|+|Changed:}} Reduced damage penalty to 65% (from 70%) | ||
|- | |- | ||
| − | ! style="background: #F2D9AD;" rowspan=5 | {{ | + | ! style="background:#F2D9AD;" rowspan=5 | {{class link|Soldier|br=yes}} |
! rowspan=1 | {{Icon item|Beggar's Bazooka|icon-size=75px}} <br /> {{item link|Beggar's Bazooka}} | ! rowspan=1 | {{Icon item|Beggar's Bazooka|icon-size=75px}} <br /> {{item link|Beggar's Bazooka}} | ||
| {{c|-|Added:}} -20% blast radius penalty | | {{c|-|Added:}} -20% blast radius penalty | ||
| Line 232: | Line 229: | ||
| {{c|-|Added:}} 20% slower firing speed | | {{c|-|Added:}} 20% slower firing speed | ||
|- | |- | ||
| − | ! style="background: #F2D9AD;" rowspan=10 | {{ | + | ! style="background:#F2D9AD;" rowspan=10 | {{class link|Pyro|br=yes}} |
! rowspan=4 | {{Icon item|Degreaser|icon-size=75px}} <br /> {{item link|Degreaser}} | ! rowspan=4 | {{Icon item|Degreaser|icon-size=75px}} <br /> {{item link|Degreaser}} | ||
| {{c|+|Removed:}} Removed damage penalty | | {{c|+|Removed:}} Removed damage penalty | ||
| Line 256: | Line 253: | ||
| {{c|-|Added}} 75% slower deploy speed | | {{c|-|Added}} 75% slower deploy speed | ||
|- | |- | ||
| − | ! style="background: #F2D9AD;" rowspan=22 | {{ | + | ! style="background:#F2D9AD;" rowspan=22 | {{class link|Demoman|br=yes}} |
! rowspan=4 | {{Icon item|Loose Cannon|icon-size=75px}} <br /> {{item link|Loose Cannon}} | ! rowspan=4 | {{Icon item|Loose Cannon|icon-size=75px}} <br /> {{item link|Loose Cannon}} | ||
| {{c|-|Changed:}} Reduced projectile speed (now a visible attribute) | | {{c|-|Changed:}} Reduced projectile speed (now a visible attribute) | ||
| Line 309: | Line 306: | ||
| {{c|-|Removed:}} Ammo pickups granting health instead of ammo | | {{c|-|Removed:}} Ammo pickups granting health instead of ammo | ||
|- | |- | ||
| − | ! style="background: #F2D9AD;" rowspan=10 | {{ | + | ! style="background:#F2D9AD;" rowspan=10 | {{class link|Heavy|br=yes}} |
! rowspan=1 | {{Icon item|Gloves of Running Urgently|icon-size=75px}} <br /> {{item link|Gloves of Running Urgently}} | ! rowspan=1 | {{Icon item|Gloves of Running Urgently|icon-size=75px}} <br /> {{item link|Gloves of Running Urgently}} | ||
| {{c|-|Added:}} 50% slower holster speed | | {{c|-|Added:}} 50% slower holster speed | ||
| Line 334: | Line 331: | ||
| {{c|-|Changed:}} Reduced faster firing speed bonus to 40% (from 50%) | | {{c|-|Changed:}} Reduced faster firing speed bonus to 40% (from 50%) | ||
|- | |- | ||
| − | ! style="background: #F2D9AD;" rowspan=2| {{ | + | ! style="background:#F2D9AD;" rowspan=2 | {{class link|Engineer|br=yes}} |
! rowspan=1 | {{Icon item|Rescue Ranger|icon-size=75px}} <br /> {{item link|Rescue Ranger}} | ! rowspan=1 | {{Icon item|Rescue Ranger|icon-size=75px}} <br /> {{item link|Rescue Ranger}} | ||
| {{c|-|Changed:}} Reduced healing per bolt to 60 (from 75) | | {{c|-|Changed:}} Reduced healing per bolt to 60 (from 75) | ||
| Line 362: | Line 359: | ||
| {{c|+|Changed:}} Taunt can now be activated by alt-fire | | {{c|+|Changed:}} Taunt can now be activated by alt-fire | ||
|- | |- | ||
| − | ! style="background: #F2D9AD;" rowspan=6| {{ | + | ! style="background:#F2D9AD;" rowspan=6 | {{class link|Sniper|br=yes}} |
! rowspan=1 | {{Icon item|Huntsman|icon-size=75px}} <br /> {{item link|Huntsman}} | ! rowspan=1 | {{Icon item|Huntsman|icon-size=75px}} <br /> {{item link|Huntsman}} | ||
| {{c|+|Changed:}} Can be fired while off the ground | | {{c|+|Changed:}} Can be fired while off the ground | ||
| Line 379: | Line 376: | ||
| {{c|+|Changed:}} Reduced slower firing speed penalty to 20% (from 35%) | | {{c|+|Changed:}} Reduced slower firing speed penalty to 20% (from 35%) | ||
|- | |- | ||
| − | ! style="background: #F2D9AD;" rowspan=2| {{ | + | ! style="background:#F2D9AD;" rowspan=2 | {{class link|Spy|br=yes}} |
! rowspan=1 | {{Icon item|Spy-cicle|icon-size=75px}} <br /> {{item link|Spy-cicle}} | ! rowspan=1 | {{Icon item|Spy-cicle|icon-size=75px}} <br /> {{item link|Spy-cicle}} | ||
| {{c|+|Changed:}} Fire immunity shield no longer appears when fire immunity is triggered | | {{c|+|Changed:}} Fire immunity shield no longer appears when fire immunity is triggered | ||
| Line 386: | Line 383: | ||
| {{c|+|Changed:}} Increased initial damage reduction when feigning death to 75% (from 50%) | | {{c|+|Changed:}} Increased initial damage reduction when feigning death to 75% (from 50%) | ||
|- | |- | ||
| − | + | | style="background:#F2D9AD; text-align:left;" rowspan=2 | '''{{class link|Soldier}}<br />{{class link|Pyro}}''' | |
! rowspan=2 | {{Icon item|Reserve Shooter|icon-size=75px}} <br /> {{item link|Reserve Shooter}} | ! rowspan=2 | {{Icon item|Reserve Shooter|icon-size=75px}} <br /> {{item link|Reserve Shooter}} | ||
| {{c|=|Changed:}} No longer boosts all-around switch speed, instead boosts switch-to speed by 20% and switch-from speed by 15% | | {{c|=|Changed:}} No longer boosts all-around switch speed, instead boosts switch-to speed by 20% and switch-from speed by 15% | ||
| Line 392: | Line 389: | ||
| {{c|-|Changed:}} No longer mini-crits any airborne target (i.e. jumping). Target must be forced in to the air via blastjump, knockback, airblast, or grapple. | | {{c|-|Changed:}} No longer mini-crits any airborne target (i.e. jumping). Target must be forced in to the air via blastjump, knockback, airblast, or grapple. | ||
|- | |- | ||
| − | + | | style="background:#F2D9AD; text-align:left;" rowspan=4 | '''{{class link|Soldier}}<br />{{class link|Demoman}}''' | |
! rowspan=4 | {{Icon item|Half-Zatoichi|icon-size=75px}} <br /> {{item link|Half-Zatoichi}} | ! rowspan=4 | {{Icon item|Half-Zatoichi|icon-size=75px}} <br /> {{item link|Half-Zatoichi}} | ||
| {{c|+|Changed:}} Honorbound deals 50 self-damage when holstered before it kills (Before, the weapon would be unable to be holstered if it didn't kill) | | {{c|+|Changed:}} Honorbound deals 50 self-damage when holstered before it kills (Before, the weapon would be unable to be holstered if it didn't kill) | ||
| Line 402: | Line 399: | ||
| {{c|=|Changed:}} 100% life restore on kill changed to 50% health gain on kill that can result in overheal | | {{c|=|Changed:}} 100% life restore on kill changed to 50% health gain on kill that can result in overheal | ||
|- | |- | ||
| − | + | | style="background:#F2D9AD; text-align:left;" rowspan=1 | '''{{class link|Soldier}}<br />{{class link|Pyro}}<br />{{class link|Heavy}}<br />{{class link|Engineer}}''' | |
! rowspan=1 | {{Icon item|Panic Attack|icon-size=75px}} <br /> {{item link|Panic Attack}} | ! rowspan=1 | {{Icon item|Panic Attack|icon-size=75px}} <br /> {{item link|Panic Attack}} | ||
| {{c|+|Changed:}} No longer auto-fires when fully loaded. Shots can be held and released at will. | | {{c|+|Changed:}} No longer auto-fires when fully loaded. Shots can be held and released at will. | ||
Revision as of 02:14, 25 November 2019
|

| “ | The New Mexico Department of Labor has found the Administrator in violation of every safety law they have, including 106 violations of the Employee Electroshock (Face, Trunk and Genital) Protection Act and 496 unexplained workplace disappearances. This means Miss Pauling has been state-mandated to take her first vacation in... well, ever. It also means she'll still be working round the clock, since those kill-contracts won't assign themselves.
— Tough Break Update publicity blurb
|
” |
The Tough Break Update was a major update added in the 2015 Smissmas season that spanned from December 17, 2015 to April 11, 2016.
The update introduced 4 new weapon collections, 15 community-created new cosmetics, 4 community-created new maps, and 3 new taunts. It also added the Tough Break Campaign, a three-month contract campaign which allows players to complete 26 skill-based challenges to unlock one-of-a-kind weapons and exclusive weapon and cosmetic cases. To participate in the Tough Break Campaign, players had to obtain the Tough Break Campaign Pass, which was available for purchase in the Mann Co. Store. Players were invited to fulfill contracts ostensibly handed out by Miss Pauling via postcards on her state-mandated vacation.
Additional content was further added in the December 22, 2015 Patch, such as the Festivizer.
Contents
Additions
Cosmetics
Taunts
| Bad Pipes | ||
| Bucking Bronco | ||
| Mannrobics |
Tools
Maps
| Name | Picture | Game mode | File name |
|---|---|---|---|
| Highpass | 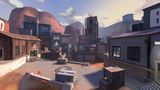
|
King of the Hill |
koth_highpass
|
| Landfall | 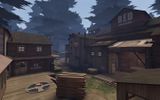
|
Capture the Flag |
ctf_landfall
|
| Snowycoast | 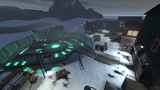
|
Payload
|
pl_snowycoast
|
| Vanguard | 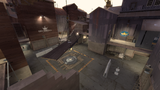
|
Control Point |
cp_vanguard
|
Tweaked Classes
| Class | Changes |
|---|---|
Tweaked Weapons
| Class | Weapon | Changes |
|---|---|---|
Mad Milk |
||
Pretty Boy's Pocket Pistol |
||
Wrap Assassin |
||
Beggar's Bazooka |
||
Air Strike |
||
Concheror |
||
B.A.S.E. Jumper |
||
Market Gardener |
||
Degreaser |
||
Phlogistinator |
||
Axtinguisher |
||
Loose Cannon |
||
Chargin' Targe |
||
Splendid Screen |
||
Tide Turner |
||
Quickiebomb Launcher |
||
Ullapool Caber |
||
Claidheamh Mòr |
||
Persian Persuader |
||
Gloves of Running Urgently |
||
Fists of Steel |
||
Warrior's Spirit |
||
Eviction Notice |
||
Rescue Ranger |
||
Jag |
||
Medic |
Crusader's Crossbow |
|
Quick-Fix |
||
Vaccinator |
||
Amputator |
||
Huntsman |
||
Jarate |
||
Cozy Camper |
||
Cleaner's Carbine |
||
Spy-cicle |
||
Dead Ringer |
||
Reserve Shooter |
||
Half-Zatoichi |
||
Panic Attack |
Gallery

In-game notification.

Screenshot of the Tough Break Update.
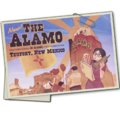
"New! The Alamo in Scenic Teufort, New Mexico"
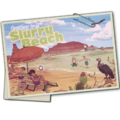
"Greetings from Slurry Beach"
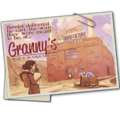
"Bombs delivered by cart, the way they were meant to be, at...Granny's World Headquarters"

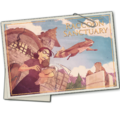
"Visit the Teufort Public Library - Home of the World's Largest Continuously Burning Book Fire!"
"Merasmus's Ancient Sumerican Carnival"

"Mann Co. Recalled Product Outlet Mall"

"Poopy Joe's Rapid Descent"
"The John Doe Raccoon Sanctuary"

"Hey Dummy! Visit The Tom Jones Museum"


See also
External links
| |||||||||||||||||||||||||||||||
| |||||
| |||||||||||||||||||||||||||||||||||||||||||||||||||||||||||||||||||||||||||||||||||||||||||||||