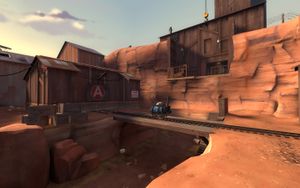
Community Hoodoo strategy
| “You are so small! Is funny to me!” This article is a stub. As such, it is not complete. You can help Team Fortress Wiki by expanding it. |
| Community Hoodoo strategy | |
|---|---|

| |
| Basic Information | |
| Developer(s): | {{{map-developer}}} |
| Map Info | |
| Environment: | Desert |
| Setting: | Daylight, sunny |
| Map Photos | |
This article is about Community Hoodoo strategy.
Contents
General (All Classes)
Class-specific strategy
 Scout
Scout
- On offense, it is best to have a Bonk! Atomic Punch to get as deep as you can into the enemy's defenses. From there, try to kill easy enemies exiting their base.
- On offense, be quick and try to flank the enemy as much as possible. When sticking to Heavies or Soldiers, help them by scouting ahead for Sentry Guns or an ambush.
- On defense, Bonk! Atomic Punch is helpful for getting the enemy's attention, especially those who are under the effects of an ÜberCharge, to help your team gain an advantage.
 Soldier
- On offense, it is useful to stick to the people who are pushing the cart. Spamming rockets into Engineer nests to destroy their Sentry Guns and Dispensers will help your team make an offensive push.
- On offense, rocket jumping across the map for mobility and flanking will aid an offensive push.
- On defense, your rockets are very good at completely clearing a group of enemies crowding to push the cart.
 Pyro
Pyro
- On offense, always Spy check around the cart to prevent a Spy from halting the cart.
- On offense, you are great at hit-and-run in this map as there are no water sources.
- On defense, your Flamethrower can clear the entire cart of enemies' you can also break up ÜberCharges with your airblast.
 Demoman
- On defense, as usual, you can lay stickybombs on the tracks to clear the cart of enemies. The Scottish Resistance is a good idea due to the number of stickies you can place.
 Heavy
Heavy
- On offense, you can literally ride the cart by crouch jumping while shooting your Minigun, allowing you to focus 100% on the enemies you're fighting. Beware of Snipers who will try to line up a headshot.
- Remember to attack from unexpected angles. Nothing throws enemies off like a Heavy suddenly behind them.
 Engineer
- The ledge at the beginning of the tight passage is an excellent Engineer spot for BLU players. With an influx of reinforcement you can stall the enemy for quite some time.
 Medic
Medic
- On offense, try using the normal Medi Gun for its invulnerable ÜberCharge to charge into the enemy's defense and destroy it.
- On defense, the ÜberCharge from a Kritzkrieg will effectively help in clearing the cart of enemies.
- If you are the only Medic on the team, the Quick-Fix is more useful, due to its rapid healing and ÜberCharge rate.
 Sniper
- As a Sniper on offense, you can snipe with ease on the balcony gate next to A station, and hide behind the gate while aiming.
 Spy
Spy
- Spies can play a crucial role at the final stage for RED, eliminating Snipers in waiting, or taking down Sentry Guns. However, it is difficult to hide as this section of the map is very small.
- Playing Spy while on defense is a good way to stop the cart and help your team out. While the enemy team is focused on moving the cart, you can easily slip behind enemy lines and get multiple backstabs at once, killing everyone pushing the cart which causes the cart to stop moving. Of course it's easier said than done, but a little practice should get you in the feel of things so you can get many points, and ultimately win the game.
