|
|
| Line 1: |
Line 1: |
| | {{Trans}} | | {{Trans}} |
| − | {{DISPLAYTITLE:Strtegie Anti-Esploratore}} | + | {{DISPLAYTITLE:Strategie Anti-Esploratore}} |
| | [[File:Scouthumiliation.png|right|125px|'Kay, this does not look good here, um...]] | | [[File:Scouthumiliation.png|right|125px|'Kay, this does not look good here, um...]] |
| | | | |
Revision as of 19:55, 22 February 2019
L' Esploratore è una classe molto veloce e manovrabile che può contare su un alto valore di potenza di fuoco a corto raggio, facendolo diventare estremamente potente in combattimenti 1 contro 1. Eccelle in spazi aperti, dove la sua velocità e i suoi doppi-salti gli permettono di muoversi intorno alla mappa,su lunghe distanze, e tendere imboscate ai nemici più vulnerabili. può usare la sua velocità per evitare completamente i danni, il modo migliore per compensare la sua scarsità di salute. Dipendendo dal suo equipaggiamento, un'Esploratore può portare con se armi con vantaggi addizionali che lo aiutano a abbattere uno dopo l'altro con magiore facilità i suoi bersagli. se puoi limitare l movimenti dell' Esploratore , puoi facilmente disfarti di lui.
Generale
 Ruolo Ruolo
|
- L'Esploratore eccelle nel seguire diverse strade per evitare il combattimento diretto, tendendo imboscate sui nemici vulnerabili, e completando gli obbiettivi della missione. Tieni d'occhio i percorsi che segue e segnala la sua posizione ai suoi compagni di squadra.
|
 Vita Vita
|
- L'Esploratore è molto debole e può essere ucciso con qualche buon colpo.
|
 Velocità Velocità
|
- L'Esploratore è molto veloce e può fare doppi salti, quindi prevedi i suoi movimnti con attenzione per assicurare che i tuoi attacchi lo colpiscano, particolarmente usando armi a proiettile. Mentre è a mezz'aria, aspetta che esaurisca i suoi doppi salti prima di provare a sparre colpi a mezz'aria.
- La sua velocità di movimento gli permette di inseguire altre classi ma è meno potente in aree confinate, dove ha meno spazio per schivare.
|
 Potenza Potenza
|
- le armi dell' Esploratore sono devastanti a corto raggio ma molto deboli a lungo raggio. Per questo, si mettera in pericolo e entrerà in combattiento per avere qualche possibilità di uccidere nemici.
|
Armi
Primary weapons
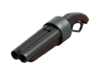 
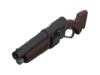
Scattergun / Festive Scattergun
|
- The Scattergun deals immense damage at point-blank range and will allow a Scout to stay in combat for a modest amount of time. Although he is faster than you, do your best to stay at medium range to minimize the damage you may take while trading blows.
- It takes a considerably long time for a Scout to reload his Scattergun; if he uses most or all of his six shots, keep pressuring him into firing so that he cannot fully reload.
|

Forza della Natura
|
- The Force-A-Nature deals even more damage than the Scattergun up close, but must be reloaded every two shots. If the Scout insists on staying in close combat, pick him off during his frequent reloading periods.
- The Force-A-Nature's knock back effects let a Scout easily reposition or disorient you for a follow-up shot, so avoid lingering near walls where you can quickly be cornered or hazards that you can be blasted into.
|
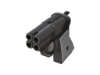
Interbase
|
- The Shortstop has a tight bullet spread suited for medium range. By closing the distance, the Scout may find it more difficult to hit you.
- Steal health packs, kill Medics, and destroy Dispensers to prevent the Scout from making use of the Shortstop's healing bonus.
- When the Scout has his Shortstop as his active weapon, he suffers extra vulnerability to knockback. Make use of this weakness to jugggle the Scout into the air, or to push him into an environmental hazard.
|
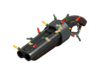
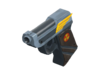
Stappa Bottiglie
|
- Like the Force-A-Nature, the Soda Popper must frequently be reloaded, which will often leave the Scout vulnerable. However, the Soda Popper reloads much faster, so beware.
- You’ll need to quickly eliminate a Scout with a full Hype charge, as his speed ensures that you won’t be able to escape from his Mini-Crits.
|
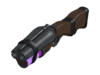
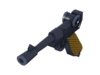
Fucile di Baby Face
|
- The Baby Face's Blaster is more accurate than the Scattergun, allowing the Scout to fight more effectively at medium to close range. However, it suffers from a damage penalty and takes as long as the Scattergun to reload.
- Dealing damage will allow a Scout to build up Boost, significantly increasing his speed until he jumps. With no Boost, the Scout runs considerably slower. Force him to jump, or try to predict his movements if he insists on staying grounded.
- Try to pick off the Scout as he leaves his respawn area, where he is at his slowest.
|
Secondary weapons
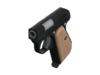
Pistol / Lugermorph
|
- While the Scout might use the Pistol to harass you from a distance, its damage is minor and its ammunition pool is meager. Keep your distance from him to take advantage of his weak long range capabilities.
|

Bonk! Pugno Atomico
|
- Bonk! Atomic Punch helps a Scout get past dangerous areas, such as chokepoints or Sentry Gun nests. He can’t fight while under its effects, so impede his movement by body blocking him or using knock back.
|

Crit-a-Cola
|
- While Crit-a-Cola will allow a Scout to deal Mini-Crits to you, you deal 25% more damage to him. He’ll often consume it when preparing for an ambush, so be alert and pick him off first.
|
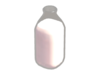
Latte Pazzo
|
- The healing provided by Mad Milk will let an accurate Scout stay in a fight for a prolonged period of time. If you’re covered by it, you’ll either need to retreat or take him out very quickly.
|
Ala
|
- The Winger functions similarly to the Pistol and should be treated the same way; keep a distance so it can only deal minor damage.
|
Pistola Tascabile di Pretty Boy
|
- The Pretty Boy's Pocket Pistol functions similarly to the Pistol and should be treated the same way.
- Be mindful of the increased health given to the Scout by this weapon. If possible, use fire to dispatch of him more quickly.
- Look out for attacks from above, as the Pretty Boy's Pocket Pistol makes a Scout immune to fall damage.
|
Ghigliottina Volante
|
- The Flying Gullotine is ideal for picking off weakened targets; move erratically when retreating or fighting the Scout so that he misses with the weapon.
- A Scout can pair the Flying Gullotine with the Sandman to deal critical hits that few classes can withstand. This can prove deadly to your team if the Scout is accurate with both weapons.
|
Melee weapons
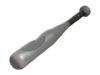 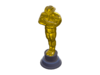      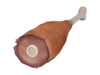
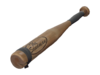
Bat / Saxxy / Conscientious Objector / Festive Bat / Frying Pan / Freedom Staff / Bat Outta Hell / Ham Shank
|
- A Scout that insists on using the Bat could easily deal more damage at close range with any of his primary weapons, actually giving you a slight advantage in melee combat so long as you keep your aim steady.
|
Sandman
|
- If you are stunned by the Sandman's baseball, retreat towards your teammates so that they can protect you. Keep your aim on the Scout so that you can immediately retaliate once the effect wears off.
- Utilize cover, and keep moving to avoid getting hit by the Sandman's stun ball from long distances; if struck by one from a far enough range, you will be stunned in place for 7 seconds. Without teammates to protect you, you are effectively helpless for this duration and can potentially be taunt-killed.
|
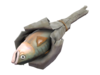 
Holy Mackerel / Unarmed Combat
|
- The Holy Mackerel functions similarly to the Bat but announces each hit in the kill feed. Hit announcements can be used to determine the whereabouts of a Scout.
- Spies should be wary of using the Dead Ringer when hit by the Holy Mackerel; it will show a hit, not a death, in the kill feed, which can compromise their cover.
|
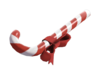
Bastoncino di Zucchero
|
- A Scout who has the Candy Cane in his loadout is 25% more vulnerable to explosions; use rockets, grenades, and/or bombs to dispatch him quickly.
- Try to steal the small health kits dropped by teammates that the Scout aided in killing while having the Candy Cane in his loadout.
|
Boston Basher / Three-Rune Blade
|
- Continuously evade a Scout that is attacking you with the Boston Basher so that he damages himself instead.
- A creative Scout might use the weapon's negative attribute to propel himself to unusual locations; however, this will often cost the Scout half his health, making retaliation against him easier.
|
Sole-su-un-Bastone
|
- The Sun-on-a-Stick does less base damage than the standard Bat. If you are set on fire, you should always be trying to extinguish yourself, retreating from and/or repelling any Scout that may try to pick you off with this weapon.
|
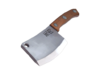
Ven Taglio
|
- If you are marked for death by the Fan O’War, the Scout will likely try to chase you down with his primary weapon. Adjust your one-on-one tactics to his chosen weapon accordingly and try to move to where your teammates are so they can help.
- A Scout may use the Fan O'War to identify which enemy his team should focus fire on; take cover or retreat until the mark wears off, preferrably while having teammates cover you for the duration.
|

Atomizzatore
|
- While a Scout might never use the Atomizer in actual combat, the triple jump greatly increases his mobility. Performing the third jump costs 10 HP, however, which can expedite killing him.
- Beware of ambushes from Scouts who use the Atomizer and the Force-A-Nature together; the combination allows them to reach even greater heights.
|
Incarto Assassino
|
- While a Scout might not use the Wrap Assassin in direct combat, the projectile it launches can inflict the bleed effect on you. Bleeding can be negated by any source of healing.
|
See also
 Esploratore Esploratore |
|---|
| | Armi |
Primario | | | Secondario | | | Mischia |
Mazza ( Padella, Saxxy, Obiettore di Coscienza, Asta della Libertà, Mazza dall'Inferno, Crea-Ricordi, Stinco di Prosciutto, Padella dorata, Schiacciamorti, Semaforo, Mazza Laser, Machete di Prinny) · Sandman · Porca Trota ( Combattimento Disarmato) · Assaltatore di Boston ( Spada delle Tre Rune) · Bastoncino di Zucchero · Sole-su-un-Bastone · Ven Taglio · Atomizzatore · Incarto Assassino | | | | | | |
| | | Abilità | | | | Decorazioni | | | | Set di Oggetti | | | | Provocazioni speciali | | | | Achievements | | | | Sul personaggio | | | | Strategie | | | | Altro | |
|

