Gold Rush/淘金熱
| 這頁目前正處於被翻譯至繁體中文的狀態。 如果你會說繁體中文,請在討論頁中留下你的大名,或透過查看歷史紀錄跟有編輯這頁的用戶聯繫。 |
| Gold Rush | |
|---|---|
| |
| 資訊 | |
| 開發者: | {{{map-developer}}} |
| 地圖資料 | |
| 所處地區: | 沙漠 |
| 環境設定: | 白天、晴朗 |
| 地圖相片 | |
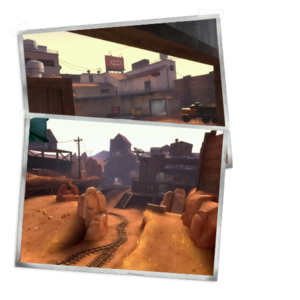
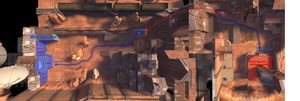
Gold Rush(淘金熱)是第一張引進彈頭車遊戲模式的地圖。地圖分成三個不同區域(階段),每個區域內都有數個中繼控制點。兩隊則分別負責進攻(藍隊)及防守(紅隊),就像 Dustbowl 一樣。藍隊的目標便是努力設法將彈頭車推過排序好的控制點,最後推到紅隊基地並將之炸毀。紅隊的目標便是阻止藍隊的推車行動。
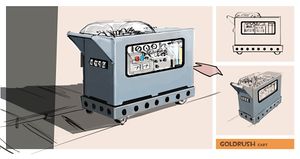
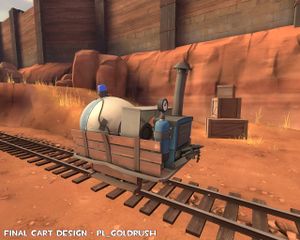
藍隊可以藉由站在彈頭車附近來推動它前往控制點,若越多隊員靠近則推動速度越快。若二十秒內都沒有藍隊成員推車,則彈頭車便會開始自動倒退至上一個控制點,再次靠近它便可阻止倒退並繼續推進。彈頭車本身則附帶補給器來治療與補給護送它的藍隊隊員。
推車每經過一個檢查點(控制點)便會將回合時間延長五分鐘。若在時間完結前便將彈頭車推至區域終點,則剩餘時間可保留到下一個區域使用,直到回合完結並換隊才會重置時間。
在每個區域中,回合開始前雙方都有 1 分 5 秒的準備時間,紅隊可利用這段時間在地圖上各處佈署防線,藍隊雖然被鎖在自家基地內,醫護兵仍可利用這段時間為 ÜberCharge 充能。然而,處於無敵狀態的玩家(包括使用 Bonk! 原子能量飲料的偵查兵)或隱形中的間諜都無法推動彈頭車。
如果時間歸零時彈頭車沒有處於倒退狀態的話,便會啟動延長賽,彈頭車的倒退狀態倒數時間由二十秒降至五秒。若藍隊成功靠近彈頭車則會令倒數計時重置。
雙方各自的任務目標為:
- 藍隊:藍隊在每張彈頭車護送地圖的主要目標便是推動藍色的彈頭車使之沿著地圖上設置的軌道前進。持續推進車子並攻陷紅隊的防禦陣式,推至地圖終點時彈頭車便會爆炸,令藍隊獲得勝利。若藍隊無法使隊員靠近彈頭車並推動它會令車子開始緩緩倒退,使推車進度倒扣。
- 紅隊:與藍隊的任務目標相反,紅隊的目標便是嚇阻並拖延藍隊的行動,防止他們將彈頭車推動至他們的目的地。持續抵抗藍隊直至時間完結,紅隊便可取得勝利。拖延藍隊最有效的方法便是在彈頭車附近流連,讓藍隊即使有隊友站在彈頭車附近也無法推動車子。
內容
簡介短片
位置
階段 A
檢查點 1
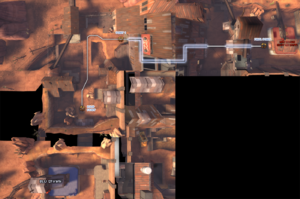
藍隊基地和第一檢查點間有一段頗具規模的相對開闊區域。彈頭車起始位置位於藍隊基地外,其路線首先為往前朝向小屋前進,並經過一個小懸崖的缺口。隨後路線會向左彎靠近高架軌道,並逐漸接近隧道。此區內的方向描述以從藍隊基地觀察為主。
- 藍隊基地:藍隊基地內有一個補給室,並有一道走廊連結到三個不同的出口。彈頭車正後方的位置(基地中間)有一對整個區域皆可觀察到的鐵捲門。基地右手邊的出口堆了幾個箱子,紅隊可以利用它們在回合開始前設置埋伏。這個位置讓火焰兵或是一組 ÜberCharge 埋伏效果為佳,尤其是在攻方啟動他們的 ÜberCharge 時,紅隊便可從這個方向快速應對。攻方人員也可以趁戰況激烈時躲在這些箱子後面,通常都不會被發現。基地左側出口則面向右側出口的方向,也因此可以避免直接暴露在坡道上及小屋內的守方視線內。
- 高架軌道:從藍隊的方向看過去,這段架高的軌道位在地圖最左側,可連接到隧道部分和第一檢查點。紅隊方面可以待在這邊進行彈幕攻擊,特別是讓火箭兵和爆破兵進行大規模轟炸。藍隊則可以從左側懸崖的最高點跳蹲到軌道上。強攻型的紅隊工程師則可以利用此區內充足的大型彈藥箱,快速在軌道末端(靠近藍隊基地)上造出一架二級或三級的步哨防禦槍。
- 懸崖:這塊高地事實上並沒有大到懸崖的程度,只是因為對藍隊而言,它有著稍陡的斜坡,末端接近垂直地面並會可人回到原本的平地高度。這個小懸崖有一個能讓彈頭車經過的缺口。紅隊可以在懸崖下方部署火焰兵、步哨防禦槍或 ÜberCharge。懸崖左側(藍隊觀點)的後方區域有著一個大型醫藥包。藍隊可以從左側懸崖的最高點跳蹲到軌道上,而爆破兵則可以從這個位置用黏彈跳飛到隧道位置(稍加練習甚至可以直接降落在大醫藥包上)。
- 小屋:小屋位在藍隊右手邊較靠後方的區域。它是一幢兩層樓建築,二樓有陽台可以直接看到整個藍隊基地。一樓有扇面向藍隊基地的門,外面的兩個樓梯中間有一個中型醫藥包和大型彈藥箱。小屋是個理想的狙擊點,讓狙擊手可以駐守此處並輕易解決剛從中間出口出來或正在推車的敵軍。二樓則常有紅隊工程師在面向左側的缺口上蓋步哨以防遭藍隊從基地直接攻擊。有經驗的藍隊爆破兵可以直接從基地門口用黏彈跳跳到二樓的陽台上。
- 隧道:隧道是位在地圖左側的彈頭車必經之路。除非車子已經通過第一檢查點,否則它只是條連接兩個開闊區域的通道而已。隧道也是本階段中的激戰點之一。
- Goldrush1a.jpg
階段 A,第一檢查點。
- Goldrush11cliffs.jpg
懸崖。
- Goldrush11house.jpg
小屋。
- Goldrush11tunnel.jpg
隧道。
第二檢查點
彈頭車進入隧道後,便會快速經過兩個一右一左的急彎,隨後進入下一個開闊區域。接著車子便會沿著壕溝前進,經過一座便橋,並向右轉朝設置在紅隊基地後方的檢查點前進。此區內的方向描述以從紅隊視點觀察為主。
- 紅隊基地:紅隊基地有兩個補給櫃,只有一個面向地圖後方的出口。紅隊離開基地後,可以選擇左轉進入連接開闊區域的另一條隧道,或是右轉後經過一條通到前線的寬敞走道,或是走樓梯登上高台。紅隊出門後一定要轉半圈才能面向「前面(面對藍隊進攻的方向)」。檢查點座落在紅隊基地背面,面向攻方的行進方向。
- 紅隊高台:紅隊基地左側(面向攻方時)有個位在地圖左側的高台。高台末端有一個中型彈藥箱和一個小補血包,同時這裡也是建造步哨防禦槍以涵蓋從隧道方向來犯的敵軍。高台中段有一座連接到紅隊基地屋頂的天橋。屋頂則是能讓狙擊手盯好正在推車或從隧道冒出來的敵軍的理想據點。
- 壕溝:在紅隊基地和藍隊進攻的隧道之間是一個開闊區域,在靠藍隊的方向有一個橫越地圖的壕溝般的小峽谷。壕溝右手邊的斜坡可以回到平地高度,而最左邊則有個小梯子可以讓壕溝裡的人員通到軌道上。壕溝上有一座橋,讓人可以直接跨越壕溝前往隧道或紅隊基地。彈頭車會沿著壕溝前進,並在壕溝末端右轉朝向檢查點前進。
- 閣樓:藍隊通過第一檢查點的隧道後便會進入一幢橫跨常被稱為閣樓的第二區域的兩層樓建築。一樓有個面向左邊的出口通到接下來的軌道。出口上方(紅隊視點)有個通到樓上的窗台,右手邊則有一座平台連接二樓的兩個房間。左側的房間有扇通到一個相當靠近檢查點的小高台的門。紅隊進入第一檢查點的隧道後可以選擇沿著軌道左轉回到第一檢查點,或是右轉沿著有著大型醫藥包的走廊,上樓進入右側房間。對於攻方而言這是一條理想的進攻路線,讓他們在接近檢查點的同時提供良好的掩護。
- 其他通道:當藍隊推過第一控制點後,地圖便會再開放兩條通往第二區域的路線。其中一條位在彈頭車隧道的右側,可通到一個閣樓建築內的架高平台上,面向上述的大型醫藥包走廊,及紅隊視點右側的房間。藍隊工程師可於此處架設傳送裝置和防禦步哨槍,紅隊很難拆除此處的藍隊前線基地。然而,紅隊也可在準備時間就先在這平台上設好前線基地。紅隊工程師可以先在基地門口放傳送裝置入口,補充金屬後走到平台末端下方建造一個補給器用來墊腳,踩上去後跳起來在平台上放置傳送裝置出口。傳送裝置建好後,紅隊便可在此處架設步哨防禦槍以及補給器,以試圖阻礙藍隊進攻並包夾藍隊。
另一條路線則是在第一檢查點的最右手邊(藍隊視點),並可通到一座靠近壕溝區域的兩層樓建築。玩家可以從二樓的小窗子看到紅隊基地的右側區域(紅隊視點),以及一小部分的紅隊基地屋頂。這讓玩家能夠從這裡對任何位在壕溝橋上或開闊區域的敵人進行攻擊。然而請小心二樓靠近壕溝的開口,火箭兵和爆破兵可以分別用火箭跳或黏彈跳飛上來突擊;偵查兵也可以從閣樓區域用二重跳躍過來騷擾。
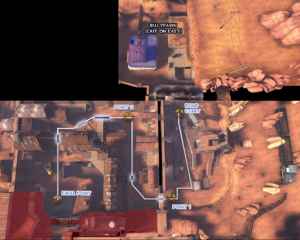
- Goldrush1b.jpg
階段 A,第二檢查點。
- Goldrush12house.jpg
閣樓。
- Goldrush12upper.jpg
紅隊高台。
- Goldrush12valley.jpg
壕溝。
Stage B
Stage B contains 2 checkpoints that BLU must reach.
Checkpoint 1
The cart starts out in front of a trench which separates BLU's spawn area and the battlefield. The cart runs between the Watchtower and House and then over the Bridge where the checkpoint is then located.
- BLU Spawn: There are two exits, one tunnel exit on the left and one double gate on the right. The right one is usually used for ÜberCharges while the left one is used to flank RED. From the left exit, it's easy for a Spy to sneak behind the lines. Be careful, though, as sometimes at the start of the match, an ÜberCharged Pyro will enter the left exit, usually killing everything in the tunnel.
- House Tunnel: In the tunnel on the left side of house from BLU's view, you'll find a large Ammo Pack and a small health kit. It's rare that it's guarded. From the tunnel on the left, there are stairs leading to the Sniper Ledge.
- The Sniper Ledge: On the right where RED enters the first checkpoint area, there is a small set of stairs leading to the Sniper Ledge. As its name indicates, it's often used by Snipers. You'll find cover behind some boxes and in the small hut, which also has a medium health kit.
- Watchtower: On the right from the Blue Spawn, when you go through the gates you'll see the Watchtower. Most of the RED defenders are here, since they have a height advantage and there's a large ammo pack and a medium health kit. From it's watchtower, Snipers can overlook both exits. Sentry Guns are often located here, so be sure to destroy them with an initial ÜberCharge.
- The Bridge: Just before the final stretch of track to the first checkpoint is a bridge which connects over the ditch.
- The House: The House is located to the left from the perspective of BLU. It has one exit, and two windows which RED can shoot through. Sometimes, Sentry Guns are placed on the windows or you'll find a Demoman here. Be sure to clean everything in the house, as it's a popular spot for Engineers. Grenades and stickybombs work wonders here.
- Goldrush2a.jpg
Stage B, Checkpoint 1
- Goldrush21house.jpg
The House
- Goldrush21housetunnel.jpg
House Tunnel
- Goldrush21sniperdeck.jpg
The Sniper Ledge
Checkpoint 2
After the first checkpoint the cart winds through a building which separates the next battlefield. It exits out to a chokepoint area and then runs under a bridge separating the Main Building and then finally onto the next checkpoint.
- The Choke: The choke area is the small exit from the checkpoint building and the small battlefield around it which is surrounded by the two huts which separate Checkpoint 2's area.
- Battlements: The battlements are located at the far end of the area from RED's spawn. It connects from the house above Checkpoint 1's building. There are two drop downs which can be used by attackers as another entry or as an entry way for RED Soldiers or Demomen.
- Main Building: The Main Building is situated in the center of the area, cutting Checkpoint 2's battlefield in half. The Main Building has two houses which are connected by a bridge, both of which can be accessed by stairs on either side.
- Sentry Ledge: Near the Checkpoint is a small ledge on the wall of the main building, this is an extremely common spot for sentry nests.
- Alcove: Underneath a ledge on the Main Building is a small alcove which is indented into the wall of the building. This is also a very common spot for Sentry Guns.
- Goldrush2b.jpg
Stage B, Checkpoint 2
- Goldrush22choke.jpg
Choke Area
- Goldrush22houses.jpg
Main Building
- Goldrush22sniperdeck.jpg
Battlements
Stage C
Stage C contains 3 checkpoints that BLU must reach.
Checkpoint 1
From the BLU spawn exits the cart starts out on a track which must run straight, up through a basin where then the checkpoint is located under an open gateway.
- Tunnel: The tunnel is one of the BLU spawn entrances. It winds out from the BLU spawn and exits out under the Truck House.
- Basin: The Basin is the area which runs through and below the platform and Truck House.
- Truck House: The Truck House is the area located across from the platform. It is a small shack with a deck overlooking the track. Next to it is an underpass which houses a large truck.
- Platform: Across from the Truck House is a platform which overlooks the track. It has a small inaccessible shack on it which is useful for cover.
- Goldrush3a.jpg
Stage C, Checkpoint 1
- Goldrush31truck.jpg
Truck House
- Goldrush31valley.jpg
Basin
Checkpoint 2
From the checkpoint the track runs straight through and alleyway surrounded by buildings on both sides.
- Dropdown: The drop down is a small opening in the wall right next to the checkpoint. It serves as an entry way for RED before BLU has captured the checkpoint.
- Hallway: The hallway is located in one of the two buildings. It is a long narrow hallway with an entrance at both far sides. At the very far end is a drop down next to the track.
- Main Deck: Across from the Hallway building is another building with a deck along the wall. This can be accessed through a set of stairs in front of it and connects to another small deck which overlooks the second checkpoint.
- Sentry Decks: On both sides of the second checkpoint are two large decks which are both common spots for Sentry Guns.
- Goldrush3b.jpg
Stage C, Checkpoint 2
- Goldrush32dropdown.jpg
Dropdown
- Goldrush32house1.jpg
Main Deck
- Goldrush32sentrydecks.jpg
Sentry Decks
Checkpoint 3
From checkpoint 2 the cart runs through more buildings until reach the checkpoint which gives entry way to RED's final yard. Reaching Checkpoint 3 means victory for BLU, as well as a nice massive explosion to satisfy the victors.
- Chokepoint: The chokepoint is the very small entry way into RED's final yard. It is an infamous chokepoint for being extremely cramped when the cart is residing inside it and heavy spam makes entry very difficult.
- Chute: The chute is a dropdown by the chokepoint which exits out into the tunnels.
- House: The House is located next to the chokepoint. It is connected by a ledge along a wall, and has a dropdown which exits out behind the truck in RED's final yard.
- The Tunnels: The tunnels are located at the bottom of the chute and exit out into the valley. It is comprised of two tunnels, one of which goes up a ledge and exits out a small ledge next to the other
tunnel's exit.
- Valley: The valley is the area next to and below RED's yard. It is accessed by a long set of stairs and gives access to the tunnels and Sniper Deck.
- Sniper Deck: The Sniper Deck is located above the valley and overlooks RED's yard. There are two windows used as vantage points and a drop down with a ledge that weaves around to the final checkpoint.
- Battlements: The battlements are located above the checkpoint area and overlook the entire area. One entry way is from the winding staircases in RED's spawn and another is from jumping from the boxes and small roof across from the House's drop down area.
- Goldrush3c.jpg
Stage C, Checkpoint 3
- Goldrush33battlements.jpg
Battlements
- Goldrush33deck.jpg
Sniper Deck
- Goldrush33tunnels.jpg
The Tunnels
- Goldrush33valley.jpg
The Valley
Strategy
Update history
- Added Gold Rush.
- Fixed map exploits in Gold Rush.
- Some changes to the second part of the first stage of Gold Rush to give the attackers more of an advantage.
- Stage 1
- Fixed overlapping train track models
- Fixed terrain seam by red spawn exit
- Fixed red spawn room door going through ceiling
- Light fixture on roof structure of red's first spawn building switched to non-solid
- Stage 2
- Added func_nobuild under bridge that would get teleported players stuck
- Stage 3
- Added invisible func_brushes above roofs to block blind demo grenade spam
- Fixed wood structure by main gate entrance so it doesn't destroy teleport buildables
- Added clip brush to top of main gate entrance
- Extended red's respawn room brushes to enclose entire interior
- Added respawn visualizer material to back face of blocker that prevents red from entering blue's respawn area from the top route
External links
| ||||||||||||||||||||
