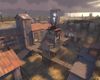
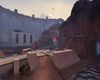
List of maps
Initially, Team Fortress 2 launched with six maps (Dustbowl, Granary, Gravel Pit, Well, 2Fort, and Hydro) with three game modes (CP, CTF, TC). Currently, there are 39 official maps with seven different game modes (CP, CTF, TC, PL, ARENA, PLR, KOTH). Community maps (identified by italics) are user-developed maps that were officially chosen by Valve due to their outstanding quality. See Custom Maps for information on unofficial maps.
Contents
Capture the Flag


| “ | Wave goodbye to ya secret crap, dumbass!
Click to listen
— The Scout
|
” |
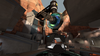
Capture the Flag maps carry the ctf_ prefix. Capture the Flag features both RED and BLU with their own Intelligence briefcase (known as the flag) and each team must capture their enemy's Intelligence continuously until they have reached the game's capture limit (default limit is 3) whilst preventing their enemy from achieving the same.
Both team's Intelligence are typically located deep within their territory, usually in a symmetrical location between each other, in an area known as the 'Intelligence Room'. To take the Intelligence the player must touch their enemy's Intel. Whilst holding the enemy's Intelligence, the player must bring it to the location of their Intelligence where they must enter their 'capture zone', indicated by the yellow and black lines, in order to make a successful capture. After each successful capture, your team will be rewarded with ten seconds of crit boost.
If the Intelligence carrier is killed or the Intelligence is intentionally dropped, the Briefcase will remain stationary for 60 seconds, with a timer shown above the Intelligence indicating how much time is left before it is returned to the Intelligence room. During that time the Intelligence can be re-captured by walking over it in the same fashion of capturing it at its starting location. Each time the Intelligence is dropped, the timer is reset. The enemy cannot move or reset the intelligence themselves. The intelligence cannot be carried by players with an invulnerability buff (i.e. Übercharged players, Scouts under the effects of Bonk! Atomic Punch) and intelligence carriers cannot receive an invulnerability buff.
If the intelligence carrier dies in a normally inaccessible part of the map (i.e. falling into a pit) the Intelligence is immediately returned to its starting location in the Intelligence room. If no team completes the capture limit before time runs out, the match will enter Sudden death mode.
Unlike variants of Capture the Flag in other games, you can make a capture without actually having your Intelligence at your base.
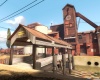
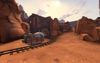
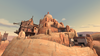
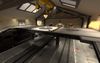
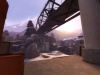
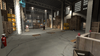
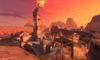
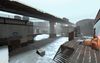
Capture the Flag maps
| Map | File Name | Setting(s) | |
|---|---|---|---|
|
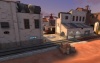
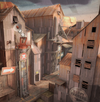
2Fort | ctf_2fort | Farmland |
|
Double Cross | ctf_doublecross | Alpine/Industrial |
| 100px | Sawmill | ctf_sawmill | Alpine |
| 100px | Turbine* | ctf_turbine | Industrial |
| 100px | Well | ctf_well | Industrial |
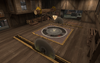
Control Point

See also: Control points
Control point maps carry the cp_ prefix and have two main types of game modes.
Control points are circular platforms with a team-colored light in the center (neutral points will have a white light). To capture a point owned by the enemy team, the player simply stands on the point until the capture meter fills with your team color. The more people of the same team on a point, the faster it will capture, though only to a limited extent. Scouts and those wielding a Pain Train count as 2 players when capturing points. No capture progress will be made when players of both teams are on the point. If all the capturing players are killed or driven off before the capture is completed, the capture progress will not reset immediately but instead will slowly fade away.
There are three statuses for a Capture Point:

Neutral: The Point can be taken by either team (usually the central pont in a standard CP map)

Captured: The Point is currently owned by one team but can be retaken by the other

Locked: The Point is currently owned by one team and cannot be retaken


There are two main types of control point maps – Standard Control Point and Attack/Defend maps:
Standard Control Point
Standard Control Point (or Linear Control Point) maps play symmetrically. Both teams start with an equal number of two controlled points and a central point starts out controlled by neither team. The team that captures all the points wins. Traditional Control Point maps will go into Sudden death (or Stalemate) if no team captures all the points before times runs out. Control points close to a team's spawn point are captured more quickly by the enemy team.
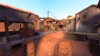
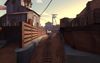
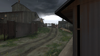
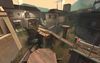
Standard Control Pont maps
| Map | File name | Setting(s) | |
|---|---|---|---|
|
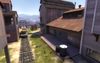
Badlands | cp_badlands | Desert |
| 100px | Coldfront* | cp_coldfront | Alpine |
|
Fastlane* | cp_fastlane | Desert |
|
Freight* | cp_freight_final1 | Industrial |
|
Granary | cp_granary | Farmland |

|
Well | cp_well | Industrial |
| 100px | Yukon* | cp_yukon_final | Alpine |
Attack/Defend
Attack/Defend maps play asymmetrically. [[[RED]] begins with all the points in their control. BLU wins if it captures all of RED's points. Points may only be captured in a set order (though some maps, such as Gravel Pit and Steel, may make exceptions). RED wins if it prevents BLU from capturing all points before the timer expires. Points captured by BLU are typically locked and cannot be taken back.
Attack/Defend maps can come in various styles. Some maps such as Dustbowl, and Egypt require BLU, the attacking team, to go through multiple stages before they can ultimately win the map. If the attacking team fails to win each stage, teams will switch and the defenders will then take turn to be the attackers. Other maps such as Gravel Pit and Junction, allow the attacker to capture two points in no particular order (points A or B) before attacking the final point (point C). Steel is a unique Attack/Defend map in that capturing each minor capture point (points A,B,C and D) will allow better accessibility to the main point (point E), such as allowing more routes into point E or extending bridges to the point so that classes other than the Scout, Soldier or Demoman can capture it.
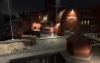
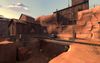
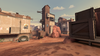
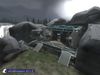
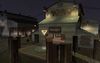
Attack/Defend maps
| Map | File name | Setting(s) | |
|---|---|---|---|

|
Dustbowl | cp_dustbowl | Desert/Industrial |
|
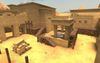
Egypt* | cp_egypt_final | Desert/Egyptian |
|
Gorge | cp_gorge | Alpine |
|
Gravel Pit | cp_gravelpit | Industrial |
|
Junction* | cp_junction_final | Spytech |
|
Steel* | cp_steel | Industrial |
Territorial Control

Territorial control maps carry the tc_ prefix. In Territorial control maps the goal is to take over the entire map by capturing 'territories'. Each game is randomly selected from the six available layouts in a 'point against point' game where both teams must capture the opposite point while preventing their own. After a team successfully captures their opposite point, the next round takes place in a different area of the map which is also randomly generated. After a team captures all four territories, the offending team must now capture the enemy team's base while the other defends it. If the base point is captured the team wins the round, the offending team loses their closest point to the base (in Hydro, the Radar Dish for RED, The Power plant for BLU). When the next round begins, territories are reset and a new random game is selected.
In any game in TC (except in RED/BLU base games), if a point is not captured within the eight minute time clock, the game then will go into Sudden Death mode.

Territorial Control maps
| Map | File name | Setting(s) | |
|---|---|---|---|
|
Hydro | tc_hydro | Industrial |
Payload

| “ | Onward, great bomb-cart!
— The Heavy
|
” |
Payload maps carry the pl_ prefix. In Payload maps, BLU team must escort a cart full of explosives through a series of checkpoints and into RED's base within a certain amount of time. BLU team members move or 'push' the cart by standing next to it - the more people nearby the cart, the faster it moves. Any RED team member standing near the cart will stop it from venturing further. If no BLU player pushes the cart after 30 seconds have passed, the cart will start moving backwards slowly until it reaches a checkpoint/BLU spawn or a BLU player stands next to it again. The cart works as a level 1 Dispenser for BLU team (and disguised enemy spies) to restore health and ammunition to those pushing it.
Payload maps may or may not be split into multiple rounds. Some maps traditionally have one-way routes from the BLU side, sometimes closed off until a specific point is taken.
Some maps such as Gold Rush, Hoodoo and Thunder Mountain are split in three stages that BLU must advance through and win. Stages one and two have 2 checkpoints and stage three has 3 checkpoints (2 for Hoodoo) , counting the final point as such. Badwater Basin and Upward maps have a single round with 4 checkpoints, counting the final point as such. Advancing the cart to the next checkpoint gives the BLU team extra time. Advancing it to the final point moves the map onto the next stage. When the cart reaches the final point on the final stage, the payload explodes and destroys RED base, symbolizing BLU's victory.
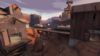
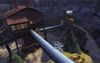
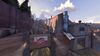
Payload maps
| Map | File name | Setting(s) | |
|---|---|---|---|
|
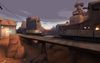
Badwater Basin | pl_badwater | Desert |
|
Gold Rush | pl_goldrush | Desert |
|
Hoodoo* | pl_hoodoo_final | Desert |

|
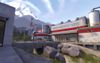
Thunder Mountain | pl_thundermountain | Alpine |
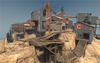
|
Upward | pl_upward | Desert |
Payload Race

Payload Race maps carry the plr_ prefix. Unlike standard Payload maps, Payload race maps feature both RED and BLU issued with a cart, thus teams are not defined to a attacking or defending role. To win, each team must simultaneously push their cart through enemy territory to reach the finishing point while preventing the enemy team from doing the same. As with Payload mode, team members push the cart by standing next to it, with more members increasing the speed of the cart and any opposing team member standing near the cart will stop it.
Unlike payload mode, the cart will not move backwards after any duration of time and there is no time limit; the map will only end when one team succesfully pushes their cart to the finish point. Each cart works as a dispenser for their team (and disguised enemy spies), restoring health and ammunition to those pushing the cart. Parts of the track may feature slopes, on which the cart will quickly roll back down to the bottom unless it is being constantly pushed.
Payload race maps may or may not be split into multiple rounds.
Payload race maps
| Map | File name | Setting(s) | |
|---|---|---|---|
|
Hightower | plr_hightower | Desert |

|
Pipeline | plr_pipeline | Industrial |
Arena

| “ | I say this to you with the unvarnished factualism of plain talk: I love Arena Mode.
— - Abraham Lincoln, Second Inaugural Address, 1865
|
” |
Arena maps carry the arena_ prefix and are designed to keep the class diversity of Team Fortress 2 while focusing goals around combat between two teams. Whereas other game modes lean towards a broad, overall strategy for the team, Arena concentrates on the specific tactical choices the teams make in a single fight. Arena maps carry the arena_prefix.
Arena features smaller maps that play out for shorter periods of time. The round ends once one team has no players left in the arena, or when the central capture point has unlocked and been captured. The central capture point unlocks after one minute has passed in the current round. Rounds tend to be very fast and highly competitive, with an emphasis on your team's class makeup and your plan to counter the opposing team's class choices. Arena mode is suitable for smaller matches of three vs. three players, while still comfortably supporting huge knockdown twelve-on-twelve brawls. Arena works much like Sudden Death - respawning is disabled and there are no resupply lockers. There are usually very few health kits available, often located far from the main action and/or near high-risk hazards. This forces teams to rely more on dispensers and Medics.
Players may have to sit out to balance keep team numbers equal if they were on the losing team, but players on the winning team never have to sit out the next round.
The First blood critical buff is unique to the Arena game mode.
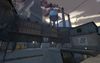
Arena maps
| Map | File name | Setting(s) | |
|---|---|---|---|
|
Badlands | arena_badlands | Desert |
|
Granary | arena_granary | Farmland |
|
Lumberyard | arena_lumberyard | Alpine |
| 100px | Nucleus | arena_nucleus | Spytech |
|
Offblast* | arena_offblast_final | Desert |
|
Ravine | arena_ravine | Desert |
|
Sawmill | arena_sawmill | Alpine |
|
Watchtower* | arena_watchtower | Alpine |
|
Well | arena_well | Industrial |
King of the Hill
| “ | Since their discovery in 1895, hills have fascinated kings.
— The Classless Update
|
” |

King of the Hill maps carry the koth_ prefix and is similar to Arena. King of the Hill focuses on a single control point at the center of the map, which is unowned and locked at the beginning of the round. Teams must make their way to the Control Point and capture it when it becomes available. Once the point is captured by a team, their team clock will start a three minute countdown. If the enemy team manages to capture the point back, their clock will start counting down while the other team’s clock freezes at the time the point was recaptured. A team wins once they own the point and their three minutes is exhumed.
King of the Hill maps
| Map | File name | Setting(s) | |
|---|---|---|---|
| 100px | Harvest / Harvest Event* | koth_harvest_final / koth_harvest_event |
Farmland |
|
Nucleus | koth_nucleus | Spytech |
|
Sawmill | koth_sawmill | Alpine |
|
Viaduct | koth_viaduct | Alpine |
Other modes
Training
Training maps carry the tr_ prefix.
| Map | File name | |
|---|---|---|
| 100px | Dustbowl | tr_dustbowl |
|
Target | tr_target |
Highlander
| “ | There can be only one.
— Highlander
|
” |
Applicable to all existing game modes, Highlander mode restricts the maximum players to 18, with 9 players allowed to each team and only 1 player for each class. Highlander mode can be activated by entering mp_highlander 1 into the console.
Custom Maps
see Category:Custom Maps for more information on Custom Maps
| Image | Name | File Name | Game Mode | Theme |
|---|---|---|---|---|
| 100px | 1fort | ctf_1fort | Capture the Flag | Alpine |
| 100px | Alaska | ctf_alaska_b5 | Capture the Flag | Snow |
|
Atrophy | Capture the Flag | Alpine | |

|
Converge | Capture the Flag | Alpine | |
| 100px | Convoy | Capture the Flag | Desert | |
|
Deliverance | ctf_deliverance_b3 | Capture the Flag | Alpine |
|
Frontier | pl_frontier | Payload | Industrial |
|
Furnace Creek | cp_furnace_rc | Control Points | Desert |
|
Fusion | ctf_fusion_b1 | Capture the Flag | Snow |
|
Moonshine | koth_moonshine | King of the Hill | Swamp |
| 100px | Nightfall | plr_nightfall_b1c | Payload Race | Alpine |
|
Waste | pl_waste | Payload | Industrial |
|
Wildfire | ctf_wildfire_rc | Capture the Flag | Industrial |