Difference between revisions of "Gold Rush/zh-hans"
m (→第二检查点) |
m (→第二检查点) |
||
| Line 72: | Line 72: | ||
* '''水渠''':在红队出生点和蓝队进入的建筑之间的开阔区域中,有一条(小型)峡谷状水渠横穿区域。其右侧为缓缓上升的土坡路,最终于地面齐平。其左侧有一架小梯子,为回到隧道提供了捷径。在水渠中间有一座木桥横跨水渠,为双方玩家提供了直接推进的选择。战车绕水渠而行最终向右转进入检查点。 | * '''水渠''':在红队出生点和蓝队进入的建筑之间的开阔区域中,有一条(小型)峡谷状水渠横穿区域。其右侧为缓缓上升的土坡路,最终于地面齐平。其左侧有一架小梯子,为回到隧道提供了捷径。在水渠中间有一座木桥横跨水渠,为双方玩家提供了直接推进的选择。战车绕水渠而行最终向右转进入检查点。 | ||
| − | * '''二楼''': | + | * '''二楼''': 在第一检查点的隧道咽喉处附近,有一到座从右到左一直延伸到边界的双层结构建筑。该建筑被玩家称为'''二楼'''。在一楼,建筑左侧(红队视角)有一个出口,战车从此进入第二检查点区。其上有一扇从二楼开启的窗户,其右边是一条木板路连接着二楼和左侧房间。左侧房间内有一个出口,连接着一个离检查点很近的小平台。进入隧道后,红队可以向左沿着战车轨道回到第一检查点,也可以向右走沿着上层轨道方向,此处有一个大医疗包,继续向右进入建筑。对于进攻方来说此处的通道至关重要,此处的出口都距离检查点很近而且还有掩体提供掩护。 |
| − | *'''狙击高台''' | + | *'''狙击高台''':在第一检查点被占领时,通往左侧小隧道的铁门将开启,使蓝队玩家可以进入这个小隧道。小隧道的尽头是一个房间,内有中医疗包。房间内有一条通往狙击平台的楼梯。狙击平台位于水渠之上,此处为狙击手狙击的绝佳点位,在此处可以看到水渠和其周围的一切。 |
| − | *'''矿道''' | + | *'''矿道''': Running parallel to the RED spawn on the right side of the map is the Mine Shaft, a small narrow tunnel with tracks running through it. The Mine Shaft directly connects the Red exit with the final checkpoint offering Reds a faster route if they wanted to reach the Attic. |
RED can set up on this platform during the pre-game wait. A RED Engineer can place a Teleporter at spawn, refills his metal, and then place a Dispenser at the edge of the platform. Once the Dispenser is 60% complete, the RED Engineer can jump on the Dispenser and then place a Teleporter exit on the platform. Note the RED Engineer cannot physically jump up, only be holding the Teleporter PDA as he jumps. Once the Teleporter exit is up and running, RED can set up Sentry Guns and Dispensers in an attempt to deny BLU access and to flank BLU. | RED can set up on this platform during the pre-game wait. A RED Engineer can place a Teleporter at spawn, refills his metal, and then place a Dispenser at the edge of the platform. Once the Dispenser is 60% complete, the RED Engineer can jump on the Dispenser and then place a Teleporter exit on the platform. Note the RED Engineer cannot physically jump up, only be holding the Teleporter PDA as he jumps. Once the Teleporter exit is up and running, RED can set up Sentry Guns and Dispensers in an attempt to deny BLU access and to flank BLU. | ||
Revision as of 08:05, 15 November 2023
| 此页面正在被翻译成简体中文。 如果您能熟练地运用简体中文,请在讨论页上留言或与为此页面贡献的作者讨论(通过浏览页面历史)。 |
| Gold Rush | |
|---|---|

| |
| 基本信息 | |
| 开发者: | {{{map-developer}}} |
| 地图资料 | |
| 环境: | 沙漠 |
| 设定: | 白昼,晴天 |
| 地图照片 | |
| “ | Gold Rush是一张注重于节奏的地图,该特点会使在这张地图上游玩的玩家感到整个队伍在作为一个整体在行动。双方队伍的玩家都需要在推进/停止战车上竭尽全力的同时还要想怎么面对眼前的敌人。随着战车进度的变化,双方队伍都需要根据对方采取的行动决定下一步战略。Gold Rush在设计时考虑到了军团要塞2九个兵种的全部能力,这意味着在这张地图上每个兵种都有其利好的点位,也都可以大放异彩。
— 淘金热更新
|
” |
Gold Rush(也可称为Goldrush)是一张推车模式地图,同时也是第一张被加入到游戏中的推车模式地图。该地图分为三个相连的阶段,每个阶段都有多个检查点。
每阶段剩余的时间会延续到下一阶段,最高叠加到9分钟。叠加的时间会在互换队伍后清零。每回合开始都有1分05秒的准备时间。
介绍视频
位置
第一阶段
第一检查点
被占领后增加的时长:5分钟30秒
在蓝队出生点和第一检查点中间隔着一段延绵且相对比较开阔的区域。战车起始于蓝队出生点门口并朝着小屋的方向前进。一开始战车沿着悬崖行进,然后会稍微向左转上到一条木制上坡路上,之后会向右转,进入小路。
- 蓝队出生点:蓝队出生点由一个补给区域和一条由三个出口的走廊组成。战车起点后方有两扇门组成的大型出口,且该出口能被该区域大部分位置看到。右侧的门在前方有箱子堆阻碍视线,红队可以利用这个盲区躲在蓝队视野之外并在开局时用火焰兵和超能冲锋的配合来偷袭,在使用此战术时可以等对方医生的超能冲锋结束后再出击来消灭更多敌人。蓝队也可以躲在这堆箱子后方偷袭,尤其是在战斗进入白热化后,红队很难注意你的去向。左侧的出口面朝右边,其门口有矮墙作为掩体可以不受上坡路敌人的干扰,其左侧在山崖处有岩石作为掩体使其不受小屋处敌人的火力影响。
- 上层轨道:在蓝队视角看此处轨道是沿着左侧行进的并一路前进到检查点和隧道处。红队在防守时,尤其是爆破手和士兵可以沿着这里一直向下方的进攻者倾泻火力。蓝队进攻者可以从山崖上蹲跳到此处。因为此处附近有大弹药箱,进攻性强的红队工程师也可以快速在轨道尽头处或蓝队基地附近建造一个2-3级的步哨。
- 山崖:这里其实并不真正意义上是个“山崖”,但是从蓝队视角来看就像是地面缓缓升起然后再一落千丈,所以在蓝队视角看起来有点像个小山崖。在山崖旁边有一条“裂谷”,此处为战车轨道经过处。红队可以在山崖后方藏火焰兵,步哨枪甚至是超能冲锋来偷袭蓝队。在山崖左后方有一个大医疗包。在此处,爆破手可以直接黏弹跳到小路入口处(如果加以练习可以精确落到医疗包处)。
- 小屋:小屋位于地图的右侧。其内部分为两层,且有一个面对蓝队出生点的阳台。一层的其中一个入口正面对着出生点且外面有一个大弹药箱,还有一个入口面对着轨道。小屋是狙击手的优质狙击点,在此处可以轻松解决掉从正门出来尝试推车的蓝队玩家。工程师也可以在顶层建造步哨,因为这里不仅可以覆盖到第一检查点区域还可以不受蓝队出生点内的火力影响。需要注意的是,蓝队的爆破手在经过一些练习后也可以直接精确落到阳台上。
- 隧道:战车需要从该区域左侧进入第二检查点区域。在第一检查点被占领前,此处是进入地图后半部分的唯一途径。此处也是该阶段重要的咽喉处部分。
- Goldrush1a.jpg
第一阶段的第一检查点
- Goldrush11cliffs.jpg
山崖
- Goldrush11house.jpg
小屋
- Goldrush11tunnel.jpg
隧道
第二检查点
被占领后增加的时长:4分钟
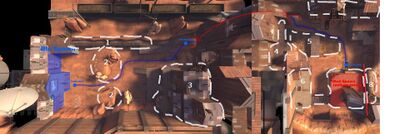
战车从上文提到的隧道穿过后会经历一段“S”型转弯然后就进入到开阔的第二检查点区域。在这里,战车沿着水渠行进然后经过一个小桥后向右转便是第二检查点。第二检查点位于红队出生点后方。下文将以红队视角描述位置。
- 红队出生点:红队基地出口处可选择向左进入矿道然后直接到检查点旁也可以向右到一片更开阔的区域,直面来自第一检查点区的敌人。此处设置有楼梯,可通往红队高台。红队的出生点面朝土墙,所以必须进行一个180°转弯才能直面进攻方。从进攻方视角看,检查点正位于红队出生点之前。
- 红队高台:红队出生点右侧(如果面对进攻方就是左侧)有一个高台抵着地图左侧的高墙分布。在平台偏前方有弹药箱和医疗包分布,使得此处成为绝佳的步哨枪点位,在此处建造步哨枪能直接覆盖到刚从隧道里出来的战车。平台上还有一座小桥连接到红队出生点屋顶,此处是狙击手的优质点位,在此处可以轻松狙击在隧道战车附近的敌人。
- 水渠:在红队出生点和蓝队进入的建筑之间的开阔区域中,有一条(小型)峡谷状水渠横穿区域。其右侧为缓缓上升的土坡路,最终于地面齐平。其左侧有一架小梯子,为回到隧道提供了捷径。在水渠中间有一座木桥横跨水渠,为双方玩家提供了直接推进的选择。战车绕水渠而行最终向右转进入检查点。
- 二楼: 在第一检查点的隧道咽喉处附近,有一到座从右到左一直延伸到边界的双层结构建筑。该建筑被玩家称为二楼。在一楼,建筑左侧(红队视角)有一个出口,战车从此进入第二检查点区。其上有一扇从二楼开启的窗户,其右边是一条木板路连接着二楼和左侧房间。左侧房间内有一个出口,连接着一个离检查点很近的小平台。进入隧道后,红队可以向左沿着战车轨道回到第一检查点,也可以向右走沿着上层轨道方向,此处有一个大医疗包,继续向右进入建筑。对于进攻方来说此处的通道至关重要,此处的出口都距离检查点很近而且还有掩体提供掩护。
- 狙击高台:在第一检查点被占领时,通往左侧小隧道的铁门将开启,使蓝队玩家可以进入这个小隧道。小隧道的尽头是一个房间,内有中医疗包。房间内有一条通往狙击平台的楼梯。狙击平台位于水渠之上,此处为狙击手狙击的绝佳点位,在此处可以看到水渠和其周围的一切。
- 矿道: Running parallel to the RED spawn on the right side of the map is the Mine Shaft, a small narrow tunnel with tracks running through it. The Mine Shaft directly connects the Red exit with the final checkpoint offering Reds a faster route if they wanted to reach the Attic.
RED can set up on this platform during the pre-game wait. A RED Engineer can place a Teleporter at spawn, refills his metal, and then place a Dispenser at the edge of the platform. Once the Dispenser is 60% complete, the RED Engineer can jump on the Dispenser and then place a Teleporter exit on the platform. Note the RED Engineer cannot physically jump up, only be holding the Teleporter PDA as he jumps. Once the Teleporter exit is up and running, RED can set up Sentry Guns and Dispensers in an attempt to deny BLU access and to flank BLU.
The other connecting passage is to BLU's far right and leads to two open levels right next to The Ditch. From these levels, you look across to the right of the level (RED's perspective) and you can only see a small part of the second level of RED's Spawn. This lets you rain down fire on anyone taking the bridge over the ditch or anyone in the open space. Be careful because even though The Ditch prevents anyone from walking back into this area, Soldiers and Demomen can rocket jump/sticky jump up, while Scouts can double jump up to surprise you.
- Goldrush1b.jpg
第一阶段的第二检查点
- Goldrush12house.jpg
二楼
- Goldrush12upper.jpg
红队高台
- Goldrush12valley.jpg
水渠
1.上层轨道
2.山崖
3.小屋
4.狙击高台
5.水渠
6.红队高台
7.二楼
8.矿道
第二阶段
第一检查点
被占领后增加的时长:4分钟30秒
The cart starts out in front of a trench which separates BLU's spawn area and the battlefield. The cart runs between the Watchtower and House and then over the Bridge where the checkpoint is then located.
- BLU Spawn: There are two exits, one tunnel exit on the left and one double gate on the right. The right one is usually used for ÜberCharges while the left one is used to flank RED. From the left exit, it is easy for a Spy to sneak behind the lines. Be careful, though, as sometimes at the start of the match, an ÜberCharged Pyro enters the left exit, usually killing everything in the tunnel.
- House Tunnel: In the tunnel on the left side of house from BLU's view, a large Ammo Pack and a small health kit can be found. From the tunnel on the left, there are stairs leading to the Sniper Ledge.
- The Sniper Ledge: On the right where RED enters the first checkpoint area, there is a small set of stairs leading to the Sniper Ledge. As its name indicates, it is often used by Snipers. Some boxes and the small hut, which also has a medium health kit, provide cover.
- Watchtower: On the right from the BLU Spawn, the Watchtower can be seen after going through the gates. Most of the RED defenders are here, since they have a height advantage, and there is a large ammo pack and a medium health kit. From its watchtower, Snipers can overlook both exits. Sentry Guns are often located here.
- The Bridge: Just before the final stretch of track to the first checkpoint is a bridge which connects over the ditch.
- The House: The House is located to the left from the perspective of BLU. It has one exit and two windows which RED can shoot through. Sometimes, Sentry Guns are placed on the windows or Demomen guard it.
- Goldrush2a.jpg
Stage 2, Checkpoint A
- Goldrush21house.jpg
The House
- Goldrush21housetunnel.jpg
House Tunnel
- Goldrush21sniperdeck.jpg
The Sniper Ledge
第二检查点
被占领后增加的时长:4分钟
After the first checkpoint the cart winds through a building which separates the next battlefield. It exits out to a chokepoint area and then runs under a bridge separating the Main Building and then finally onto the next checkpoint.
- The Choke: The Choke area is an open area positioned in between the Main buildings and the Battlements
- The Final Area: The Final Area is an area positioned in between the main buildings and the Red spawn.
- Battlements: The battlements are located at the far end of the area from RED's spawn. It connects from the house above Checkpoint 1's building. There are two drop-downs which can be used by attackers as another entry or as an entry way for RED Soldiers or Demomen.
- Main Building: The Main Building is situated in the center of the area, cutting Checkpoint 2's battlefield in half. The Main Building has two houses which are connected by a bridge, both of which can be accessed by stairs on either side. It can be said that the Main Building is positioned in between the Choke Area and the Final Area.
- Sentry Ledge: Near the Checkpoint is a small ledge on the wall of the main building, this is an extremely common spot for sentry nests.
- Alcove: Underneath a ledge on the Main Building is a small alcove which is indented into the wall of the building. This is also a very common spot for Sentry Guns.
- RED spawn: The RED spawn is on the opposite side of Checkpoint 2. The RED team can either go left or right to reach nearby Checkpoint 2 (As well as Sentry Ledge on Right pathway, and Alcove on the left pathway). The spawn room itself is slightly different from the first RED spawn, as it only has one resupply cabinet. As usual, there is one central exit in front of the players, making this type of spawn vulnerable to spawn camping. Players need to turn 180 degrees so they face forward towards the incoming enemy.
- Goldrush2b.jpg
Stage 2, Checkpoint B
- Goldrush22choke.jpg
Choke Area
- Goldrush22houses.jpg
Main Building
- Goldrush22sniperdeck.jpg
Battlements
1.Watchtower
2.House
3.Bridge
4.Snipers Deck
5.Battlements (Above the tunnel)
6.Main Buildings
7.Sentry Decks
第三阶段
第一检查点
被占领后增加的时长:3分钟30秒
From the BLU spawn exits the cart starts out on a track which must run straight, up through a basin where then the checkpoint is located under an open gateway.
- Tunnel: The tunnel is one of the BLU spawn entrances. It winds out from the BLU spawn and exits out under the Truck House.
- Basin: The Basin is the area which runs through and below the platform and Truck House.
- Truck House: The Truck House is the area located across from the platform. It is a small shack with a deck overlooking the track. Next to it is an underpass which houses a large truck.
- Platform: Across from the Truck House is a platform which overlooks the track. It has a small inaccessible shack on it which is useful for cover.
- Goldrush3a.jpg
Stage 3, Checkpoint A
- Goldrush31truck.jpg
Truck House
- Goldrush31valley.jpg
Basin
第二检查点
被占领后增加的时长:4分钟30秒
From the checkpoint, the track runs straight through an alleyway surrounded by buildings on both sides.
- Dropdown: The drop-down is a small opening in the wall right next to the checkpoint. It serves as an entryway for RED before BLU has captured the checkpoint.
- Hallway: The hallway is located in one of the two buildings. It is a long narrow hallway with an entrance on both far sides. At the very far end is a drop down next to the track.
- Main Deck: Across from the Hallway building is another building with a deck along the wall. This can be accessed through a set of stairs in front of it and connects to another small deck which overlooks the second checkpoint.
- Sentry Decks: On both sides of the second checkpoint are two large decks which are both common spots for Sentry Guns.
- Goldrush3b.jpg
Stage 3, Checkpoint B
- Goldrush32dropdown.jpg
Dropdown
- Goldrush32house1.jpg
Main Deck
- Goldrush32sentrydecks.jpg
Sentry Decks
第三检查点
From checkpoint 2 the cart runs through more buildings until it reaches the checkpoint in RED's final yard.
- Chokepoint: The chokepoint is the very small entry way into RED's final yard. It is an infamous chokepoint for being extremely cramped when the cart is residing inside it and heavy spam makes entry very difficult.
- Chute: The chute is a dropdown by the chokepoint which exits out into the tunnels.
- House: The House is located next to the chokepoint. It is connected by a ledge along a wall and has a dropdown which exits out behind the truck in RED's final yard. BLU Engineers sometimes build forward bases in here.
- The Tunnels: The tunnels are located at the bottom of the chute and exit out into the valley. It is comprised of two tunnels, one of which goes up a ledge and exits out a small ledge next to the other tunnel's exit.
- Valley: The valley is the area next to and below RED's yard. It is accessed by a long set of stairs and gives access to the tunnels and Sniper Deck.
- Sniper's Deck: The Sniper's Deck is located above the valley and overlooks RED's yard. There are two windows used as vantage points and a drop down with a ledge that weaves around to the final checkpoint.
- Battlements: The battlements are located above the checkpoint area and overlook the entire area. One entry way is from the winding staircases in RED's spawn and another is from jumping from the boxes and small roof across from the House's drop down area.
- RED Spawn #1: The RED team has two separate spawn regions for Stage 3. The first spawn room is located to the left of C, with two exits, one being a shortcut to checkpoint A, and the other a small door to C. The shortcut to A locks when A is capped by BLU.
- RED Spawn #2: The second RED spawn is located behind and to the right of point C. It is a long vertical shaft, with players spawning at the bottom of the shaft. The main exit to the left leads to a slope behind C, but players can access battlements by using the winding staircase up the shaft.
- Goldrush3c.jpg
Stage 3, Checkpoint C
- Goldrush33battlements.jpg
Battlements
- Goldrush33deck.jpg
Sniper Deck
- Goldrush33tunnels.jpg
The Tunnels
- Goldrush33valley.jpg
The Valley
1.Platform
2.Basin
3.Truck House
4.Hallway
5.Main Deck
6.Sentry Deck
7.Chokepoint
8.Valley
9.Battlements
10.Sniper's Deck
11.House
与Gold Rush有关的图片
战术
 | “孙武没告诉咱们该咋做!” 这张地图的社区战术(英语)页面是个小条目,它的内容还有待完善。 你可以通过扩充它来为军团要塞官方维基的社区战术计划出一份力。 附注:未添加附注 |
更新历史
- Gold Rush 被添加到游戏中。
- 修复了Gold Rush上的多个漏洞
- 对第一阶段第二检查点区域做了一些调整,使其对进攻者更有利。
- 第一阶段
- 修复了一段重叠了的战车轨道模型。
- 修复了红队出生点出口的地形缝隙。
- 修复了红队出生点大门会穿过天花板的问题。
- 红队第一出生点屋顶的灯改为非实体。
- 第二阶段
- 在桥下增加了
func_nobuild区域来防止玩家在此处建造传送门卡住其他玩家。
- 在桥下增加了
- 第三阶段
- 在屋顶上方加了隐形的
func_brush区域来防止爆破手利用抛物线弹道攻击对面的敌人。 - Fixed wood structure by main gate entrance so it doesn't destroy teleport buildables.
- Added clip brush to top of main gate entrance.
- Extended RED's respawn room brushes to enclose entire interior.
- Added respawn visualizer material to back face of blocker that prevents RED from entering BLU's respawn area from the top route.
- 在屋顶上方加了隐形的
- Fixed collision on props and clip exploits.
- Fixed buildings being prohibited from construction in the garage near the end of stage 3.
- Players can no longer block the cart through the wall in stage.
- Players can no longer build in spawn exits.
- Players can no longer build on the shack roof near the end of stage 3.
- Players and buildings can no longer be killed through the floor in stage 1 in the upper room by the cap.
- Players can no longer build on the perch in stage 1.
- Handrails no longer collide with bullets and projectiles.
- Fixed an areaportal improperly rendering in
pl_goldrush.
- Added
nobuildarea under the train tracks to prevent teleport trap near BLU spawn in stage 1.
- Fixed an exploit related to the final control point and dropped weapons on Badwater Basin, Barnblitz, Borneo, and Gold Rush.
- [未记载] Added saucers and posters to Gold Rush.
- [未记载] Removed Saucers and Posters from all maps.
漏洞
- Players can camp RED's spawn on Stage 2 by firing pipes into the windows on the tower of the spawn.
- There is a spot near the main deck before Stage 3, Checkpoint B where Engineers can build a teleporter trap. As with any teleporter trap, the only escape is destroying the teleporter or dying/killing oneself.
- RED Engineers can build a teleporter in their final spawn on Stage 3, due to the
func_respawnroomentity not filling up the entire room. - On Stage 3, players can get stuck on the wooden frame exiting from the BLU tunnel to Basin. This is because part of the tunnel displacement extends into the wooden frame. The only way to escape is by dying.
- On Stage 3, If a RED player is in the spawn doorway of the tunnel that leads to Checkpoint A right as BLU caps, the player becomes stuck in the door. The player can switch classes to escape.
细枝末节
- Gold Rush's layout is very similar to that of Dustbowl. This is addressed in the Gold Rush Update page.
- This is also due to the fact that Gold Rush started out as a remake of Dustbowl, which was named Dustbowl 2.
外部链接
| ||||||||||||||||||||


