Difference between revisions of "Well (Control Point)"
m (Added Well6 to the "See also" section of the page.) |
BrazilianNut (talk | contribs) m |
||
| (17 intermediate revisions by 10 users not shown) | |||
| Line 1: | Line 1: | ||
| − | |||
| − | |||
{{Map infobox | {{Map infobox | ||
| − | |game-type=Control Point | + | | map-status = official |
| − | |file-name=cp_well | + | | map-game-type = Control Point |
| − | |map-image=TF2 Well Map.jpg | + | | map-file-name = cp_well |
| − | |map-environment = Industrial | + | | map-image = TF2 Well Map.jpg |
| − | |map-setting = Daylight, sunny | + | | map-released = {{Patch name|10|10|2007|date-only=yes}} |
| − | |map-deep-water = | + | | map-released-major = Launch |
| − | |map-hazards = [[Train]]s | + | | map-environment = Industrial |
| − | |map-health | + | | map-setting = Daylight, sunny |
| − | |map-health | + | | map-has-deep-water = yes |
| − | |map-ammo | + | | map-hazards = [[Train]]s |
| − | |map-ammo | + | | map-pickups-health-small = 6 |
| + | | map-pickups-health-medium = 5 | ||
| + | | map-pickups-ammo-small = 6 | ||
| + | | map-pickups-ammo-medium = 11 | ||
}} | }} | ||
{{Quotation|'''The Scout''' to a train victim|Ha ha! Look at you! You look like you ran through traffic!|sound=Scout_domination07.wav}} | {{Quotation|'''The Scout''' to a train victim|Ha ha! Look at you! You look like you ran through traffic!|sound=Scout_domination07.wav}} | ||
| − | '''Well''' is an official [[Control Point (game mode)# | + | '''Well''' is an official [[Control Point (game mode)#Symmetric|Standard Control Point]] map. |
There are three buildings, the first and last of which hold 2 [[control point (objective)|control points]]. The second building holds a neutral control point. The map is symmetrical from both sides of the center building. There are 6 [[train]] tracks - 2 in each yard and 2 going through the neutral building. Only the 2 in the neutral building actually have trains traveling on them. | There are three buildings, the first and last of which hold 2 [[control point (objective)|control points]]. The second building holds a neutral control point. The map is symmetrical from both sides of the center building. There are 6 [[train]] tracks - 2 in each yard and 2 going through the neutral building. Only the 2 in the neutral building actually have trains traveling on them. | ||
| − | Team Fortress 2's Well has many drastic changes from ''TFC'''s version, but keeps the two bases, [[Sniper]] ports, and the neutral building. | + | ''[[Team Fortress 2]]'s'' Well has many drastic changes from ''[[Team Fortress Classic|TFC]]'''s version, but keeps the two bases, [[Sniper]] ports, and the neutral building. |
== Introduction video == | == Introduction video == | ||
| Line 27: | Line 28: | ||
== Locations == | == Locations == | ||
| + | {{HelpfulOverviewNote}} | ||
=== Control Points 1 & 5 === | === Control Points 1 & 5 === | ||
| − | [[ | + | [[File:cpwell03.jpg|thumb|Final point.]] |
| + | |||
* '''Control Points''': The control points are on a raised circular platform in a large room, and behind it is the rear-most respawn of the point's corresponding team. | * '''Control Points''': The control points are on a raised circular platform in a large room, and behind it is the rear-most respawn of the point's corresponding team. | ||
* '''Exits''': The large room the point is situated in has two exits on each side of the wall opposite the respawn. Almost directly above these two exits are another two exits (one on each side) that quickly join together and lead to an area overlooking points 2 and 4. | * '''Exits''': The large room the point is situated in has two exits on each side of the wall opposite the respawn. Almost directly above these two exits are another two exits (one on each side) that quickly join together and lead to an area overlooking points 2 and 4. | ||
| − | * '''Catwalks''': Surrounding the room are the catwalks | + | * '''Catwalks''': Surrounding the room are the catwalks that run along the walls on the second floor level. These enter to from the command room overlooking the point and lead all the way around to an area behind the point and a balcony above the point. |
* '''Command Room''': The command room is the room that the entrances to the catwalks lead to. It contains many computer consoles and a large window which serves as a vantage point to the control point room. | * '''Command Room''': The command room is the room that the entrances to the catwalks lead to. It contains many computer consoles and a large window which serves as a vantage point to the control point room. | ||
<gallery widths=150px heights=90px> | <gallery widths=150px heights=90px> | ||
| − | well finalbattlements.jpg|Battlements overlooking last. | + | File:well finalbattlements.jpg|Battlements overlooking last. |
| − | well finalbattlementsroom.jpg|Command room overlooking the point. | + | File:well finalbattlementsroom.jpg|Command room overlooking the point. |
| − | well secondfloor.jpg|Second floor above point 2/4. | + | File:well secondfloor.jpg|Second floor above point 2/4. |
| − | well spawn.jpg|Initial spawn. | + | File:well spawn.jpg|Initial spawn. |
</gallery> | </gallery> | ||
=== Control Points 2 & 4 === | === Control Points 2 & 4 === | ||
| − | [[ | + | [[File:cpwell02.jpg|thumb|Second point.]] |
| + | |||
* '''Control Point''': Control Points 2 & 4 are the control points second closest to each team's forward [[respawn]] and are located inside the lower lobby of the corresponding team's building. It is accessible from two sides (the left and right), with the other two sides being a wall and a bulletproof glass window. These points have an average capture speed. | * '''Control Point''': Control Points 2 & 4 are the control points second closest to each team's forward [[respawn]] and are located inside the lower lobby of the corresponding team's building. It is accessible from two sides (the left and right), with the other two sides being a wall and a bulletproof glass window. These points have an average capture speed. | ||
| − | * '''Inner Lobby''': Next to the first forward spawn and behind the control point is the inner lobby. It has two entrances to the final point room and a set of stairs | + | * '''Inner Lobby''': Next to the first forward spawn and behind the control point is the inner lobby. It has two entrances to the final point room and a set of stairs that lead to a platform surrounding the area. On both sides of the platform are exits to the battlements. |
* '''Third Floor''': The third floor is the highest point of the building, there is a hole in the middle which drops down to the inner lobby. It is accessed from the battlements and has an entrance to the command room. | * '''Third Floor''': The third floor is the highest point of the building, there is a hole in the middle which drops down to the inner lobby. It is accessed from the battlements and has an entrance to the command room. | ||
* '''Swing Doors''': There are two entrances to each main base, which are called the swing doors. They are the only entrances to the main building and enter on both far sides of the complex. | * '''Swing Doors''': There are two entrances to each main base, which are called the swing doors. They are the only entrances to the main building and enter on both far sides of the complex. | ||
| − | * '''Well Room''': The well room is the room between the swing doors which has a drop down pipe to the | + | * '''Well Room''': The well room is the room between the swing doors which has a drop-down pipe to the waterways. |
| − | * '''Battlements''': The battlements are on the second floor of the base and have windows | + | * '''Battlements''': The battlements are on the second floor of the base and have windows that overlook the yard areas. There are four exits, two of which lead around to the inner lobby, one of which to the well room, and the other which leads up to the third floor drop down above the inner lobby. |
| − | * '''Yard''': Outside the | + | * '''Yard''': Outside the swing doors and between the main buildings and control point building is the yard. The yard contains two train carts, the waterway, and two entrances to the central control point building. |
<gallery widths=150px heights=90px> | <gallery widths=150px heights=90px> | ||
| − | well yard.jpg|Yard between mid and the RED/BLU base. | + | File:well yard.jpg|Yard between mid and the RED/BLU base. |
| − | well battlements.jpg|Battlements overlooking yard. | + | File:well battlements.jpg|Battlements overlooking yard. |
| − | well wellroom.jpg|Wellroom. | + | File:well wellroom.jpg|Wellroom. |
| − | well secondspawn.jpg|Spawn for teams that have capped mid. | + | File:well secondspawn.jpg|Spawn for teams that have capped mid. |
</gallery> | </gallery> | ||
=== Control Point 3 === | === Control Point 3 === | ||
| − | [[ | + | [[File:cpwell01.jpg|thumb|Middle point.]] |
| + | |||
* '''Water Room''': The waterway in the yard leads to an open room directly connected to the interior of the neutral building, which exits out to below the point. | * '''Water Room''': The waterway in the yard leads to an open room directly connected to the interior of the neutral building, which exits out to below the point. | ||
| − | * '''Entrances''': There are two ground-level side entrances on the left and right | + | * '''Entrances''': There are two ground-level side entrances on the left and right sides of the point. The side entrances of both one team and their enemy are separated by a stationary train car. When entering these entrances remain cautious, trains regularly run through these entrances. |
* '''Bridge (Point)''': The point itself is situated on a bridge over the rail lines that is accessible from four platforms - one going to each corner of the room. The platform connects the walls closest to each enemy base together and there is a small opening in the wall on each end of the platform leading into the Battlements. | * '''Bridge (Point)''': The point itself is situated on a bridge over the rail lines that is accessible from four platforms - one going to each corner of the room. The platform connects the walls closest to each enemy base together and there is a small opening in the wall on each end of the platform leading into the Battlements. | ||
| − | * '''Train Rails''': Along the ground level of the Central Building are two train rails | + | * '''Train Rails''': Along the ground level of the Central Building are two train rails that run through the Entrances. Beware as trains often run through them. |
| − | * '''Battlements''': Across from the central point are the battlements | + | * '''Battlements''': Across from the central point are the battlements that overlook the spawn yard, a common spot for [[Sniper]]s and [[Soldier]]s to safely pick off enemies. |
| − | |||
<gallery widths=150px heights=90px> | <gallery widths=150px heights=90px> | ||
| − | well water.jpg|Water that leads to the point. | + | File:well water.jpg|Water that leads to the point. |
| − | well sniperdeck.jpg|Sniper deck overlooking yard. | + | File:well sniperdeck.jpg|Sniper deck overlooking yard. |
| − | well thirdspawn.jpg|Spawn for teams that have capped 4. | + | File:well thirdspawn.jpg|Spawn for teams that have capped 4. |
</gallery> | </gallery> | ||
| + | == Helpful overview == | ||
| + | [[File:Well (Control Point) overview with lines.png|left|Well's locations|655px]] | ||
| + | <big>1.Main Building | ||
| + | 2.Yard | ||
| + | 3.Swing Doors | ||
| + | 4.battlements | ||
| + | 5.Inner Lobby | ||
| + | 6.Command Room | ||
| + | 7.Catwalks</big> | ||
| + | |||
| + | {{clr}} | ||
== Strategy == | == Strategy == | ||
{{Main|Community Well (CP) strategy}} | {{Main|Community Well (CP) strategy}} | ||
| Line 80: | Line 95: | ||
== Related achievements == | == Related achievements == | ||
| − | === | + | === {{Achiev type link|general}} === |
{{Achievement table | {{Achievement table | ||
| − | |{{Show achievement|General|Lightning Offense}} | + | | {{Show achievement|General|Lightning Offense}} |
| − | |{{Show achievement|General|World Traveler}} | + | | {{Show achievement|General|World Traveler}} |
}} | }} | ||
| − | + | ||
| + | |||
=== {{Class link|Scout}} === | === {{Class link|Scout}} === | ||
{{Achievement table | {{Achievement table | ||
| − | | | + | | {{Show achievement|Scout|Quick Hook}} |
}} | }} | ||
| Line 96: | Line 112: | ||
* Increased starting round timer to 10 minutes in Well | * Increased starting round timer to 10 minutes in Well | ||
* Fixed players blocking doors in Well. | * Fixed players blocking doors in Well. | ||
| − | * Fixed [[Engineer]] [[building]] in [[exploit]] areas on final caps in Well. | + | * Fixed [[Engineer]] [[Buildings|building]] in [[exploit]] areas on final caps in Well. |
'''{{Patch name|2|14|2008}}''' | '''{{Patch name|2|14|2008}}''' | ||
| − | * Added ctf_well to the default mapcycle.txt file. | + | * Added {{code|ctf_well}} to the default {{code|mapcycle.txt}} file. |
| − | * Added ctf_well to the default motd.txt file. | + | * Added {{code|ctf_well}} to the default {{code|motd.txt}} file. |
'''{{Patch name|6|19|2008}}''' ([[Pyro Update]]) | '''{{Patch name|6|19|2008}}''' ([[Pyro Update]]) | ||
| Line 107: | Line 123: | ||
'''{{Patch name|7|29|2008}}''' | '''{{Patch name|7|29|2008}}''' | ||
| − | * Fixed various exploits and performance problems in CP_Well. | + | * Fixed various exploits and performance problems in {{code|CP_Well}}. |
'''{{patch name|1|6|2011|beta}}''' | '''{{patch name|1|6|2011|beta}}''' | ||
| Line 121: | Line 137: | ||
}} | }} | ||
| − | == | + | == Bugs == |
| − | * Well is one of the maps designed after existing [[Team Fortress Classic]] maps, the others being [[2Fort]], [[Dustbowl]], and [[Badlands (Control Point)|Badlands]]. The original version was significantly different, with this version focusing more on a train station than any actual well. | + | * It's possible to build in RED's final forward spawn. |
| + | |||
| + | == Trivia == | ||
| + | * Well is one of the maps designed after existing ''[[Team Fortress Classic]]'' maps, the others being [[2Fort]], [[Dustbowl]], and [[Badlands (Control Point)|Badlands]]. The original version was significantly different, with this version focusing more on a train station than any actual well. | ||
* According to the [[Map of Badlands|Map of Mann's Land]], Well (called The Well) is southwest from [[Gravel Pit]]. A sea of gravel (called The Gravel Sea on the map) lies north. | * According to the [[Map of Badlands|Map of Mann's Land]], Well (called The Well) is southwest from [[Gravel Pit]]. A sea of gravel (called The Gravel Sea on the map) lies north. | ||
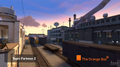
* The beginning of ''[[Meet the Scout]]'' takes place in Well. | * The beginning of ''[[Meet the Scout]]'' takes place in Well. | ||
| + | |||
| + | == Gallery == | ||
| + | === Concept art === | ||
| + | <gallery> | ||
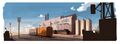
| + | File:Well environment.jpg|Well environment concept | ||
| + | File:Well environment2.jpg.jpg|Ditto | ||
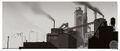
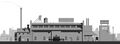
| + | File:Well building environment.jpg|Сoncept of building exterior | ||
| + | File:environment1.jpg|Concept of a rocket located in a building | ||
| + | </gallery> | ||
| + | |||
| + | === Pre-release === | ||
| + | <gallery> | ||
| + | File:Well old skybox.jpg|Early Well skybox | ||
| + | File:Well early spawn.png|Early RED spawn 1 interior | ||
| + | </gallery> | ||
== See also == | == See also == | ||
| − | *[[Well6|Well6 (Team Fortress)]] | + | * [[Well6|Well6 (Team Fortress)]] |
| − | *[[Well (Classic)]] | + | * [[Well (Classic)]] |
| − | *[[Well developer commentary]] | + | * [[Well developer commentary]] |
| − | {{Maps | + | {{Maps Nav}} |
[[Category:Quickplay maps]] | [[Category:Quickplay maps]] | ||
Latest revision as of 15:42, 22 February 2024
| Well (Control Point) | |
|---|---|

| |
| Basic Information | |
| Map type: | Control Point |
| File name: | cp_well
|
| Released: | October 10, 2007 (Launch) |
| Variants: | Arena and Capture the Flag |
| Developer(s): | Valve |
| Map Info | |
| Environment: | Industrial |
| Setting: | Daylight, sunny |
| Hazards: | Trains |
| Deep Water: | Yes |
| Map Items | |
| Map Photos | |
 | |
| Map Overview | |
_overview.png) | |
| “ | Ha ha! Look at you! You look like you ran through traffic!
Click to listen
— The Scout to a train victim
|
” |
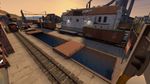
Well is an official Standard Control Point map.
There are three buildings, the first and last of which hold 2 control points. The second building holds a neutral control point. The map is symmetrical from both sides of the center building. There are 6 train tracks - 2 in each yard and 2 going through the neutral building. Only the 2 in the neutral building actually have trains traveling on them.
Team Fortress 2's Well has many drastic changes from TFC's version, but keeps the two bases, Sniper ports, and the neutral building.
Contents
Introduction video
Locations
Note: If you are having trouble with finding the locations listed here, see the Helpful overview section to see their exact position marked on the map.
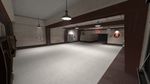
Control Points 1 & 5

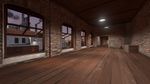
- Control Points: The control points are on a raised circular platform in a large room, and behind it is the rear-most respawn of the point's corresponding team.
- Exits: The large room the point is situated in has two exits on each side of the wall opposite the respawn. Almost directly above these two exits are another two exits (one on each side) that quickly join together and lead to an area overlooking points 2 and 4.
- Catwalks: Surrounding the room are the catwalks that run along the walls on the second floor level. These enter to from the command room overlooking the point and lead all the way around to an area behind the point and a balcony above the point.
- Command Room: The command room is the room that the entrances to the catwalks lead to. It contains many computer consoles and a large window which serves as a vantage point to the control point room.
Battlements overlooking last.

Command room overlooking the point.
Second floor above point 2/4.
Initial spawn.


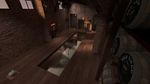
Control Points 2 & 4

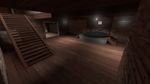
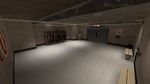
- Control Point: Control Points 2 & 4 are the control points second closest to each team's forward respawn and are located inside the lower lobby of the corresponding team's building. It is accessible from two sides (the left and right), with the other two sides being a wall and a bulletproof glass window. These points have an average capture speed.
- Inner Lobby: Next to the first forward spawn and behind the control point is the inner lobby. It has two entrances to the final point room and a set of stairs that lead to a platform surrounding the area. On both sides of the platform are exits to the battlements.
- Third Floor: The third floor is the highest point of the building, there is a hole in the middle which drops down to the inner lobby. It is accessed from the battlements and has an entrance to the command room.
- Swing Doors: There are two entrances to each main base, which are called the swing doors. They are the only entrances to the main building and enter on both far sides of the complex.
- Well Room: The well room is the room between the swing doors which has a drop-down pipe to the waterways.
- Battlements: The battlements are on the second floor of the base and have windows that overlook the yard areas. There are four exits, two of which lead around to the inner lobby, one of which to the well room, and the other which leads up to the third floor drop down above the inner lobby.
- Yard: Outside the swing doors and between the main buildings and control point building is the yard. The yard contains two train carts, the waterway, and two entrances to the central control point building.
Yard between mid and the RED/BLU base.
Battlements overlooking yard.
Wellroom.

Spawn for teams that have capped mid.


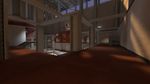
Control Point 3

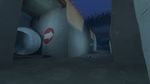
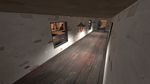
- Water Room: The waterway in the yard leads to an open room directly connected to the interior of the neutral building, which exits out to below the point.
- Entrances: There are two ground-level side entrances on the left and right sides of the point. The side entrances of both one team and their enemy are separated by a stationary train car. When entering these entrances remain cautious, trains regularly run through these entrances.
- Bridge (Point): The point itself is situated on a bridge over the rail lines that is accessible from four platforms - one going to each corner of the room. The platform connects the walls closest to each enemy base together and there is a small opening in the wall on each end of the platform leading into the Battlements.
- Train Rails: Along the ground level of the Central Building are two train rails that run through the Entrances. Beware as trains often run through them.
- Battlements: Across from the central point are the battlements that overlook the spawn yard, a common spot for Snipers and Soldiers to safely pick off enemies.
Water that leads to the point.
Sniper deck overlooking yard.
Spawn for teams that have capped 4.


Helpful overview
_overview_with_lines.png)
1.Main Building
2.Yard
3.Swing Doors
4.battlements
5.Inner Lobby
6.Command Room
7.Catwalks
Strategy
Control Point timing
| Control Point | Multiplier | Seconds | ||
|---|---|---|---|---|
| Control Point 1 and 5 | ×1 |
| ||
| ×2 |
| |||
| ×3 |
| |||
| ×4 |
| |||
| Control Point 2 and 4 | ×1 |
| ||
| ×2 |
| |||
| ×3 |
| |||
| ×4 |
| |||
| Control Point 3 | ×1 |
| ||
| ×2 |
| |||
| ×3 |
| |||
| ×4 |
|
Related achievements
 General achievements
|
|


 Scout
Scout
|

Update history
- Increased starting round timer to 10 minutes in Well
- Fixed players blocking doors in Well.
- Fixed Engineer building in exploit areas on final caps in Well.
- Added
ctf_wellto the defaultmapcycle.txtfile. - Added
ctf_wellto the defaultmotd.txtfile.
June 19, 2008 Patch (Pyro Update)
- Added a route from the forward central foyer up to the battlements.
- Redistributed health and ammunition throughout the bases.
- Fixed various exploits and performance problems in
CP_Well.
- Fixed a bunch of model and playerclip issues.
- Made the 2nd point defender spawn door one-way.
- Note: there's a known-issue with the skybox on the Mac.
April 14, 2011 Patch (Hatless Update)
- Spawn room by second cap for each time is now a one-way door.
- Added performance improvements.
Bugs
- It's possible to build in RED's final forward spawn.
Trivia
- Well is one of the maps designed after existing Team Fortress Classic maps, the others being 2Fort, Dustbowl, and Badlands. The original version was significantly different, with this version focusing more on a train station than any actual well.
- According to the Map of Mann's Land, Well (called The Well) is southwest from Gravel Pit. A sea of gravel (called The Gravel Sea on the map) lies north.
- The beginning of Meet the Scout takes place in Well.
Gallery
Concept art
Well environment concept
Ditto
Сoncept of building exterior
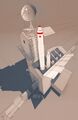
Concept of a rocket located in a building


Pre-release
Early Well skybox

Early RED spawn 1 interior

