Difference between revisions of "Yukon"
(→Trivia) |
m |
||
| (48 intermediate revisions by 33 users not shown) | |||
| Line 1: | Line 1: | ||
{{Map infobox | {{Map infobox | ||
| − | | game-type = Control Point | + | | map-status = community |
| − | | file-name = cp_yukon_final | + | | map-game-type = Control Point |
| − | | map-image = CP_Yukon_overview.png | + | | map-file-name = cp_yukon_final |
| − | | | + | | map-image = CP_Yukon_overview.png |
| − | | map-environment = Alpine | + | | map-released = {{Patch name|8|13|2009}} |
| − | | map-setting = Daylight, sunny | + | | map-released-major = Classless Update |
| − | | map-health | + | | map-environment = Alpine |
| − | | map-health | + | | map-setting = Daylight, sunny |
| − | | map | + | | map-pickups-health-small = 8 |
| − | + | | map-pickups-health-medium = 8 | |
| − | | map-ammo | + | | map-pickups-ammo-small = 6 |
| − | | map-ammo | + | | map-pickups-ammo-medium = 6 |
| − | | map-stamp-link = | + | | map-pickups-ammo-large = 2 |
| + | | map-stamp-link = https://steamcommunity.com/stats/TF2/leaderboards/30388 | ||
}} | }} | ||
| − | {{Quotation | [ | + | {{Quotation|'''[https://www.teamfortress.com/classless/ The Classless Update]'''|This abandoned mountaintop coalmine was repurposed by shadowy operatives into a top secret surveillance outpost—one which also, so nobody gets wise, insidiously continues to mine coal. There is also a log hanging in the center of the map—possibly as an example to other logs. Logs that said too much. |
| − | | This abandoned mountaintop coalmine was repurposed by shadowy operatives into a top secret surveillance outpost—one which also, so nobody gets wise, insidiously continues to mine coal. There is also a log hanging in the center of the map—possibly as an example to other logs. Logs that said too much. | ||
| − | Five control points promise a lot of momentum swings in this compact outdoor map, with plenty of tunnels and rocky outcroppings. Plenty of alternate routes ensure that if you can’t get past a well-placed Engineer through one tunnel, you might be able to sneak up behind them through another. | + | Five control points promise a lot of momentum swings in this compact outdoor map, with plenty of tunnels and rocky outcroppings. Plenty of alternate routes ensure that if you can’t get past a well-placed Engineer through one tunnel, you might be able to sneak up behind them through another.}} |
| − | }} | ||
| − | '''Yukon''' is a | + | '''Yukon''' is a [[Steam Workshop|community-created]] [[Control Point (game mode)#Symmetric|Standard Control Point]] map. It is one of the [[Custom maps|community maps]] chosen by [[Valve]] and was included in the [[Classless Update]] as an official map due to its outstanding quality. |
| − | + | Yukon used to be one of the top played competitive maps in 6v6 leagues. | |
== Locations == | == Locations == | ||
| − | + | {{HelpfulOverviewNote}} | |
| − | === | + | === Control Point 1 & 5 === |
| − | *'''Bridge | + | * '''Bridge''': The bridge is located at the swing door directly across from the capture point. It spans across the whole area above the basin and leads to the control point. |
| − | *'''Right Path | + | * '''Right Path''': The right path (from a defender's perspective) runs along the rock wall around the basin from the tunnel. It leads all the way to the small shack beside the control point and the end of the bridge. There is a small bush next to a rocky outcrop with a medium health pack next to it along the path. |
| − | *'''Dirt Ramp | + | * '''Dirt Ramp''': The ramp starts at the entrance of the lower tunnels across from the swing door. It stretches up along the fenced wall all the way up to the control point and the lower spawn exit. |
| − | *'''Basin | + | * '''Basin''': The basin lays in the middle of the area. There is a tall radio tower in its center next to the right path. Next to the tower is a pile of rocks used to climb to the path. On the other side the ramp runs down into the basin next to the lower tunnel and next to that the bridge stretches across over. |
| − | *'''Tunnel | + | * '''Tunnel''': At the end of the right path and across from the bridge is the tunnel. It enters from the second point bridge and stretches down to the swing door and across to the right path entrance. |
| + | *'''First Spawn''': Players begin the game spawning at their base. | ||
<gallery widths=140px heights=80px> | <gallery widths=140px heights=80px> | ||
| − | File:yukon-base1.png| Bridge | + | File:yukon-base1.png| Bridge, First Spawn and Control Point |
File:yukon-base2.png| Swing Door & Lower Tunnel | File:yukon-base2.png| Swing Door & Lower Tunnel | ||
File:yukon-base3.png| Right Path | File:yukon-base3.png| Right Path | ||
| Line 41: | Line 41: | ||
</gallery> | </gallery> | ||
| − | === | + | === Control Point 2 & 4 === |
| − | *'''House | + | * '''House''': The house is located in the center of the bridge. It is connected to the bridge on both sides and has dirt ramps leading up to its entrances. This capture point is enclosed, allowing skilled classes to land on the roof and barrage those contesting or capturing the point. |
| − | *'''Back Path | + | * '''Back Path''': The back path is the path that bends around the main path and directly exits out across from the bridge. It is entered from going right when the path from mid forks. |
| − | *'''Main Path | + | * '''Main Path''': The main path is the direct path to the point. It is entered from going left when the path from mid forks. There is a sign above the path which is a common spot for sticky traps. |
| − | *'''Bridge | + | * '''Bridge''': The bridge stretches across the area from the ends of the paths to the tunnel entrance. There are multiple ramps on both sides which lead up to the bridge. It has two underpasses, one of which has a medium healthpack, and the other has a medium ammo pack. In the center of the bridge is the control point house. |
| − | *'''Lower Tunnel | + | * '''Lower Tunnel''': The lower tunnel is located at the far wall in the basin under the bridge. It ramps up then down into the path below the middle point building. The lower tunnel is a popular spot for back-flanking. |
| + | * '''Second Spawn''': When they capture the middle point, their spawn is moved below their second capture point. | ||
<gallery widths=140px heights=80px> | <gallery widths=140px heights=80px> | ||
| + | File:yukon-spawnbuffer.png| Second Spawn | ||
File:yukon-buffer1.png|Bridge & House | File:yukon-buffer1.png|Bridge & House | ||
File:yukon-buffer2.png|Bridge Underpasses | File:yukon-buffer2.png|Bridge Underpasses | ||
| Line 55: | Line 57: | ||
</gallery> | </gallery> | ||
| − | === | + | === Control Point 3 === |
| − | *'''Bridge Building | + | * '''Bridge Building''': The bridge building is the marks this area. It has four entrances, two at the ends of the building for each team, both of which are across from each other. These enter into hallways containing medium health packs and the entrance to the central part of the bridge which houses the control point. The control point area is open on both sides. |
| − | *'''Roof | + | * '''Roof''': The roof of the bridge building is accessible by [[Soldier]]s or [[Demoman|Demomen]], and is a popular spot for barraging the enemy as the entire area can be seen from the roof. |
| − | *'''Valley | + | * '''Valley''': The valley is the area that dips down below the bridge. Other than the bridge building this is the other spot where most of the fighting will occur. |
| − | *'''Yard | + | * '''Yard''': The yards are where the paths from the second exit out to. They are located far back along the fenced walls. The yards are a popular spot for [[Sniper]]s. |
| + | *'''Third Spawn''': When they capture the enemy's second point, their spawn is moved mid-map, enemy side, in a large shed. | ||
<gallery widths=140px heights=80px> | <gallery widths=140px heights=80px> | ||
| + | File:yukon-spawnmiddle.png| Middle Point Forward | ||
File:yukon-cap.png|The Middle & Bridge | File:yukon-cap.png|The Middle & Bridge | ||
File:yukon-middle1.png| Yard | File:yukon-middle1.png| Yard | ||
| Line 68: | Line 72: | ||
</gallery> | </gallery> | ||
| − | == | + | == Helpful overview == |
| − | + | [[File:Yukon overview with lines.png|left|Yukon's locations|600px]] | |
| − | + | <big>1.Bridge Building | |
| − | + | 2.Valley | |
| − | + | 3.Back Path | |
| − | + | 4.Main Path | |
| − | + | 5.Lower Tunnel | |
| − | + | 6.Side Tunnel | |
| − | + | 7.Bridge | |
| − | </ | + | 8.Basin |
| + | 9.Right Path</big> | ||
| − | == Strategy == | + | {{clr}} |
| − | {{ | + | == Strategy == |
| + | {{main|Community Yukon strategy}} | ||
| + | {{community strategy stub link}} | ||
| − | == Control Point | + | == Control Point timing == |
{{Control Point Timing/Official Map}} | {{Control Point Timing/Official Map}} | ||
== Update history == | == Update history == | ||
| + | {{Update history| | ||
| + | '''{{Patch name|8|13|2009}}''' ([[Classless Update]]) | ||
| + | * Added Yukon to the game. | ||
| − | ''' | + | '''{{Patch name|8|25|2010}}''' |
| − | * | + | * Fixed an exploit where players could get outside of the gameplay space. |
| − | ''' | + | '''{{Patch name|1|19|2011}}''' |
| − | * | + | * Middle Control Point moved up to the bridge. |
| + | * Bridge expanded. | ||
| + | * Several sticky failures fixed. | ||
| + | * Bridge flat added onto the pipes of the first control point. | ||
| + | * {{Undocumented}} Capture time reduced in the last control points from 4s to 3.8s. | ||
| − | ''' | + | '''{{Patch name|3|11|2011}}''' |
| − | * | + | * Fixed a hole in the map. |
| − | + | }} | |
| − | |||
| − | |||
| − | |||
| − | ' | + | == Bugs == |
| − | * | + | * It's possible to get out-of-bounds near the 2nd BLU control point. |
| + | |||
| + | == Notes == | ||
| + | * The picture of the map during the loading screen and on the map's official stamp still shows the central control point under the bridge, despite its subsequent move onto the bridge. | ||
== Trivia == | == Trivia == | ||
| − | * | + | * [[w:Yukon|Yukon]] is a Canadian territory. |
| − | * The | + | |
| + | == External links == | ||
| + | * [https://www.teamfortress.com/classless/index.php The Classless Update: Day 3 - Full changelog, Sawmill (Capture the Flag) and Yukon maps] | ||
| − | + | {{Classless Update Nav}} | |
| − | + | {{Maps Nav}} | |
| − | + | [[Category:Quickplay maps]] | |
| − | |||
| − | |||
Latest revision as of 01:22, 18 January 2024
| Yukon | |
|---|---|

| |
| Basic Information | |
| Map type: | Control Point |
| File name: | cp_yukon_final
|
| Released: | August 13, 2009 Patch (Classless Update) |
| Developer(s): | Patrick "MangyCarface" Mulholland Freya "Acegikmo" Holmér |
| Map Info | |
| Environment: | Alpine |
| Setting: | Daylight, sunny |
| Map Items | |
| Map Photos | |
 | |
| Map Overview | |
 | |
| Map Stamp | |
| Supporters Leaderboard | |
| “ | This abandoned mountaintop coalmine was repurposed by shadowy operatives into a top secret surveillance outpost—one which also, so nobody gets wise, insidiously continues to mine coal. There is also a log hanging in the center of the map—possibly as an example to other logs. Logs that said too much.
Five control points promise a lot of momentum swings in this compact outdoor map, with plenty of tunnels and rocky outcroppings. Plenty of alternate routes ensure that if you can’t get past a well-placed Engineer through one tunnel, you might be able to sneak up behind them through another.
|
” |
Yukon is a community-created Standard Control Point map. It is one of the community maps chosen by Valve and was included in the Classless Update as an official map due to its outstanding quality.
Yukon used to be one of the top played competitive maps in 6v6 leagues.
Contents
Locations
Note: If you are having trouble with finding the locations listed here, see the Helpful overview section to see their exact position marked on the map.
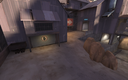
Control Point 1 & 5
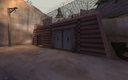
- Bridge: The bridge is located at the swing door directly across from the capture point. It spans across the whole area above the basin and leads to the control point.
- Right Path: The right path (from a defender's perspective) runs along the rock wall around the basin from the tunnel. It leads all the way to the small shack beside the control point and the end of the bridge. There is a small bush next to a rocky outcrop with a medium health pack next to it along the path.
- Dirt Ramp: The ramp starts at the entrance of the lower tunnels across from the swing door. It stretches up along the fenced wall all the way up to the control point and the lower spawn exit.
- Basin: The basin lays in the middle of the area. There is a tall radio tower in its center next to the right path. Next to the tower is a pile of rocks used to climb to the path. On the other side the ramp runs down into the basin next to the lower tunnel and next to that the bridge stretches across over.
- Tunnel: At the end of the right path and across from the bridge is the tunnel. It enters from the second point bridge and stretches down to the swing door and across to the right path entrance.
- First Spawn: Players begin the game spawning at their base.
Bridge, First Spawn and Control Point
Swing Door & Lower Tunnel
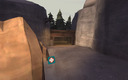
Right Path
Tunnel


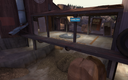
Control Point 2 & 4
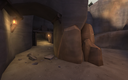
- House: The house is located in the center of the bridge. It is connected to the bridge on both sides and has dirt ramps leading up to its entrances. This capture point is enclosed, allowing skilled classes to land on the roof and barrage those contesting or capturing the point.
- Back Path: The back path is the path that bends around the main path and directly exits out across from the bridge. It is entered from going right when the path from mid forks.
- Main Path: The main path is the direct path to the point. It is entered from going left when the path from mid forks. There is a sign above the path which is a common spot for sticky traps.
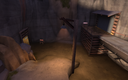
- Bridge: The bridge stretches across the area from the ends of the paths to the tunnel entrance. There are multiple ramps on both sides which lead up to the bridge. It has two underpasses, one of which has a medium healthpack, and the other has a medium ammo pack. In the center of the bridge is the control point house.
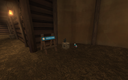
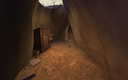
- Lower Tunnel: The lower tunnel is located at the far wall in the basin under the bridge. It ramps up then down into the path below the middle point building. The lower tunnel is a popular spot for back-flanking.
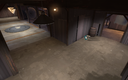
- Second Spawn: When they capture the middle point, their spawn is moved below their second capture point.
Second Spawn

Bridge & House
Bridge Underpasses
Back Path
Lower Tunnel


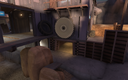
Control Point 3
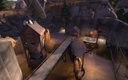
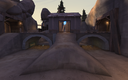
- Bridge Building: The bridge building is the marks this area. It has four entrances, two at the ends of the building for each team, both of which are across from each other. These enter into hallways containing medium health packs and the entrance to the central part of the bridge which houses the control point. The control point area is open on both sides.
- Roof: The roof of the bridge building is accessible by Soldiers or Demomen, and is a popular spot for barraging the enemy as the entire area can be seen from the roof.
- Valley: The valley is the area that dips down below the bridge. Other than the bridge building this is the other spot where most of the fighting will occur.
- Yard: The yards are where the paths from the second exit out to. They are located far back along the fenced walls. The yards are a popular spot for Snipers.
- Third Spawn: When they capture the enemy's second point, their spawn is moved mid-map, enemy side, in a large shed.
Middle Point Forward
The Middle & Bridge

Yard
Lower Tunnel Entrance
Inside Bridge Building


Helpful overview

1.Bridge Building
2.Valley
3.Back Path
4.Main Path
5.Lower Tunnel
6.Side Tunnel
7.Bridge
8.Basin
9.Right Path
Strategy
Main article: Community Yukon strategy
 | “Sun Tzu's got nothing on us!” This map's Community strategy page is a stub. As such, it is not complete. You can help the Team Fortress Wiki Community Strategy Project by expanding it. Notes: None added |
Control Point timing
| Control Point | Multiplier | Seconds | ||
|---|---|---|---|---|
| Control Point 1 and 5 | ×1 |
| ||
| ×2 |
| |||
| ×3 |
| |||
| ×4 |
| |||
| Control Point 2 and 4 | ×1 |
| ||
| ×2 |
| |||
| ×3 |
| |||
| ×4 |
| |||
| Control Point 3 | ×1 |
| ||
| ×2 |
| |||
| ×3 |
| |||
| ×4 |
|
Update history
August 13, 2009 Patch (Classless Update)
- Added Yukon to the game.
- Fixed an exploit where players could get outside of the gameplay space.
- Middle Control Point moved up to the bridge.
- Bridge expanded.
- Several sticky failures fixed.
- Bridge flat added onto the pipes of the first control point.
- [Undocumented] Capture time reduced in the last control points from 4s to 3.8s.
- Fixed a hole in the map.
Bugs
- It's possible to get out-of-bounds near the 2nd BLU control point.
Notes
- The picture of the map during the loading screen and on the map's official stamp still shows the central control point under the bridge, despite its subsequent move onto the bridge.
Trivia
- Yukon is a Canadian territory.
External links
| ||||||||||||||||||||||||||||||||||||||||||||||||||||||||||||||||